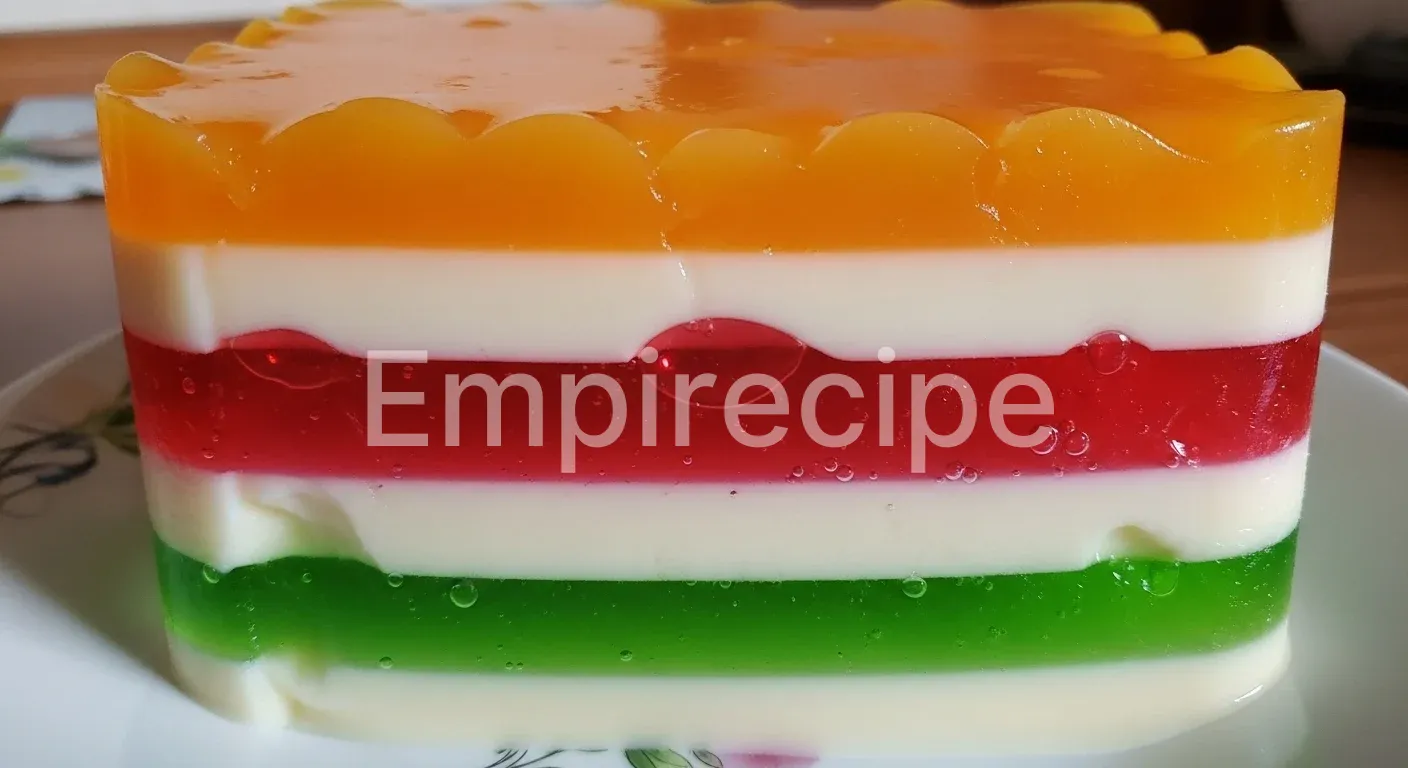

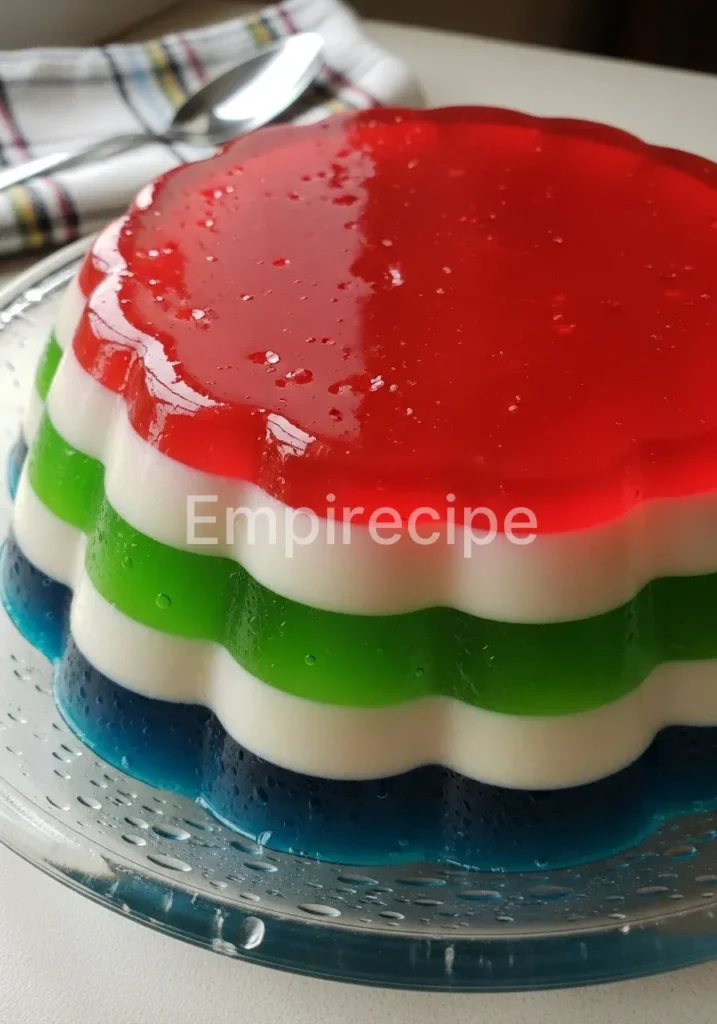
Mom’s Ribbon Gelatin features vibrant layers and a creamy texture. This masterpiece combines fruity sweetness with a velvety finish. It reminds us of slow afternoons and joyful family gatherings. Preparing this dessert feels like a gentle, creative ritual for the modern home.
Table of Contents
Why You’ll Love Mom’s Ribbon Gelatin
- Mom’s Ribbon Gelatin offers a stunning rainbow aesthetic that transforms any simple dinner into a festive celebration effortlessly.
- The recipe balances refreshing fruit flavors with a rich, creamy middle layer, providing a nostalgic taste of childhood comfort.
- This dessert encourages the art of slow living by inviting you to enjoy a mindful, rhythmic process in the kitchen.
Ingredients You’ll Need
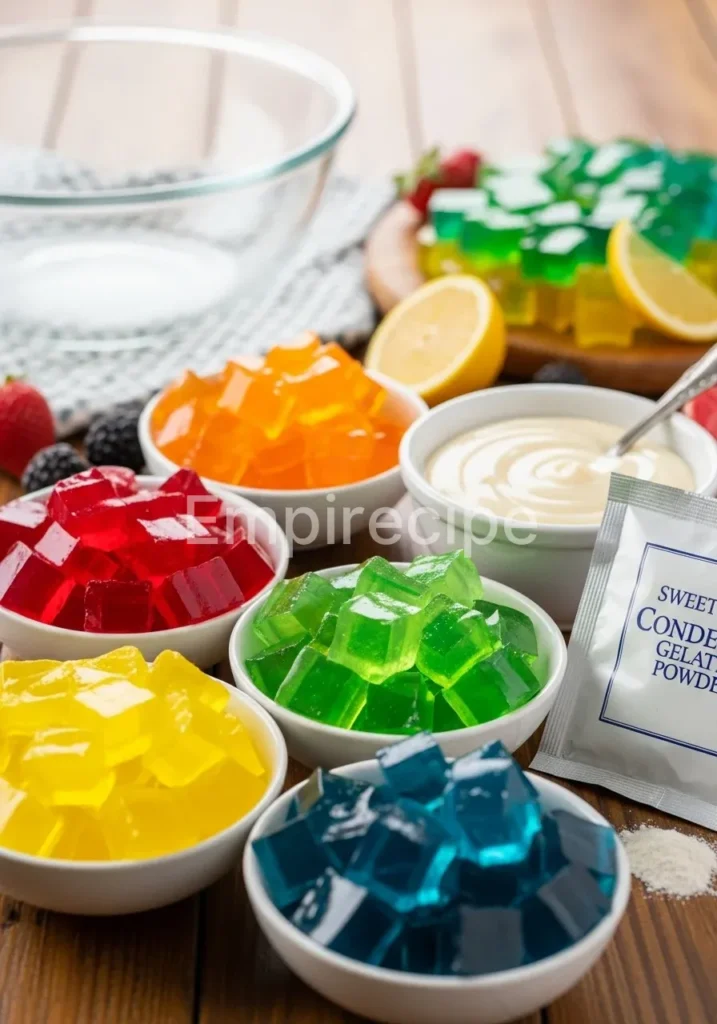
The secret to a truly spectacular Mom’s Ribbon Gelatin lies in the quality and variety of your ingredients. While traditional versions use standard gelatin packets, you can elevate the experience by selecting high-quality extracts or even organic fruit juice bases. Always ensure your dairy components are fresh to achieve that signature velvety texture in the white layers.
| Ingredient | Quantity | Purpose |
|---|---|---|
| Assorted Fruit Gelatin (e.g., Strawberry, Lime, Orange) | 4 to 5 small boxes (3 oz each) | Provides the vibrant colors and fruity flavor base. |
| Unflavored Gelatin | 2 envelopes (0.25 oz each) | Provides structural integrity to the creamy white layers. |
| Sweetened Condensed Milk | 1 can (14 oz) | Creates the rich, opaque sweetness for the ribbon effect. |
| Boiling Water | As needed (usually 1 cup per layer) | Dissolves the gelatin crystals completely for a smooth set. |
| Cold Water | As needed (usually 1/2 cup per layer) | Helps regulate the temperature for faster setting. |
| Vanilla Extract | 1 teaspoon | Adds a gentle, floral aromatic note to the white layers. |
| Classic Mom’s Ribbon Gelatin Mold Oil | Trace amount | A light flavorless oil spray ensures the mold releases perfectly. |
Substitutions & Variations
[ra_display_video url=”https://www.youtube.com/watch?v=0BWAnft2lLM”]
You can easily adapt Mom’s Ribbon Gelatin to suit your dietary preferences or the seasonal availability of ingredients. For a more wholesome approach, consider substituting the sweetened condensed milk with a mixture of thick coconut cream and honey to maintain that opaque look with a natural twist. If you prefer a lighter version, plain Greek yogurt whisked until smooth can replace some of the dairy, adding a pleasant tang to the sweet profile.
Furthermore, you might choose to use agar-agar if you are looking for a plant-based gelling agent, though the texture will be slightly firmer. For those sensitive to artificial dyes, look for gelatin brands that utilize vegetable-based colorants like beet juice or turmeric. These small changes allow you to enjoy a beautiful Mom’s Ribbon Gelatin while honoring your commitment to wellness and authentic ingredients.
For a delightful twist on your Mom’s Ribbon Gelatin, consider exploring festive ideas in our comprehensive guide on Valentine’s Day Food and Drinks. This resource provides inspiration for seasonal variations that will impress your guests.
Equipment You’ll Need
Preparing Mom’s Ribbon Gelatin requires a few specific tools to ensure the layers remain distinct and the final presentation looks professional. You do not need expensive gadgets, but precision helps in creating those clean, sharp lines that make this dessert so famous.
- A 9×13 inch glass baking dish or a classic decorative Bundt mold.
- Several small heat-proof mixing bowls for dissolving individual gelatin flavors.
- A large measuring cup with a pour spout to help you add layers gently without disturbing the set layers beneath.
- A wire whisk to ensure all gelatin crystals dissolve fully into the boiling water.
- Ample refrigerator space to keep the dish level during the multiple setting stages.
- A flat spatula or knife to help loosen the edges if you are unmolding the dessert.
Step-by-Step Instructions
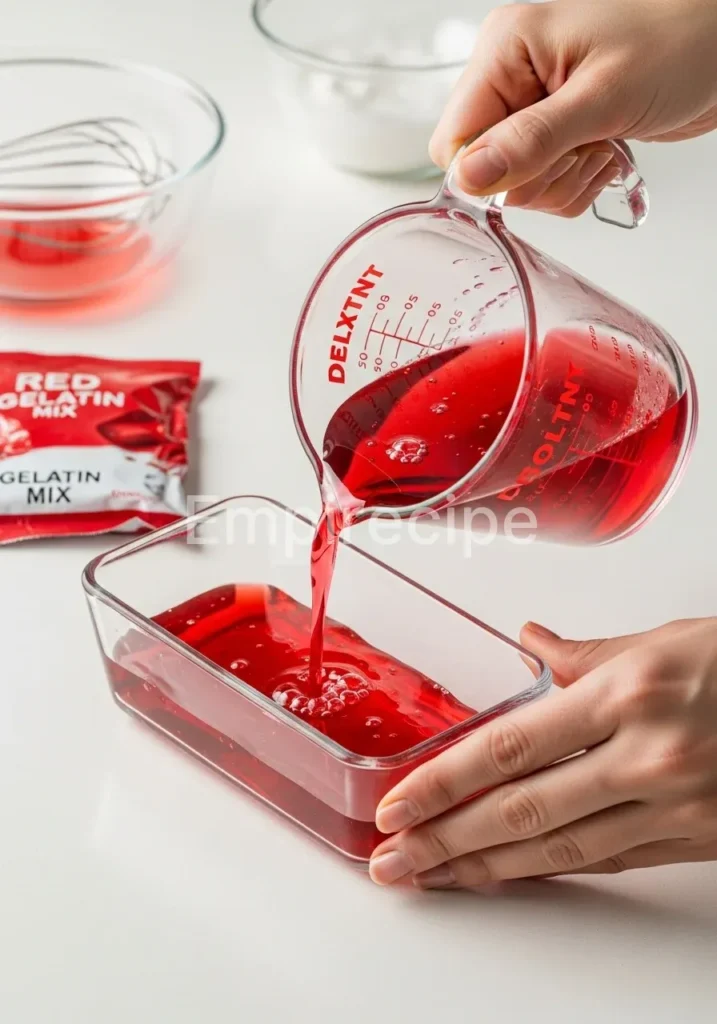
- Prepare the first color layer: Initially, choose your first flavor of gelatin for the bottom of Mom’s Ribbon Gelatin. Dissolve one 3 oz box of flavored gelatin in 1 cup of boiling water. Stir constantly for two minutes until the powder completely disappears. Add 1/2 cup of cold water, stir briefly, and pour the mixture into your prepared mold. Refrigerate this layer for about 20 to 30 minutes until it is firm enough to support the next layer but still slightly tacky to the touch.
- Create the creamy white mixture: While the first layer sets, prepare the signature white ribbon. In a separate bowl, sprinkle two envelopes of unflavored gelatin over 1/2 cup of cold water and let it sit for a minute to bloom. Add 1.5 cups of boiling water and stir until dissolved. Consequently, whisk in the sweetened condensed milk and vanilla extract. Allow this mixture to cool to room temperature before using, as a hot liquid will melt the layers beneath.
- Add the first white ribbon: Once the first color layer feels set, gently pour about 1 cup of the white mixture over the back of a spoon onto the gelatin. The spoon helps disperse the liquid so it does not “drill” into the previous layer. Return the Mom’s Ribbon Gelatin to the refrigerator for another 15 to 20 minutes.
- Repeat the coloring process: Dissolve your second flavor of gelatin exactly like the first. Ensure this mixture cools significantly before pouring it over the set white layer. If the liquid is too warm, the colors will bleed, ruining the “ribbon” effect of your Mom’s Ribbon Gelatin.
- Continue layering: Alternate between the colored gelatin layers and the white milk layers. Depending on the size of your mold, you should aim for at least 6 to 8 distinct stripes. Always ensure each layer is sufficiently set before adding the next one.
- Final chill: After adding the final colored layer, leave the Mom’s Ribbon Gelatin in the refrigerator for at least 4 to 6 hours, or ideally overnight. This extended chilling time ensures the structure is stable and the flavors have melded beautifully.
- Unmold with care: If you used a Bundt mold, dip the bottom of the pan into warm water for about 10 seconds. Gently pull the gelatin away from the edges with your fingers and invert it onto a large serving platter.
- Slice and serve: Use a sharp, wet knife to cut the Mom’s Ribbon Gelatin into squares or slices. The wet blade prevents sticking and ensures the layers look crisp and clean for your guests.
While preparing the first layer of your Mom’s Ribbon Gelatin, you might also enjoy a crunchy side dish by trying The Best Crispy Orange Chicken Recipe. This flavorful recipe could complement your dessert beautifully and round out your meal.
Pro Tips for Success
- To achieve the most beautiful Mom’s Ribbon Gelatin, patience is your best friend. Never rush the cooling process of the liquid mixtures, as heat is the enemy of distinct layers.
- Use a turkey baster or a small ladle for the white layers if you find pouring from a cup too imprecise. This gives you total control over the thickness of each ribbon.
- If your white mixture starts to thicken too much in the bowl while you wait for the colored layers to set, simply set the bowl in a larger pan of warm water for a few minutes to loosen it up again.
- Always place your mold on a flat, level shelf in the refrigerator to prevent Mom’s Ribbon Gelatin from having slanted or uneven layers.
Storage & Reheating Tips
Because Mom’s Ribbon Gelatin contains dairy and gelatin, you must store it properly to maintain its texture and freshness. Gelatin does not handle room temperature for long periods, so keep it chilled until the very moment you intend to serve it.
Specifically, you should cover the dish tightly with plastic wrap or store the slices in an airtight container. This prevents the gelatin from absorbing other odors from the refrigerator, which could taint the delicate fruit flavors. You can keep Mom’s Ribbon Gelatin in the fridge for up to 5 days. However, do not freeze this dessert; freezing changes the molecular structure of the gelatin, causing it to become watery and lose its iconic jiggle once thawed.
To ensure your Mom’s Ribbon Gelatin retains its delightful texture, proper storage is essential, just like maintaining the freshness of other dishes. For a delicious sandwich option to serve alongside, check out The Ultimate Shrimp Po’Boy Sandwich Recipe To Try.
What to Serve With This Recipe
Since Mom’s Ribbon Gelatin is quite sweet and creamy, it pairs wonderfully with light, acidic accompaniments. I personally love serving it alongside a crisp seasonal salad featuring toasted walnuts and a bright lemon vinaigrette to cleanse the palate between bites.
Furthermore, you could serve small portions of this gelatin with a side of lightly roasted vegetables, such as asparagus or glazed carrots, for a sophisticated brunch spread. The vibrant colors of the Mom’s Ribbon Gelatin act as a centerpiece themselves, so keep your other side dishes visually simple. A dollop of unsweetened whipped cream or a few fresh berries on top can also add a touch of modern elegance to this classic, homemade treat.
Frequently Asked Questions (FAQ)
Can I make Mom’s Ribbon Gelatin ahead of time?
Yes, this is the perfect “make-ahead” dessert. In fact, Mom’s Ribbon Gelatin actually benefits from being made 24 hours in advance, as the layers bond more securely and the flavors intensify during the long chill.
How do I prevent the layers of Mom’s Ribbon Gelatin from separating?
The key to preventing separation is the “tacky” test. Do not wait until a layer is rock hard before adding the next one. Pour the next layer when the previous one is set but still slightly sticky when touched with a clean finger.
What is the best way to get clean slices of Mom’s Ribbon Gelatin?
For the most professional look, use a long, thin knife dipped in hot water. Wipe the knife clean after every single cut to ensure the white and colored layers of your Mom’s Ribbon Gelatin do not smudge into one another.
Mom’s Ribbon Gelatin is a nostalgic dessert that evokes feelings of family gatherings and joyful celebrations. Its layered presentation and creamy consistency come from combining high-quality ingredients, making it a beloved choice for special occasions and a symbol of creative culinary expression.
Final Thoughts
Creating Mom’s Ribbon Gelatin connects us to cherished memories and the beauty of slow living. This dessert is more than a treat; it is a labor of love that brightens any table. May each colorful layer bring a sense of peace and sweet nostalgia to your home and your loved ones today.
Nutrition Information (per serving)
Understanding the nutritional profile of Mom’s Ribbon Gelatin helps you enjoy it as part of a balanced lifestyle. While it is a celebratory treat, it provides a surprising amount of protein from the gelatin itself.
| Metric | Amount per Serving |
|---|---|
| Calories | 185 kcal |
| Total Fat | 4.5g |
| Saturated Fat | 3g |
| Cholesterol | 15mg |
| Sodium | 85mg |
| Total Carbohydrates | 32g |
| Sugars | 30g |
| Protein | 5g |
Mom’s Ribbon Gelatin
Ingredients
Method
- Prepare the first color layer by dissolving one box of flavored gelatin in boiling water. Stir until dissolved, add cold water, and pour into the mold. Refrigerate until set.
- Create the creamy white mixture by blooming unflavored gelatin in cold water, adding boiling water, and whisking in sweetened condensed milk and vanilla extract. Cool to room temperature.
- Pour the white mixture over the first set color layer using a spoon to prevent drilling. Refrigerate until set.
- Repeat the process by adding alternating layers of flavored gelatin and the white mixture, ensuring each layer is slightly tacky before adding the next.
- After the final colored layer, chill for at least 4 to 6 hours or overnight.
- Unmold carefully and serve sliced.
Notes