The Best Fluffy Pancakes recipe you will fall in love with. Full of tips and tricks to help you make the best pancakes.

Welcome to my kitchen! Today, we master Classic Deviled Eggs, a timeless appetizer balancing a creamy filling with a firm base. This recipe brings vibrant color and velvety texture to any gathering.
These simple ingredients transform into a sophisticated treat. Let’s dive in!
Table of Contents
Why You’ll Love This Classic Deviled Eggs Recipe
- Quick to prepare for busy afternoons.
- Bursting with tangy, creamy flavor.
- Easy to customize with colorful garnishes.
- High protein and naturally gluten-free.
Ingredients You’ll Need
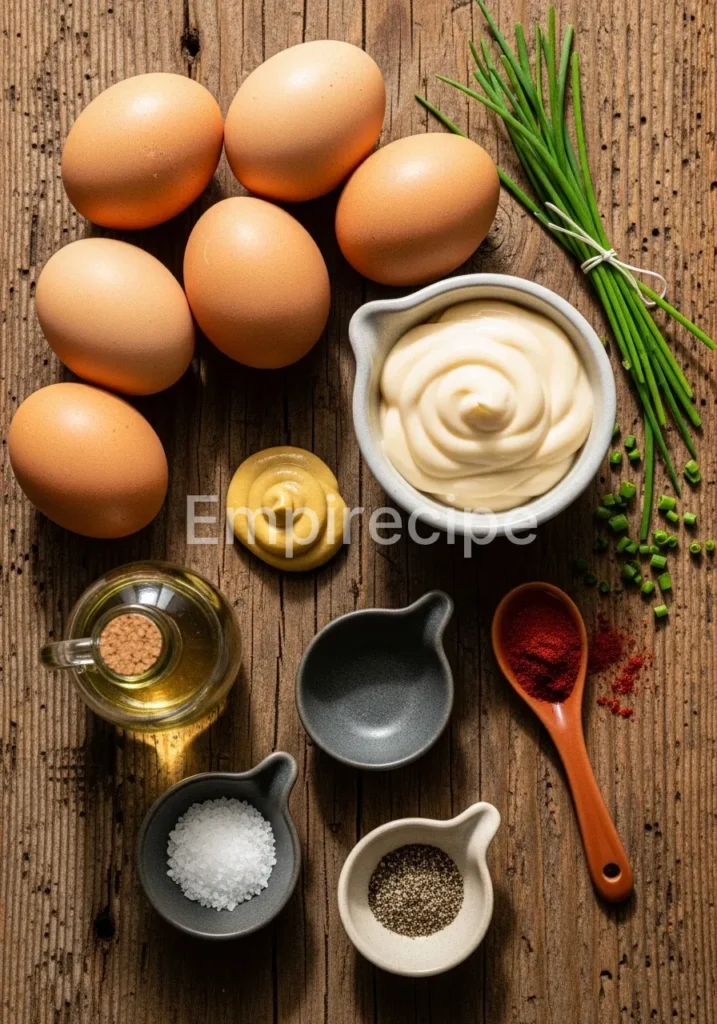
To create the most delicious Classic Deviled Eggs, you must prioritize the quality of your ingredients. I always recommend sourcing organic, pasture-raised eggs from a local farmer to ensure a vibrant yellow yolk and a rich flavor profile. The creamy texture depends heavily on the quality of your fats, so choose a high-quality mayonnaise or even a homemade version if you have the time. Here is what you will need to gather before you begin your culinary adventure.
| Ingredient | Quantity | Notes |
|---|---|---|
| Large Eggs | 6 pieces | Preferably organic and local. |
| Mayonnaise | 1/4 cup | Use avocado oil mayo for a healthy twist. |
| Dijon Mustard | 1 teaspoon | Adds a sophisticated tang. |
| Apple Cider Vinegar | 1 teaspoon | Provides a bright acidity. |
| Sea Salt | 1 pinch | Adjust to your personal taste. |
| Black Pepper | To taste | Freshly ground is always best. |
| Smoked Paprika | 1/2 teaspoon | For that iconic, colorful finish. |
| Fresh Chives | 1 tablespoon | Finely chopped for a fresh garnish. |
Substitutions & Variations
Note: This video is for demonstration purposes and may use a slightly different method.
You can easily adapt Classic Deviled Eggs to suit your dietary needs. If you want a lighter version, swap half of the mayonnaise for Greek yogurt or mashed avocado. For my plant-forward friends, using a vegan mayonnaise works beautifully to maintain that signature silkiness without the dairy. You might also consider adding a dash of hot sauce for a spicy kick or a teaspoon of nutritional yeast for a subtle “cheesy” depth that surprises the palate.
If you’re looking for a fresh side dish to accompany your Classic Deviled Eggs, try out our delightful Classic Coleslaw Recipe. It provides a refreshing crunch that complements the creamy texture of the eggs perfectly.
Equipment You’ll Need
Having the right tools in your kitchen makes the process of preparing Classic Deviled Eggs much smoother and more enjoyable. You do not need professional-grade machinery, but a few specific items will help you achieve that perfect, restaurant-quality look. First, a medium-sized saucepan with a heavy bottom ensures even heat distribution when boiling your eggs. You also need a large bowl to prepare an ice bath, which is the secret to easy peeling and stopping the cooking process instantly.
A sharp chef’s knife is essential for slicing the whites cleanly without tearing them. For the filling, a small mixing bowl and a sturdy fork are usually sufficient for mashing the yolks into a smooth paste. However, if you want a truly professional finish, I highly recommend using a piping bag fitted with a star tip.
If you do not have one, a simple plastic sandwich bag with the corner snipped off works perfectly as a creative anti-waste hack. Finally, keep a small spoon nearby for tasting and adjusting your seasoning levels as you go.
Step-by-Step Instructions
- Place your eggs in a single layer at the bottom of a saucepan and cover them with cold water by at least an inch.
- Bring the water to a full rolling boil over medium-high heat. Once boiling, immediately turn off the heat and cover the pan with a tight-fitting lid.
- Let the eggs sit in the hot water for exactly 12 minutes to achieve a fully set but creamy yolk for your Classic Deviled Eggs.
- While the eggs sit, prepare an ice bath by filling a large bowl with cold water and plenty of ice cubes.
- Transfer the eggs to the ice bath using a slotted spoon and let them cool completely for at least 10 minutes; this step makes peeling much easier.
- Gently crack the shells all over and peel them under cool running water. Pat the eggs dry with a clean towel.
- Slice each egg in half lengthwise and carefully remove the yolks into a small mixing bowl.
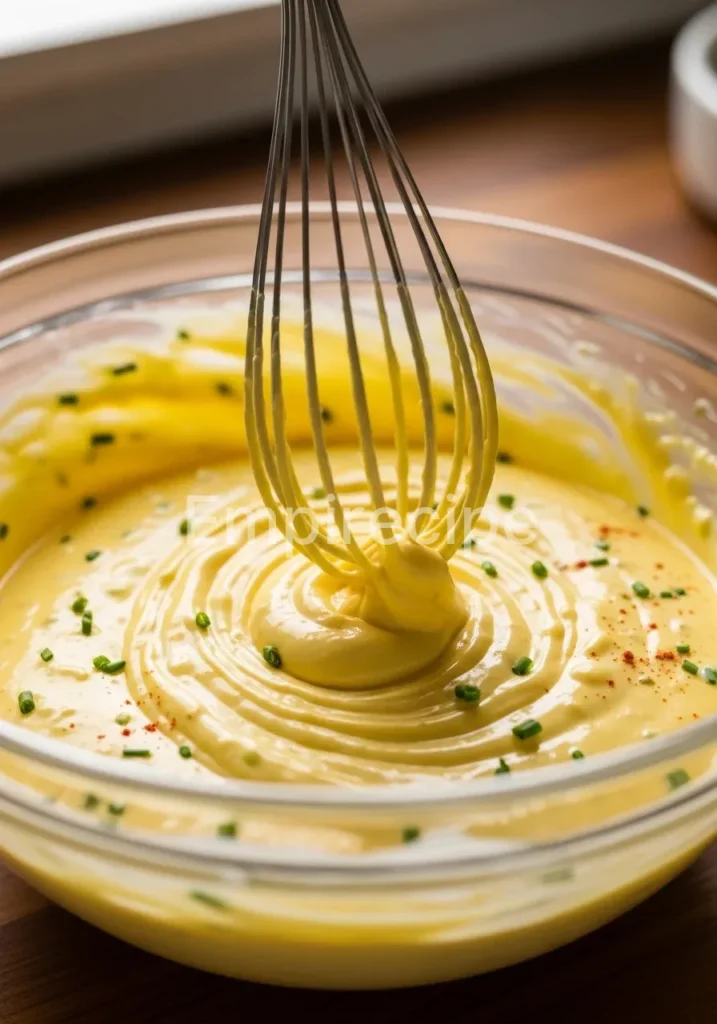
- Mash the yolks with a fork until they become a fine crumble, then stir in the mayonnaise, mustard, vinegar, salt, and pepper.
- Whisk the mixture vigorously until it becomes completely smooth and airy. This is the heart of your Classic Deviled Eggs.
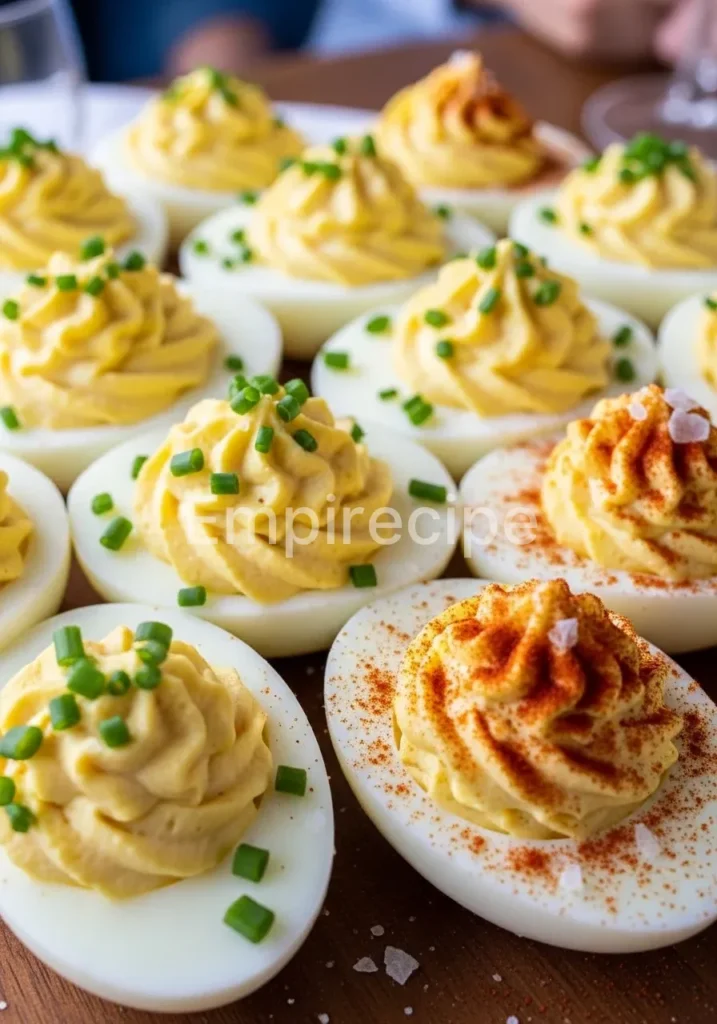
- Use a spoon or a piping bag to fill the hollows of the egg whites with the creamy yolk mixture.
- Dust the tops with a light sprinkle of smoked paprika and garnish with freshly chopped chives before serving.
To perfect your technique, reference our detailed Classic Deviled Eggs Recipe, where you’ll learn the essential steps for achieving the best results. This guide will ensure your eggs turn out beautifully every time.
Pro Tips for Success
Mastering Classic Deviled Eggs requires attention to detail. One of the best technical tips I can offer involves the age of your eggs. While we often strive for the freshest ingredients, eggs that are about a week old actually peel much better than farm-fresh ones.
The internal pH level changes as the egg ages, causing the membrane to pull away from the shell. This results in a smooth, crater-free surface every single time.
When mixing your filling, do not be afraid to pass the yolks through a fine-mesh sieve. This extra step removes any tiny lumps and creates a texture that feels like velvet on the tongue. Furthermore, always taste your mixture before you start piping.
The balance between the richness of the mayo and the acidity of the vinegar is subjective. Sometimes, a tiny drop of honey or a pinch of celery salt can elevate the flavors to a whole new level of complexity. Lastly, always wipe your knife with a damp cloth between every single cut to ensure the whites stay pristine and beautiful.
Storage & Reheating Tips
You should always store Classic Deviled Eggs in the refrigerator until the very moment you plan to serve them. Use an airtight container to prevent the eggs from absorbing any lingering odors from the fridge. If you have a dedicated egg carrier with individual slots, use it to prevent the eggs from sliding around and ruining your beautiful piping work. Properly stored, these savory treats will stay fresh and delicious for up to two days.
I do not recommend freezing this dish, as the texture of the cooked egg whites becomes rubbery and unpleasant upon thawing. If you are preparing these for an event, you can boil and peel the eggs a day in advance. Store the whites and the yolk mixture separately in airtight bags.
Simply pipe the filling into the whites a few hours before your guests arrive to ensure the freshest possible presentation. Never reheat deviled eggs, as they are meant to be enjoyed chilled or at room temperature for the best flavor experience.
For a contrasting dish that pairs well with your Classic Deviled Eggs, consider trying our hearty Classic French Green Lentil Soup. Its warm, comforting flavors create an inviting balance to the appetizer.
What to Serve With This Recipe
When you serve Classic Deviled Eggs, think about balance and color on your platter. These rich, creamy bites pair beautifully with crisp, refreshing elements. A vibrant garden salad with a light lemon vinaigrette offers a perfect acidic contrast to the savory yolks. I also love serving them alongside roasted seasonal vegetables, such as asparagus spears or charred carrots, to add an earthy depth to your appetizer spread.
For a more substantial meal, consider pairing your eggs with a chilled quinoa salad or a hearty platter of artisanal sourdough bread and pickles. The tanginess of fermented vegetables like sauerkraut or pickled red onions complements the mustard in the filling exceptionally well.
If you are hosting a festive brunch, these eggs look stunning next to a bowl of fresh seasonal berries or a platter of smoked salmon. By focusing on whole, plant-forward sides, you create a conscious and colorful meal that everyone will remember.
Frequently Asked Questions (FAQ)
How do I prevent the green ring around the yolk?
The green ring is caused by overcooking or a reaction between the iron in the yolk and the sulfur in the white. To avoid this, follow my timing strictly. Boiling the eggs for 12 minutes in residual heat and then immediately plunging them into an ice bath prevents this discoloration. This ensures your Classic Deviled Eggs look as good as they taste.
Can I make these eggs ahead of time for a party?
Yes, you can certainly prepare Classic Deviled Eggs in advance. For the best results, boil and peel the eggs up to 24 hours before your event. Store the whites in a sealed container and the filling in a separate piping bag. Assemble them shortly before serving to keep the whites from becoming soggy and the filling from drying out.
What is the best way to peel eggs easily?
The secret to easy peeling for your Classic Deviled Eggs lies in the temperature shock. Always move the eggs directly from the hot water into a bowl filled with ice and water. Once they are cold, crack the shell gently all over. Peeling them under a stream of cool water helps the shell slip right off the membrane without damaging the delicate egg white.
Classic Deviled Eggs are a popular dish made by mixing egg yolks with ingredients such as mayonnaise and mustard, then refilling the egg whites with this mixture. Often served as an appetizer or party food, they have a rich culinary history that reflects various flavor adaptations across cultures, much like other traditional culinary staples found in appetizers.
Final Thoughts
Classic Deviled Eggs represent the perfect fusion of simplicity and elegance. They remind us that conscious cooking starts with quality ingredients and a splash of creativity. I hope this recipe brings joy and vibrant energy to your table. Happy cooking, and enjoy every flavorful, creamy bite!
Nutrition Information (per serving)
This nutritional summary provides an estimate for one individual egg half. Enjoy these protein-rich snacks as part of a balanced and colorful diet.
| Metric | Amount |
|---|---|
| Calories | 65 kcal |
| Protein | 3.2 g |
| Total Fat | 5.5 g |
| Carbohydrates | 0.6 g |
| Sodium | 95 mg |
Classic Deviled Eggs
Classic Deviled Eggs are a timeless appetizer that offers a creamy filling complemented by a firm egg white base. They’re easy to prepare, full of flavor, and can be customized with various garnishes.
Ingredients
Method
- Place the eggs in a saucepan and cover with cold water by at least an inch.
- Bring water to a boil over medium-high heat, then turn off the heat and cover the pan.
- Let the eggs sit in the hot water for 12 minutes.
- Prepare an ice bath in a large bowl with cold water and ice cubes.
- Transfer eggs to the ice bath and cool for at least 10 minutes.
- Crack the shells and peel the eggs under running water, then dry them.
- Slice each egg in half and remove the yolks into a mixing bowl.
- Mash the yolks and stir in mayonnaise, mustard, vinegar, salt, and pepper.
- Whisk the mixture until smooth and airy.
- Fill the egg whites with the yolk mixture using a spoon or piping bag.
- Garnish with smoked paprika and chives before serving.
Notes
Use organic eggs for best flavor. Consider substituting half of the mayonnaise for Greek yogurt for a lighter version. Always peel under running water for easier removal.