The Best Fluffy Pancakes recipe you will fall in love with. Full of tips and tricks to help you make the best pancakes.
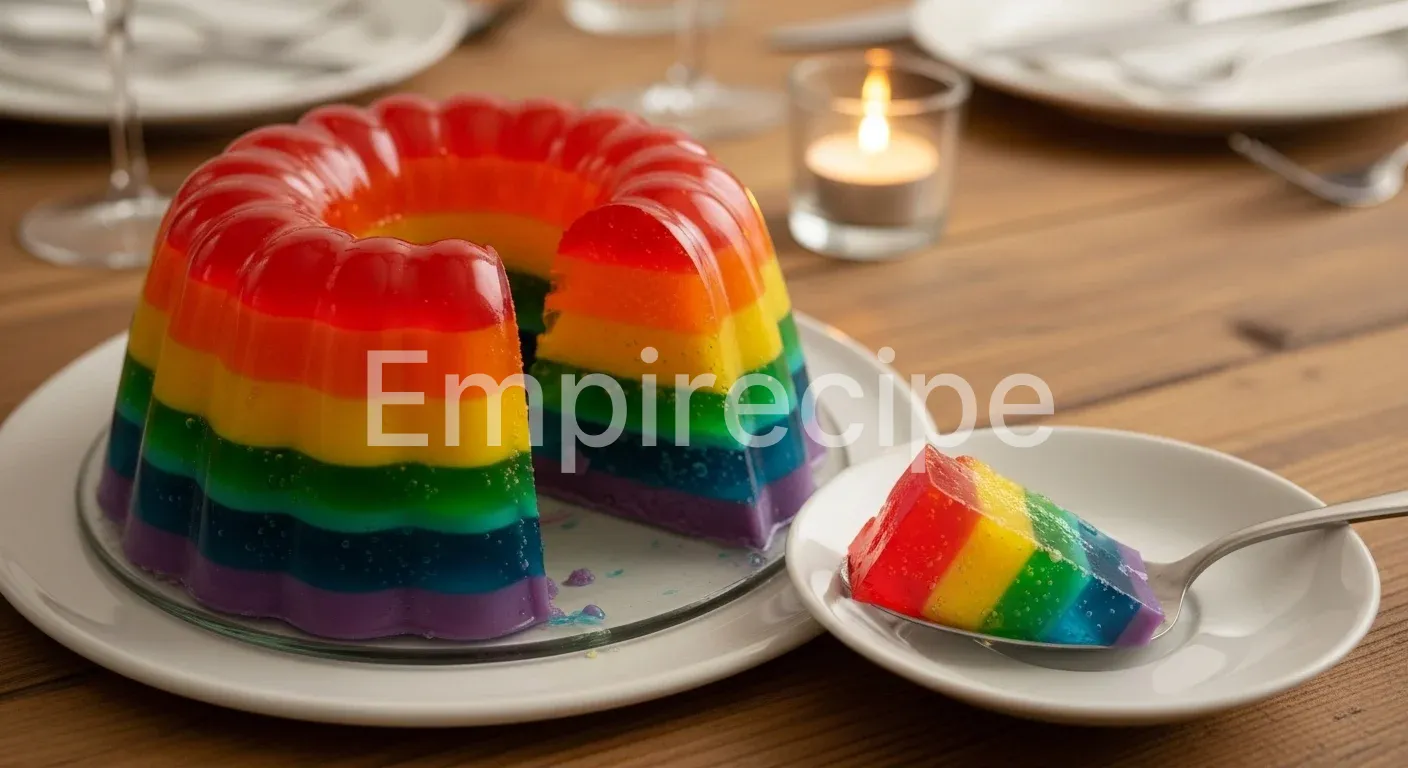
Welcome to a world of color! My Rainbow Gelatin Recipe brings joy with vibrant layers and refreshing taste. This dessert features a bouncy texture everyone adores.
We use plant-based alternatives for an eco-friendly treat. Master the art of layering to perfection. This Rainbow Gelatin Recipe is a true showstopper.
Table of Contents
Why You’ll Love This Rainbow Gelatin Recipe
- Explosion of natural fruit flavors that dance on your palate with every single bite.
- Completely plant-based and cruelty-free ingredients ensure a treat that respects our planet.
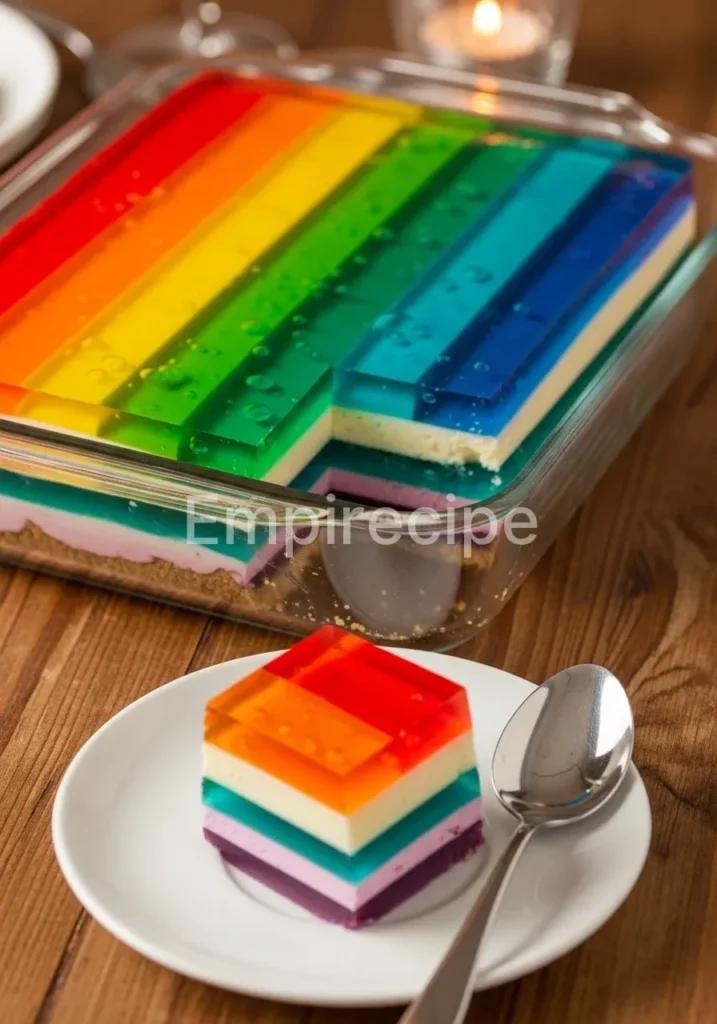
- Stunning visual appeal makes it the perfect center-piece for any festive party or gathering.
Ingredients You’ll Need
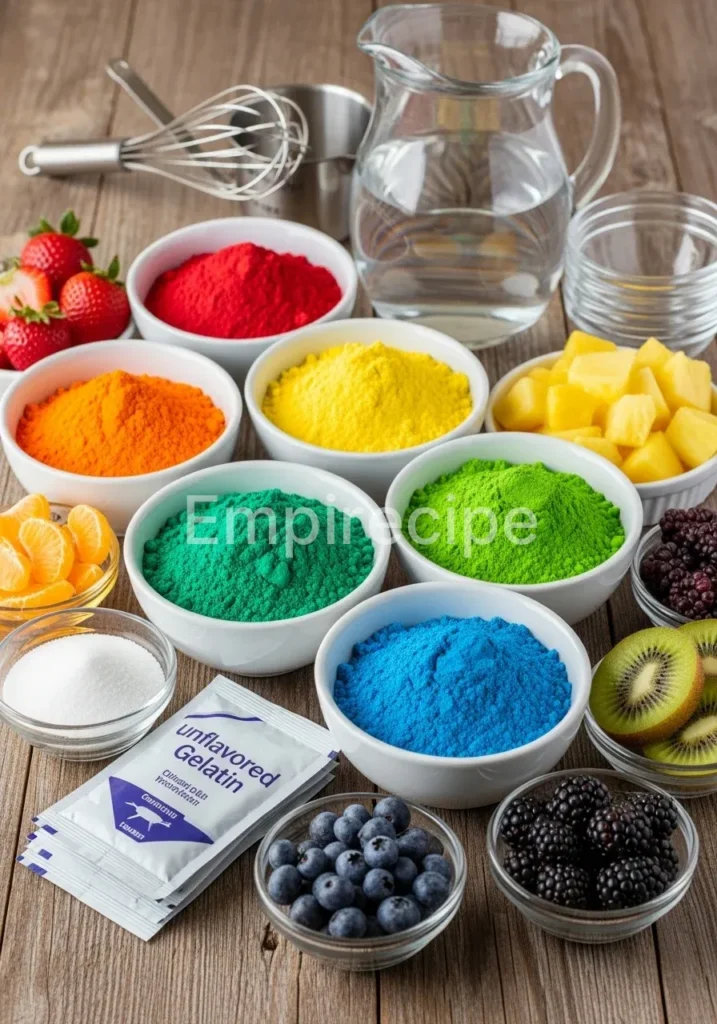
To create a truly spectacular Rainbow Gelatin Recipe, we must focus on high-quality, natural components. I always prioritize organic juices to avoid synthetic dyes and artificial flavors. Using agar-agar instead of traditional gelatin makes this dish inclusive for my vegan and vegetarian friends while maintaining that classic, bouncy structure we all crave. Quality ingredients lead to a more vibrant color palette and a cleaner taste profile that reflects the beauty of nature.
- 2 cups organic red grape or pomegranate juice (for the red layer)
- 2 cups organic orange juice (for the orange layer)
- 2 cups organic pineapple or mango juice (for the yellow layer)
- 2 cups organic lime juice or green apple juice mixed with a hint of spirulina (for the green layer)
- 2 cups organic blueberry juice (for the blue/purple layer)
- 5 tablespoons agar-agar powder (divided across the different color sections)
- 1/2 cup agave nectar or maple syrup (to adjust sweetness as needed)
- 1 teaspoon vanilla extract (optional, to add depth to the fruit flavors)
- Fresh mint leaves for a sustainable and aromatic garnish
Substitutions & Variations
[ra_display_video url=”https://www.youtube.com/watch?v=fs3AHqH-GSo”]
You can easily customize this Rainbow Gelatin Recipe to fit your specific dietary needs or flavor preferences. If you prefer a creamier texture, replace one cup of juice in any layer with full-fat coconut milk to create an opaque, pastel effect. For those watching their sugar intake, stevia or monk fruit extract work beautifully as natural sweeteners.
If you cannot find agar-agar, carrageenan serves as another excellent plant-based gelling agent derived from red seaweed. Always ensure your substitutions maintain the Rainbow Gelatin Recipe spirit of vibrancy and health.
If you’re looking to elevate your dessert experience, check out this Pastel Rainbow Gelatin recipe. It’s an excellent option for tailoring the classic flavor to suit your dietary preferences.
Equipment You’ll Need
Having the right tools ensures your Rainbow Gelatin Recipe turns out perfectly every time. You do not need professional-grade machinery, but precision helps when creating distinct layers. Since we are focusing on an eco-responsible kitchen, I recommend using glass or silicone molds which are reusable and do not leach chemicals into your food. Here is what I keep on my counter when preparing this masterpiece:
- A large, clear glass trifle bowl or a high-quality silicone Bundt mold
- Five small saucepans for heating the different juice layers simultaneously or sequentially
- A precise measuring cup for consistent layer thickness
- A wire whisk to ensure the agar-agar dissolves completely without lumps
- A long-handled spoon or a turkey baster for gently pouring layers
- A flat shelf in your refrigerator to ensure the layers set horizontally
Step-by-Step Instructions
- Prepare the Base: Start your Rainbow Gelatin Recipe by selecting your first color, typically the darkest blue or purple layer. In a small saucepan, combine 2 cups of blueberry juice with 1 tablespoon of agar-agar powder and whisk thoroughly until no clumps remain.
- Heat the Mixture: Place the saucepan over medium heat and bring the liquid to a gentle boil. Continuous stirring is essential here to activate the gelling properties of the agar-agar. Let it simmer for about 2 minutes.
- Sweeten and Flavor: Remove from heat and stir in a tablespoon of agave nectar. Taste the mixture; remember that flavors often dull slightly once chilled, so ensure it tastes vibrant now.
- Pour the First Layer: Carefully pour the mixture into your chosen glass mold. Use a spoon to break any surface bubbles for a crystal-clear finish. Place the mold in the refrigerator for 15 to 20 minutes until the surface feels firm to a light touch.
- Repeat for Orange and Yellow: While the first layer sets, prepare the yellow layer using pineapple juice. Repeat the heating and simmering process. Crucially, allow the hot liquid to cool slightly before pouring it over the set purple layer to prevent melting.
- The Gentle Pour Technique: When pouring subsequent layers for your Rainbow Gelatin Recipe, pour the liquid over the back of a spoon. This technique breaks the fall of the liquid and prevents the new layer from piercing the one beneath it.
- Incorporate the Greens: Prepare the green layer with lime juice and a pinch of spirulina for that deep emerald hue. Follow the same boiling and cooling steps. By now, your kitchen will smell like a tropical paradise!
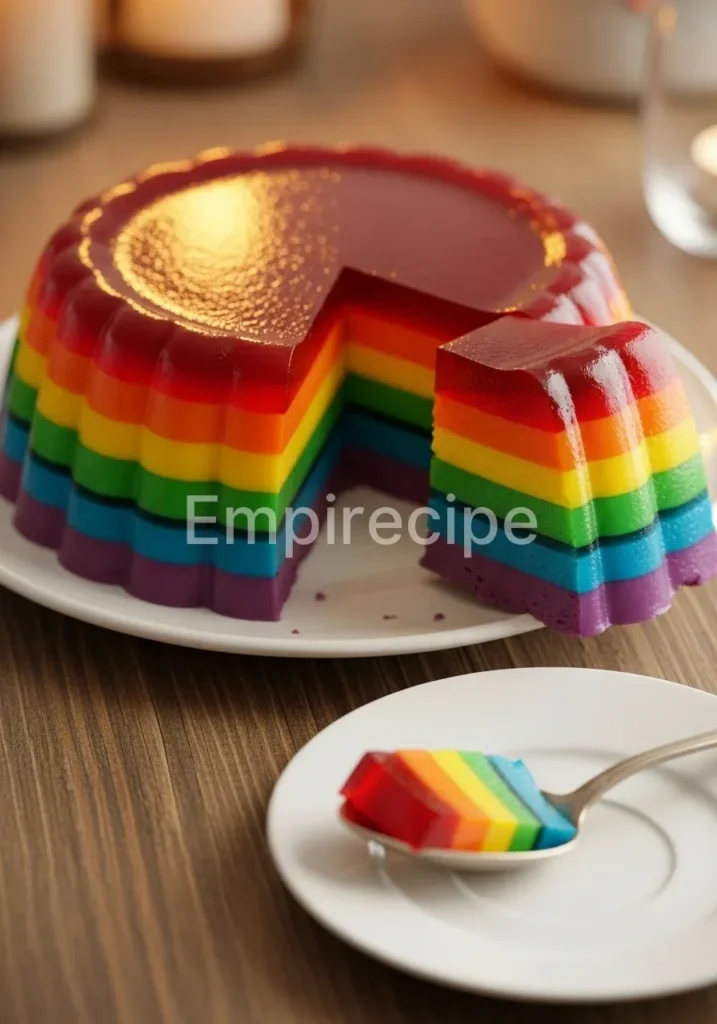
- Finish with the Red Top: Complete the Rainbow Gelatin Recipe by adding the final red layer of pomegranate juice. This top layer will be the first thing people see, so ensure it is perfectly smooth.
- The Final Set: Once all layers are assembled, refrigerate the entire mold for at least 4 hours, or ideally overnight. This ensures the Rainbow Gelatin Recipe is structurally sound and easy to slice.
- Unmolding: If using a silicone mold, gently pull the edges away from the gelatin. If using glass, briefly dip the bottom of the mold in warm water for 5 seconds to loosen the seal before inverting it onto a serving plate.
To create a similar but distinct variation, you might want to explore Mom’s Ribbon Gelatin for a delicious twist. This recipe features vibrant layers with a touch of nostalgia that will bring smiles to any gathering.
Pro Tips for Success
Achieving a professional-looking Rainbow Gelatin Recipe requires a few technical tricks. First, understand that agar-agar sets at room temperature, unlike animal-based gelatin which requires refrigeration to begin firming. This means you must work efficiently but carefully.
If your juice mixture in the pot begins to thicken before you are ready to pour, simply reheat it gently to liquefy it again. This flexibility makes the Rainbow Gelatin Recipe very forgiving for beginners.
Another secret involves the “tackiness” of the layers. You should pour the next layer when the previous one is set but still slightly tacky to the touch. If the bottom layer is completely cold and hard, the new layer might slide right off when you try to slice the dessert.
If you accidentally let a layer get too cold, gently score the surface with a fork to help the new layer grip. Mastering these nuances will elevate your Rainbow Gelatin Recipe to artisan levels.
Storage & Reheating Tips
Proper storage is vital for maintaining the integrity of your Rainbow Gelatin Recipe. Always keep the dessert in the refrigerator until the very moment of serving. Agar-agar is more stable at room temperature than traditional gelatin, but it still tastes best when chilled.
If you have leftovers, place them in an airtight glass container to prevent the gelatin from absorbing other odors from the fridge. I do not recommend freezing this Rainbow Gelatin Recipe, as the ice crystals will destroy the delicate cell structure of the agar, resulting in a mushy texture upon thawing.
As for reheating, this is a cold dessert and should never be microwaved or heated. However, if you wish to repurpose leftover pieces into a new shape, you can actually melt the Rainbow Gelatin Recipe back down in a saucepan over low heat. Once liquid, you can pour it into new molds. This anti-waste approach ensures that not a single drop of your colorful creation goes to waste!
Properly storing your Rainbow Gelatin is key; consider reviewing our Mosaic Gelatin Recipe for tips on keeping your desserts fresh. You’ll find insights on maintaining flavors while ensuring an appealing presentation.
What to Serve With This Recipe
This Rainbow Gelatin Recipe is naturally sweet and refreshing, so I love pairing it with contrasting textures and earthy flavors. A crisp, bitter greens salad with walnuts and a light citrus vinaigrette provides a sophisticated counterpoint to the dessert’s sweetness. For a brunch setting, serve slices of the gelatin alongside a platter of roasted root vegetables seasoned with fresh rosemary and thyme. The earthiness of the vegetables grounds the ethereal quality of the fruit layers.
If you want to stay in the dessert realm, a dollop of homemade coconut whipped cream or a sprinkle of toasted hemp seeds adds a lovely nutty crunch. I also find that a side of fresh berries or a tart lemon sorbet complements the Rainbow Gelatin Recipe perfectly. Always serve with a refreshing herbal tea, such as hibiscus or mint, to cleanse the palate between the colorful layers.
Frequently Asked Questions (FAQ)
Can I use fresh pineapple juice in this Rainbow Gelatin Recipe?
Yes! Unlike traditional animal gelatin, which contains enzymes that prevent fresh pineapple from setting, agar-agar is not affected by these enzymes. You can use any fresh tropical fruit juice you like in your Rainbow Gelatin Recipe without fear of it remaining liquid.
How do I get the colors so bright without food coloring?
The secret to a vibrant Rainbow Gelatin Recipe lies in the concentration of your juices. You can simmer your juices to reduce them by half before adding the agar-agar to intensify the natural pigments. Using botanical powders like beet powder or butterfly pea flower tea also provides intense, natural hues.
Is this Rainbow Gelatin Recipe suitable for kids’ parties?
Absolutely! Children find the bright colors of the Rainbow Gelatin Recipe irresistible. Because it is made from fruit juice and natural sweeteners, it is a much healthier alternative to store-bought gelatin snacks. Plus, it is a great way to introduce them to plant-based ingredients in a fun way.
Rainbow gelatin is a vibrant dessert made by layering flavored gelatin in a spectrum of colors, often using fruit juices for natural sweetness. This delightful treat is not only visually appealing but can also be made vegan-friendly by employing alternatives like agar-agar, adding a unique twist to traditional gelatin dishes, as detailed in this informative article.
Final Thoughts
Making this Rainbow Gelatin Recipe connects us to the joy of creative cooking. You transform simple ingredients into a glowing prism of flavor. Share this vibrant treat with your loved ones and celebrate the beauty of plant-based eating. Stay colorful, stay conscious, and enjoy every bite!
Nutrition Information (per serving)
This Rainbow Gelatin Recipe is a nutrient-dense alternative to traditional desserts, offering vitamins from real fruit juices and minerals from agar-agar. It is naturally fat-free and low in calories, making it a guilt-free way to satisfy your sweet tooth.
| Calories | 95 kcal |
| Total Fat | 0g |
| Sodium | 12mg |
| Total Carbohydrates | 23g |
| Dietary Fiber | 2g |
| Sugars | 18g |
| Protein | 1g |
| Vitamin C | 45% DV |
Rainbow Gelatin Recipe
A vibrant and refreshing Rainbow Gelatin dessert made with natural fruit juices and agar-agar for a plant-based treat.
Ingredients
Method
- Combine 2 cups of blueberry juice with 1 tablespoon of agar-agar in a saucepan and whisk until smooth.
- Heat the mixture over medium heat, stirring continuously until it simmers for 2 minutes.
- Remove from heat and add sweetener; taste and adjust as necessary.
- Pour the first layer into a mold and refrigerate for 15-20 minutes until set.
- Prepare the next layers (orange, yellow, green, red) using the same method as the first layer, remembering to cool slightly before pouring over set layers.
- Once all layers are assembled, refrigerate for at least 4 hours or overnight.
- Unmold the gelatin and serve with fresh mint leaves.
Notes
Agar-agar sets at room temperature, pour each subsequent layer when the previous layer is slightly tacky. Store in the refrigerator.