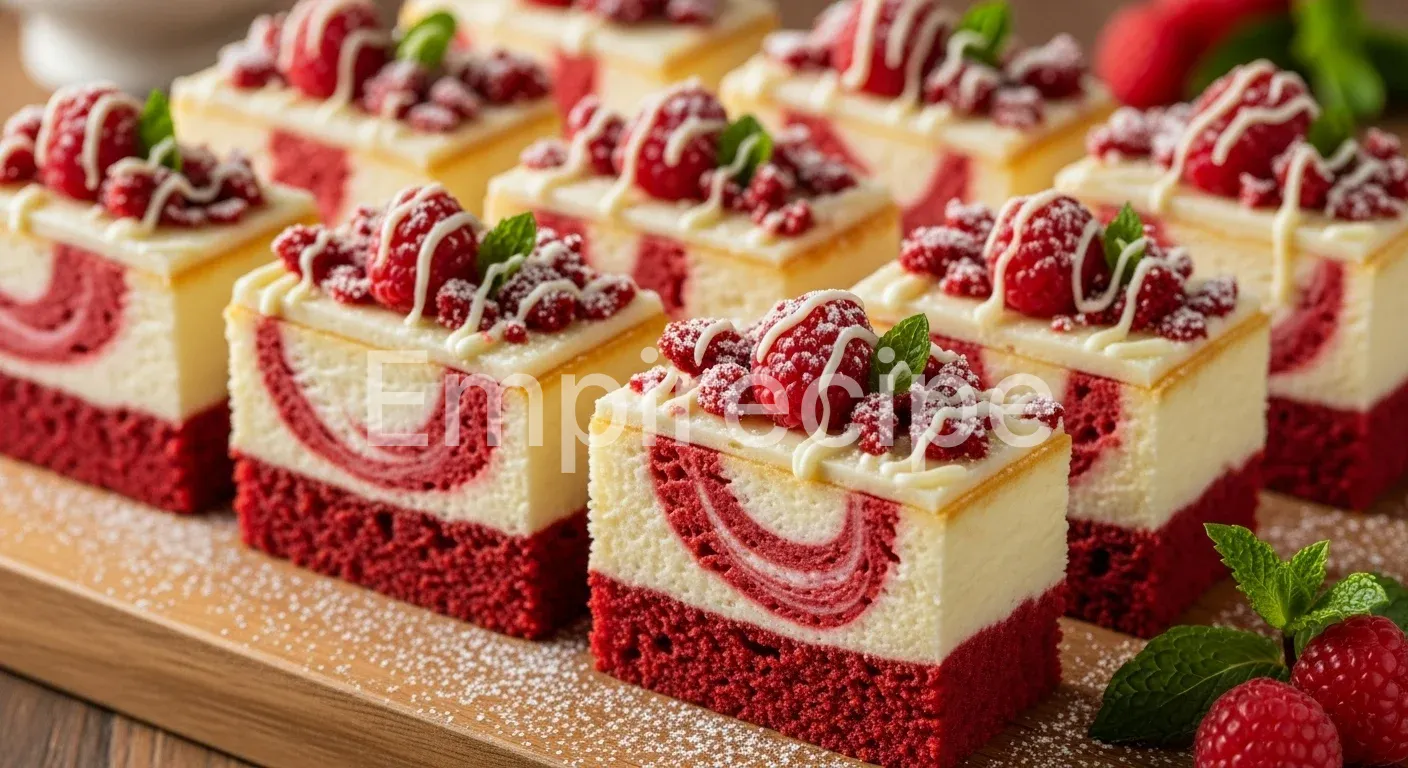

These Red Velvet Cheesecake Bars offer a sophisticated fusion of cocoa-infused richness and tangy creaminess. I focus on structural integrity and flavor balance to ensure every bite delivers a dense, velvety texture. This recipe demands precision but rewards you with a professional-grade dessert. We are building a high-performance treat that stands up to any culinary challenge.
Table of Contents
Why You’ll Love This Recipe (Red Velvet Cheesecake Bars)
- Visual Impact: The striking contrast between the deep crimson cocoa base and the ivory cheesecake swirl makes these Red Velvet Cheesecake Bars a centerpiece for any event.
- Technical Balance: We utilize a specific ratio of acidity to cocoa, ensuring the flavor profile remains complex rather than just sweet.
- Optimized Texture: By controlling the aeration during the mixing process, we achieve a dense, fudge-like brownie base that supports the weight of the cheesecake.
- Efficient Workflow: This recipe streamlines the baking process, allowing you to master two distinct textures in a single pan.
Ingredients You’ll Need
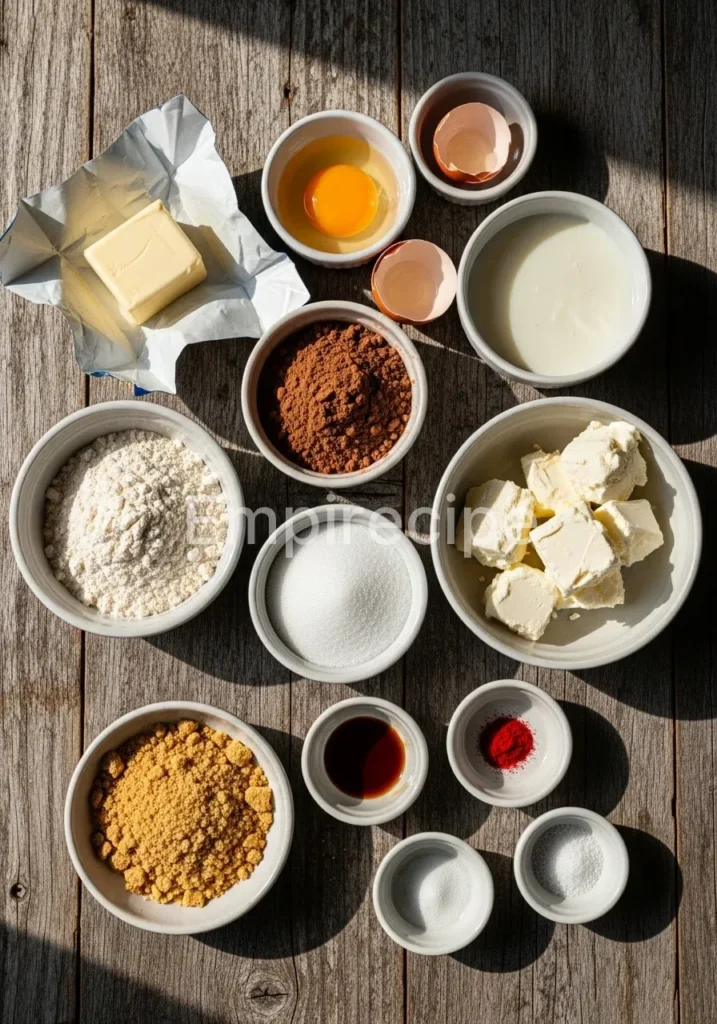
Quality ingredients dictate the final outcome of your Red Velvet Cheesecake Bars. Do not settle for subpar dairy or low-grade chocolate. Precision in your selection ensures that the chemical reactions necessary for the “red velvet” effect occur correctly.
- Unsalted European-Style Butter: Use butter with at least 82% fat content for a richer mouthfeel in the base.
- Granulated White Sugar: This provides the necessary structure and sweetness without altering the color profile.
- Dutch-Processed Cocoa Powder: This provides a darker, smoother chocolate flavor that reacts beautifully with the food coloring.
- High-Quality Red Food Gel: Gel is superior to liquid coloring as it provides intense pigment without altering the moisture content of the batter.
- Distilled White Vinegar: A critical technical component that activates the cocoa and provides the signature red velvet tang.
- Pure Vanilla Extract: Always use real vanilla to enhance the aromatic complexity of the Red Velvet Cheesecake Bars.
- Large Room-Temperature Eggs: Eggs must be at room temperature to ensure proper emulsification with the fats.
- All-Purpose Flour: Sift your flour to avoid clumps and ensure a uniform crumb structure.
- Full-Fat Cream Cheese: Never use “light” or spreadable versions; the high fat content is required for structural stability during the bake.
- Sour Cream: This adds a necessary level of acidity and moisture to the cheesecake layer.
Substitutions & Variations
[ra_display_video url=”https://www.youtube.com/watch?v=ZsLrkqSW69g”]
To optimize the health profile of your Red Velvet Cheesecake Bars, consider these calculated swaps. Replace the granulated sugar with an erythritol-based monk fruit sweetener to reduce the glycemic load. For the base, you can substitute 30% of the all-purpose flour with almond flour to increase protein density and add a subtle nutty depth.
If you require a gluten-free version, use a high-quality 1:1 gluten-free flour blend containing xanthan gum to maintain the structural integrity of the bars. Avoid using liquid oils in place of butter, as the saturated fats in butter are essential for the specific texture of these Red Velvet Cheesecake Bars.
If you’re looking for a delicious way to enjoy the flavors of red velvet in another form, you should try our Red Velvet Cookies. These cookies are equally rich and flavorful, making them a perfect companion to your cheesecake bars.
Equipment You’ll Need
Success in modern baking relies heavily on the right tools. To execute these Red Velvet Cheesecake Bars perfectly, you need equipment that provides consistent results.
- 8×8 Inch Square Baking Pan: I prefer light-colored aluminum for even heat distribution.
- Parchment Paper: Crucial for removing the bars from the pan without damaging the delicate cheesecake layer.
- Digital Kitchen Scale: Volumetric measurements are imprecise; weighing ingredients in grams ensures total consistency.
- Electric Hand Mixer or Stand Mixer: Necessary for aerating the cream cheese to a silky smooth consistency.
- Stainless Steel Mixing Bowls: These are non-reactive and help maintain the temperature of your ingredients.
- Silicone Spatula: Essential for folding the flour into the base without overworking the gluten.
- Offset Spatula: This tool allows for precision when layering the cheesecake and creating the swirl pattern.
- Oven Thermometer: Most ovens are improperly calibrated; a thermometer ensures you are baking at exactly 325°F (163°C).
Step-by-Step Instructions
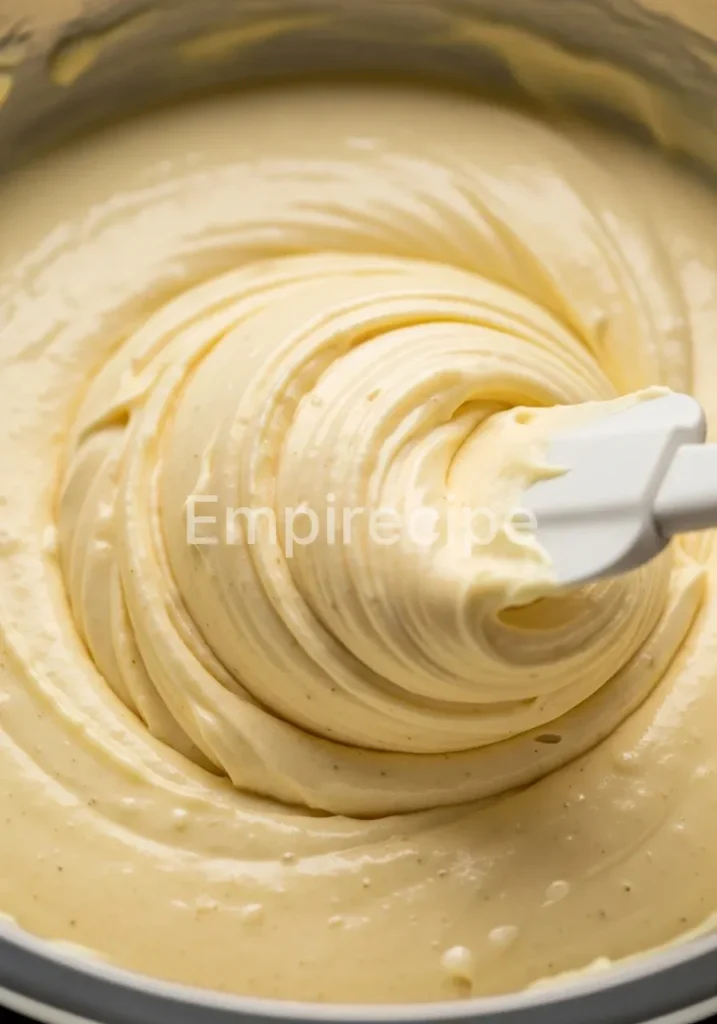
Follow these steps with technical precision to ensure your Red Velvet Cheesecake Bars reach professional standards.
- Preparation and Calibration: Preheat your convection oven to 325°F (163°C). Line your 8×8 inch pan with parchment paper, leaving an overhang on two sides for easy removal later.
- Synthesize the Red Velvet Base: In a large bowl, whisk together the melted butter and granulated sugar until fully combined. Incorporate the cocoa powder, red food gel, vinegar, vanilla, and a pinch of salt. The mixture should be vibrant and glossy.
- Incorporate the Binding Agents: Add the eggs one at a time, whisking vigorously after each addition. This creates a stable emulsion. Gently fold in the sifted flour until just combined. Do not overmix, as this will develop too much gluten and make the base tough.
- Reserve and Layer: Set aside approximately 1/4 cup of the red velvet batter. Pour the remaining batter into the prepared pan and smooth it out using your offset spatula. This forms the foundation of your Red Velvet Cheesecake Bars.
- Engineer the Cheesecake Layer: In a separate bowl, beat the room-temperature cream cheese until completely smooth. Add the sugar, egg, sour cream, and vanilla. Mix on low speed to avoid incorporating excess air, which causes cracking.
- Execute the Swirl: Spread the cheesecake mixture evenly over the red velvet base. Drop small dollops of the reserved red velvet batter on top. Use a skewer or a thin knife to swirl the two layers together, creating an aesthetic marble effect.
- The Precision Bake: Place the pan in the center of the oven. Bake for 30 to 35 minutes. The edges should be set, but the center should still have a slight “jiggle” when shaken. This indicates the cheesecake has reached the perfect internal temperature.
- Thermal Regulation: Allow the Red Velvet Cheesecake Bars to cool completely in the pan at room temperature for one hour. Then, refrigerate for at least 3 hours (ideally overnight) to allow the fats to solidify and the flavors to mature.
To expand your dessert repertoire, consider trying a beautiful Heart Shaped Red Velvet Cake that brings a romantic flair to any occasion. This cake captures the same beloved flavors and provides a stunning presentation.
Pro Tips for Success
To master Red Velvet Cheesecake Bars, you must pay attention to the thermodynamics of the process. First, ensure all dairy components are at exactly room temperature (about 70°F). Cold cream cheese will result in a lumpy texture that ruins the mouthfeel.
Second, use a “low and slow” baking approach. High heat causes the cheesecake to rise and then collapse, creating unsightly cracks on the surface of your Red Velvet Cheesecake Bars. Third, for perfectly clean cuts, use a sharp chef’s knife dipped in hot water and wiped dry between every single slice.
This prevents the red base from bleeding into the white cheesecake layer during the portioning process. Finally, avoid over-beating the cheesecake batter; excess air leads to bubbles that mar the surface of the Red Velvet Cheesecake Bars.
Storage & Reheating Tips
Proper storage is essential to maintain the moisture balance of your Red Velvet Cheesecake Bars. Place the sliced bars in an airtight container with parchment paper between layers to prevent sticking. They will remain fresh in the refrigerator for up to 5 days.
For long-term storage, these bars freeze exceptionally well. Wrap individual bars tightly in plastic wrap and then foil; they will maintain their quality for up to 3 months. When you are ready to serve, thaw them in the refrigerator overnight. I do not recommend reheating Red Velvet Cheesecake Bars, as the cheesecake layer will lose its structural integrity and become oily when exposed to high heat.
For those who love the classic red velvet flavor, our Red Velvet Bundt Cake is another exquisite option that showcases this flavor in a new form. This bundt cake is sure to impress with its moist texture and vibrant color.
What to Serve With This Recipe
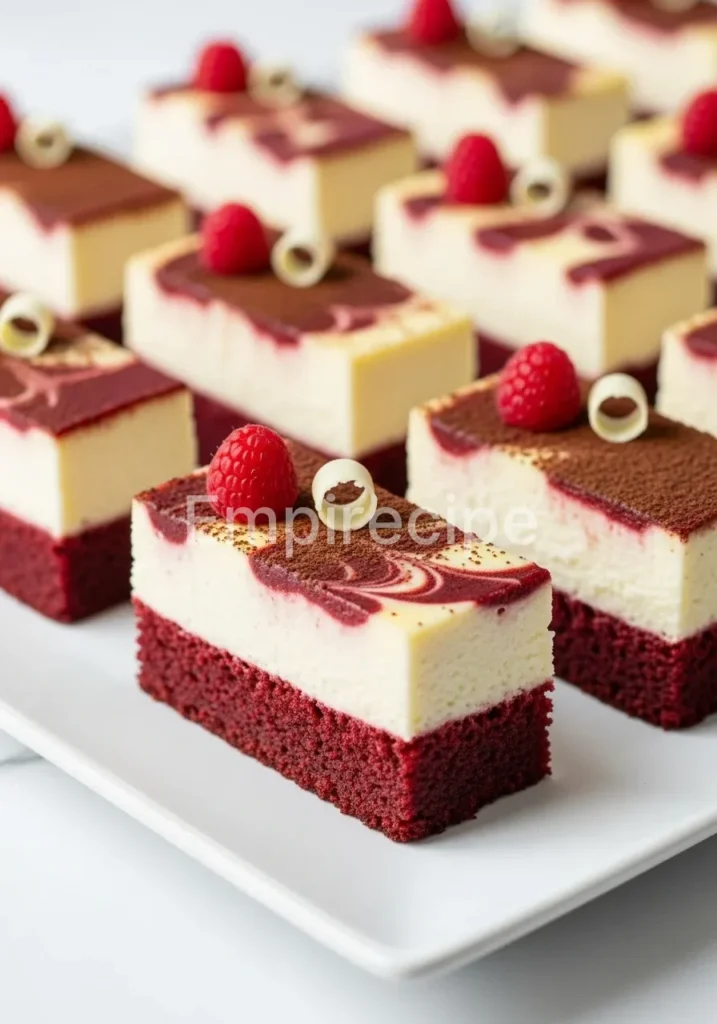
Since Red Velvet Cheesecake Bars are inherently rich and decadent, I recommend pairing them with elements that provide contrast. A sharp, acidic component like a fresh raspberry coulis or a side of macerated strawberries can cut through the fat of the cream cheese. For a more sophisticated presentation, serve them alongside a small arugula salad dressed with a light lemon vinaigrette.
The bitterness of the greens acts as a palate cleanser. Additionally, a cup of strong, black coffee or a dry espresso provides a roasted bitterness that complements the Dutch-processed cocoa in the Red Velvet Cheesecake Bars beautifully.
Frequently Asked Questions (FAQ)
Can I use natural cocoa powder instead of Dutch-processed?
You can, but the flavor will be more acidic and the color will be lighter. Natural cocoa reacts differently with the vinegar. For the best Red Velvet Cheesecake Bars, Dutch-processed cocoa provides the superior color and mellow flavor profile required for this specific dessert.
How do I prevent my cheesecake layer from cracking?
Cracking is usually the result of over-baking or cooling too quickly. Ensure you remove the Red Velvet Cheesecake Bars from the oven while the center is still slightly wobbly. Cooling at room temperature before refrigerating allows the internal structure to stabilize without thermal shock.
Why did my red velvet base turn out dry?
Dryness is typically caused by over-mixing the flour or over-baking. When you add the flour to the Red Velvet Cheesecake Bars base, fold it in just until no white streaks remain. Every extra second of mixing develops gluten, which creates a bread-like texture rather than a fudgy one.
Red Velvet Cheesecake Bars are a modern twist on the traditional red velvet cake, featuring a rich cheesecake layer on top of a dense cocoa base. This decadent dessert has roots in Southern baking culture, reflecting a popular trend towards layered sweets and creative flavor combinations that elevate classic recipes, which you can learn more about in this article.
Final Thoughts
Mastering these Red Velvet Cheesecake Bars represents a triumph of precision and bold flavor. You have balanced the acidic cocoa base with a silky, technical cheesecake layer. Share these bars with those who appreciate the intersection of modern baking science and classic, indulgent aesthetics.
Nutrition Information (per serving)
This data reflects a standard yield of 16 Red Velvet Cheesecake Bars. Always verify your specific brand ingredients for total accuracy.
| Nutrient | Amount per Serving |
|---|---|
| Calories | 285 kcal |
| Total Fat | 18g |
| Saturated Fat | 11g |
| Carbohydrates | 28g |
| Sugars | 21g |
| Protein | 4g |
| Sodium | 145mg |
Red Velvet Cheesecake Bars
Ingredients
Method
- Preheat convection oven to 325°F (163°C) and line an 8×8 inch pan with parchment paper.
- In a large bowl, whisk together melted butter and granulated sugar. Incorporate cocoa powder, red food gel, vinegar, vanilla, and salt until glossy.
- Add eggs one at a time, whisking vigorously. Fold in the sifted flour until just combined.
- Reserve 1/4 cup of the red velvet batter. Pour remaining batter into the prepared pan and smooth out.
- In another bowl, beat cream cheese until smooth. Add sugar, egg, sour cream, and vanilla; mix on low speed.
- Spread the cheesecake mixture over the red velvet base. Drop dollops of reserved batter on top and swirl.
- Bake for 30 to 35 minutes. The edges should set, the center should jiggle slightly.
- Cool completely in the pan, then refrigerate for at least 3 hours before serving.
Notes