The Best Fluffy Pancakes recipe you will fall in love with. Full of tips and tricks to help you make the best pancakes.

Chocolate Gelatin offers a silky, mindful treat. It balances deep cocoa with wellness. This dessert melts slowly, providing comfort. You will love the pure, simple ingredients. It supports health and satisfies cravings perfectly. Enjoy this slow-living staple today.
Table of Contents
Why You’ll Love This Chocolate Gelatin Recipe
- Silky texture and rich cocoa flavor satisfy cravings.
- Preparation takes only ten minutes of active work.
- Grass-fed gelatin supports gut health and glowing skin.
Ingredients You’ll Need
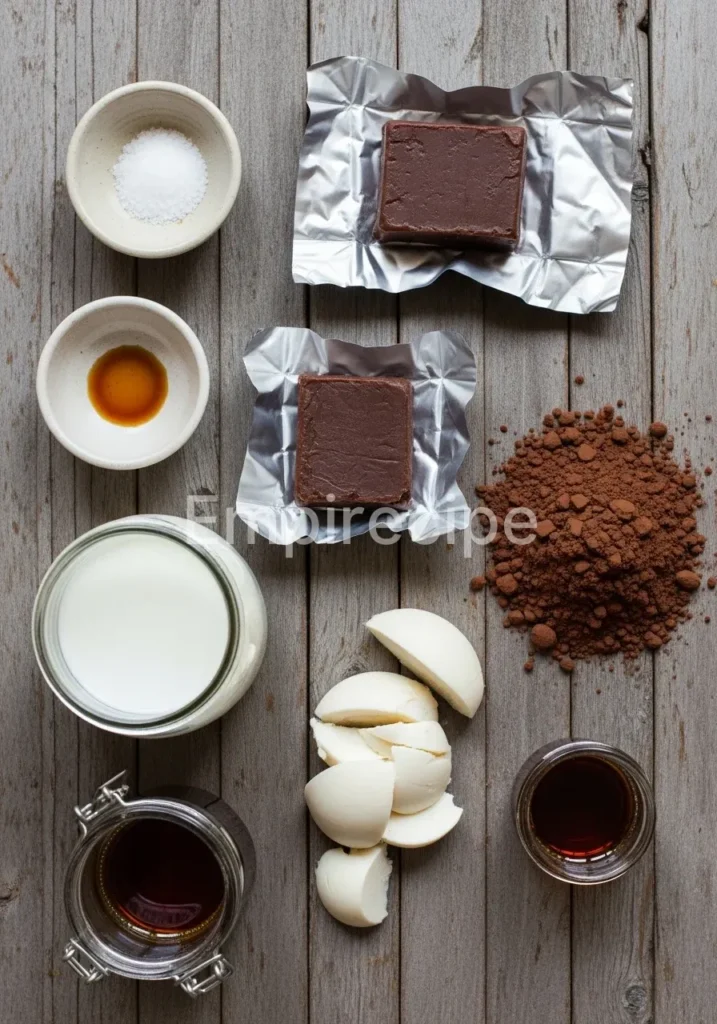
Quality remains the heartbeat of my kitchen. When you select ingredients for this Chocolate Gelatin, choose items that nourish your spirit and body. The depth of flavor depends entirely on the purity of your cocoa and the richness of your milk. I prefer organic options to maintain that authentic, homemade essence we all cherish in slow-living.
- 2 cups of milk: You may use whole dairy milk for creaminess or almond milk for a lighter touch.
- 3 tablespoons of unsweetened cocoa powder: Look for high-quality, ethically sourced cocoa to ensure a robust profile.
- 1/4 cup of maple syrup: This natural sweetener adds a hint of caramel-like depth without refined sugars.
- 1.5 tablespoons of grass-fed gelatin powder: Ensure you use high-quality unflavored gelatin for the best nutritional benefits.
- 1 teaspoon of pure vanilla extract: A small splash elevates the chocolate notes significantly.
- A pinch of sea salt: Salt acts as a flavor enhancer, making the Chocolate Gelatin taste more intense.
Substitutions & Variations
Note: This video is for demonstration purposes and may use a slightly different method.
You can easily adapt this Chocolate Gelatin to your dietary needs. Swap maple syrup for honey or monk fruit for a lower-carb version. Use coconut milk for an exotic, tropical undertone.
If you’re looking to explore more creative variations of chocolate treats, try out this amazing Pink Hot Chocolate. It’s a delightful twist that offers a deliciously unique flavor profile while still being easy to make.
Equipment You’ll Need
Creating a beautiful dessert does not require a kitchen full of gadgets. Instead, we focus on a few essential tools that make the process of crafting Chocolate Gelatin a meditative and joyful experience. Taking the time to gather your equipment helps you stay present in the moment.
- Small saucepan: Choose one with a heavy bottom to ensure even heating of the liquid.
- Fine-mesh whisk: This tool helps you incorporate the cocoa powder smoothly without leaving any stubborn clumps.
- Ramekins or glass molds: These provide the final shape and elegant presentation for your dessert.
- Measuring cups and spoons: Precision ensures the perfect balance of sweetness and structural integrity.
- Fine-mesh sieve (optional): Use this if you want an extra-smooth, professional finish for your Chocolate Gelatin.
Step-by-Step Instructions
- Bloom the gelatin: Pour half a cup of cold milk into a small bowl. Sprinkle the gelatin powder evenly over the surface. Let it sit for five minutes. This process, called blooming, ensures your Chocolate Gelatin has a smooth, consistent texture without any grainy patches.
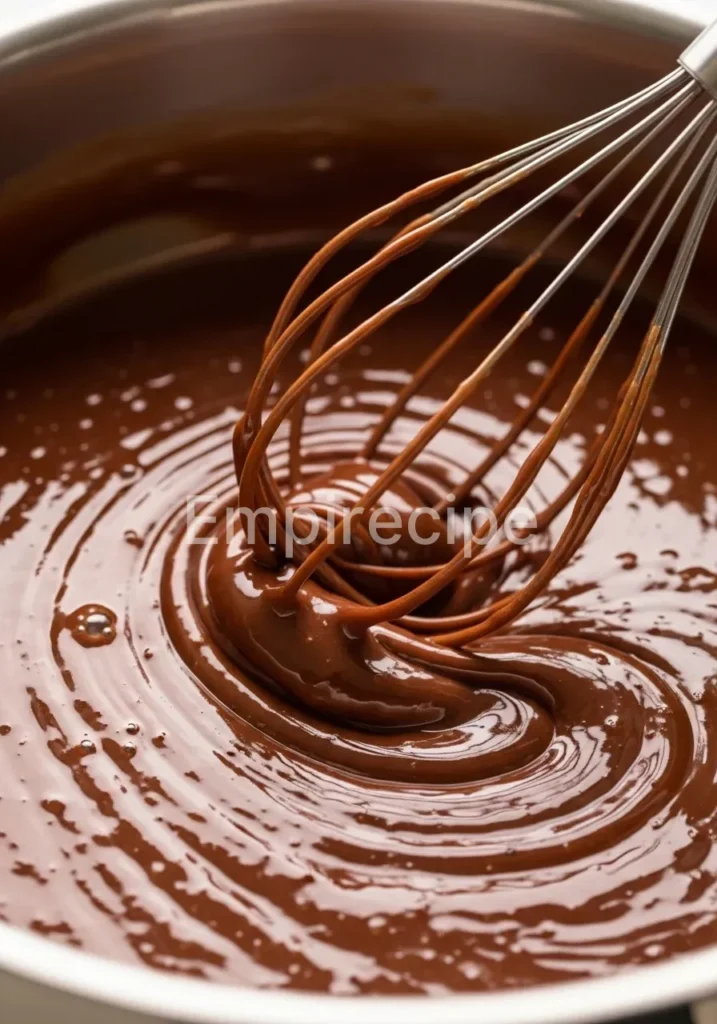
- Heat the base: Place the remaining milk, cocoa powder, maple syrup, and sea salt into your saucepan. Turn the heat to medium-low. Whisk the mixture constantly as it warms. Do not let the liquid reach a rolling boil, as high heat can damage the setting properties of the gelatin.
- Combine the ingredients: Once the cocoa mixture is steaming and smooth, add the bloomed gelatin mixture to the saucepan. Continue whisking gently for two to three minutes until the gelatin dissolves completely into the warm chocolate milk.
- Add the aromatics: Remove the saucepan from the heat. Stir in the pure vanilla extract. The scent of warm vanilla mingling with cocoa creates a beautiful sensory experience in your kitchen.
- Strain and pour: If you notice any tiny lumps of cocoa, pour the liquid through a fine-mesh sieve into a clean pitcher. Carefully pour the liquid into your prepared ramekins or glass molds.
- Chill to set: Place the molds in the refrigerator. Allow the Chocolate Gelatin to set for at least four hours, though leaving them overnight produces the best results. This patience is a core part of the slow-living lifestyle.
- Unmold and serve: When you are ready to eat, gently run a thin knife around the edges of the mold. Invert the mold onto a small plate to release the Chocolate Gelatin.
To elevate your dessert game, consider making Chocolate Covered Strawberries for an extra indulgence. These sweet bites perfectly complement the silky richness of Chocolate Gelatin.
Pro Tips for Success
Mastering the art of Chocolate Gelatin requires attention to detail. First, never boil the mixture once you add the gelatin. Excessive heat breaks down the protein bonds, which prevents the dessert from firming up properly.
Second, always whisk the cocoa powder into the cold or room temperature milk before heating to prevent clumping. If you desire a richer, mousse-like consistency, you can whisk in a tablespoon of heavy cream or coconut cream at the very end.
Another technical secret involves the blooming process. Make sure you sprinkle the powder over the liquid rather than dumping it in a pile. This allows every grain to hydrate properly.
When you finally combine the ingredients, the Chocolate Gelatin will reward you with a glass-like smoothness. If you prefer a firmer set for molded shapes, increase the gelatin by half a teaspoon. For a soft, spoonable pudding texture, stick to the original measurements.
Storage & Reheating Tips
You must store your Chocolate Gelatin in the refrigerator at all times. Cover each ramekin with beeswax wrap or a reusable lid to prevent the surface from drying out or absorbing other fridge odors. This dessert stays fresh and delicious for up to five days.
Because gelatin is heat-sensitive, do not reheat this dish. If you prefer a less-chilled sensation, let the Chocolate Gelatin sit at room temperature for ten minutes before serving. Avoid freezing this recipe, as the freezing and thawing process destroys the delicate protein structure, resulting in a watery and unappealing texture.
While storing your Chocolate Gelatin properly is essential, you might also enjoy a Chocolate Strawberry Heart Cake for a festive occasion. This cake offers a stunning and delicious alternative for when you’re ready to impress your guests.
What to Serve With This Recipe

I love pairing this Chocolate Gelatin with fresh, seasonal elements. A handful of tart raspberries or sliced strawberries provides a bright contrast to the deep cocoa. For a more indulgent experience, add a dollop of homemade whipped cream or a drizzle of coconut yogurt.
If you appreciate a savory edge, sprinkle a few flakes of Maldon sea salt on top just before serving. This simple addition makes the Chocolate Gelatin feel sophisticated and gourmet. You might also serve it alongside a warm cup of herbal tea for a cozy evening ritual.
Frequently Asked Questions (FAQ)
Can I make this Chocolate Gelatin vegan?
Standard gelatin comes from animal sources, so it is not vegan. You can substitute it with agar-agar powder, which is derived from seaweed. However, agar-agar creates a firmer, more brittle texture than the creamy set of traditional Chocolate Gelatin. Use about one teaspoon of agar-agar powder for every two cups of liquid and ensure you boil it for one minute to activate it.
Why did my gelatin not set properly?
If your Chocolate Gelatin remains liquid, you likely overheated the mixture or did not bloom the powder long enough. Gelatin is a delicate protein that loses its thickening power if boiled vigorously. Additionally, ensure your gelatin is fresh, as old powder can lose its strength over time. Simply pour the mixture back into a pot, add a little more bloomed gelatin, and warm it gently again.
Is this Chocolate Gelatin healthy for kids?
Yes, this is an excellent snack for children. By making Chocolate Gelatin at home, you control the sugar content and avoid the artificial dyes and preservatives found in commercial puddings. The gelatin provides amino acids that support growing bones and digestive health. Most children love the familiar chocolate taste and the fun, jiggly texture of this wholesome dessert.
Chocolate Gelatin is a delightful dessert that combines the richness of cocoa with the lightness of gelatin, creating a silky texture that melts in your mouth. For a deeper understanding of its health benefits and various uses, check out this detailed overview on gelatin.
Final Thoughts
This Chocolate Gelatin recipe invites you to slow down and savor the simple joys of a homemade dessert. It nourishes your body while delighting your palate with deep cocoa notes. Share this treat with loved ones to create a moment of pure, authentic connection and mindful well-being today.
Nutrition Information (per serving)
| Calories | 120 kcal |
| Protein | 6g |
| Total Fat | 4g |
| Carbohydrates | 16g |
| Sugar | 12g |
Chocolate Gelatin
This Chocolate Gelatin recipe invites you to slow down and savor the simple joys of a homemade dessert. It nourishes your body while delighting your palate with deep cocoa notes. Share this treat with loved ones to create a moment of pure, authentic connection and mindful well-being today.
Ingredients
Method
- Pour half a cup of cold milk into a small bowl. Sprinkle the gelatin powder evenly over the surface. Let it sit for five minutes.
- Place the remaining milk, cocoa powder, maple syrup, and sea salt into a saucepan over medium-low heat. Whisk constantly as it warms.
- Once the cocoa mixture is steaming and smooth, add the bloomed gelatin mixture to the saucepan. Continue whisking for two to three minutes until the gelatin dissolves completely.
- Remove the saucepan from heat and stir in the pure vanilla extract.
- Pour the liquid through a fine-mesh sieve into a clean pitcher and then into prepared ramekins or glass molds.
- Place in the refrigerator to set for at least four hours before serving.
Notes
Store in the refrigerator covered to prevent drying. This dessert stays fresh for up to five days. Do not reheat. Allow it to sit at room temperature for ten minutes before serving for a less-chilled sensation.