The Best Fluffy Pancakes recipe you will fall in love with. Full of tips and tricks to help you make the best pancakes.
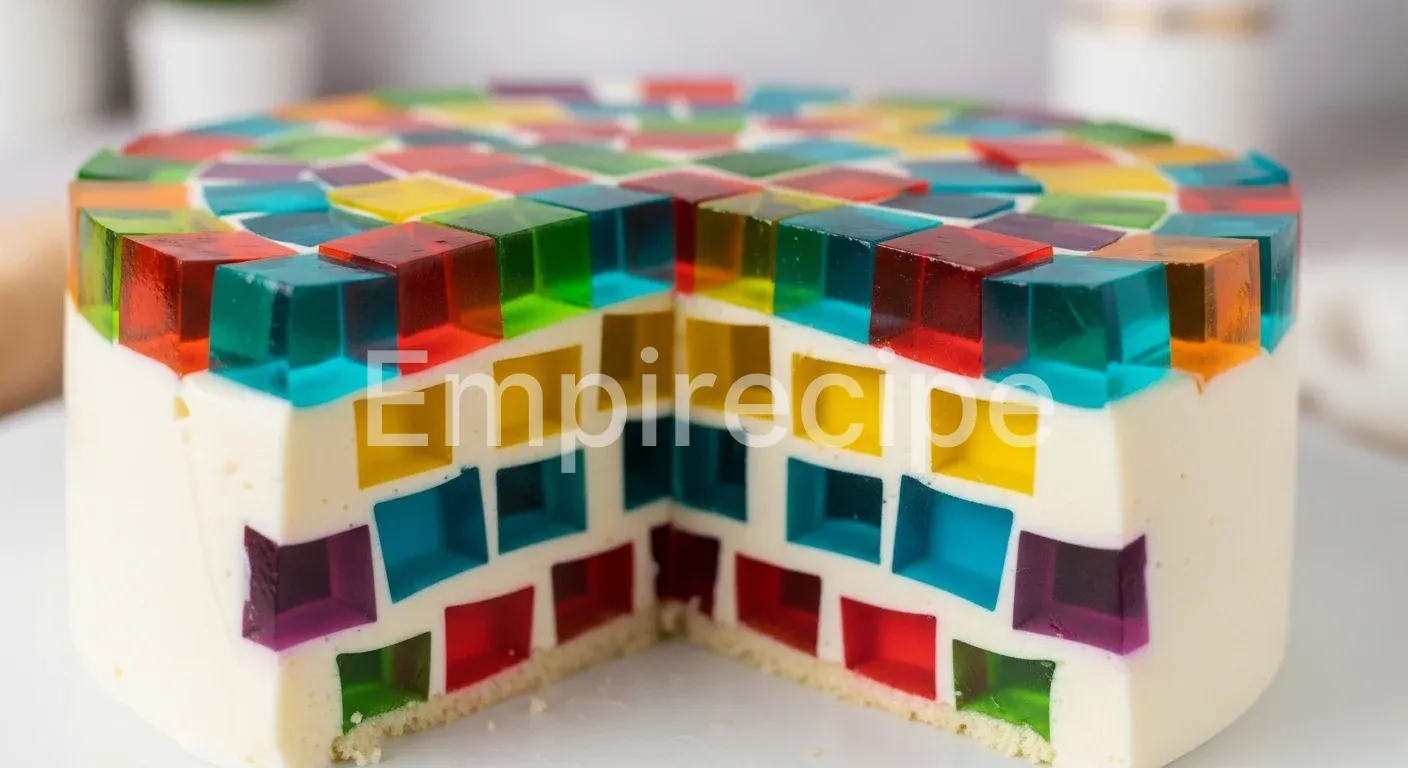
The Stained Glass Gelatin Cake offers a technical fusion of creamy textures and vibrant colors. This dessert relies on structural precision and cooling ratios to create a stunning mosaic effect. You will master the art of the perfect bloom and the clean unmold for a professional, bold finish.
Table of Contents
Why You’ll Love This Stained Glass Gelatin Cake
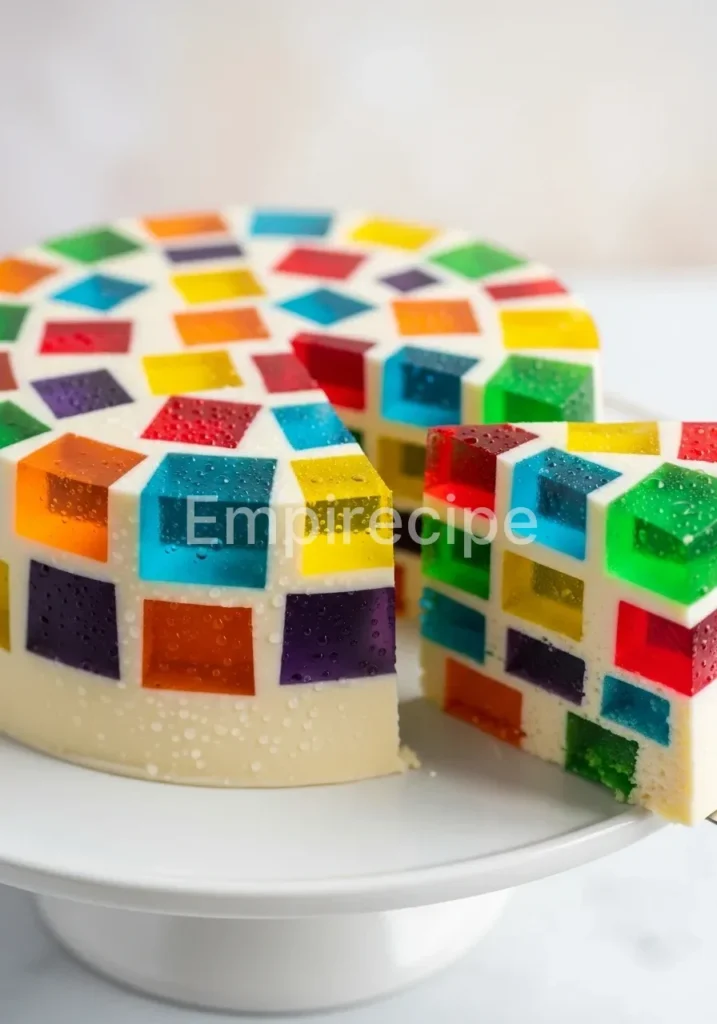
- Visual Impact: The translucent cubes create a mesmerizing 3D mosaic that rivals professional pastry shop displays.
- Texture Contrast: You get a firm, bouncy chew from the colored cubes paired with a silky, melt-in-your-mouth cream base.
- Technical Ease: This recipe utilizes modern setting techniques that require zero baking time or complex oven management.
Ingredients You’ll Need
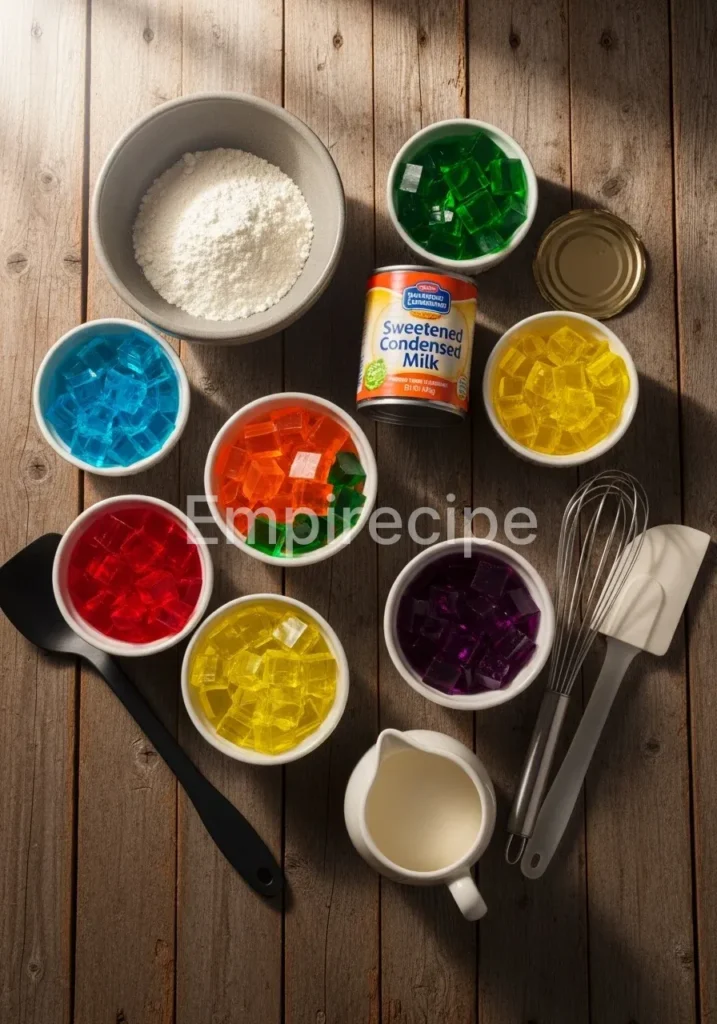
To achieve the architectural integrity required for a Stained Glass Gelatin Cake, you must select high-quality gelatin and concentrated flavorings. Lower-tier ingredients often lack the bloom strength necessary for a clean slice.
- Colored Gelatin Powder: 4 packages (85g each) in contrasting colors like cherry, lime, blue raspberry, and orange.
- Unflavored Gelatin: 4 envelopes (approx. 28g total) to provide the structural foundation for the white cream base.
- Sweetened Condensed Milk: 1 can (400g) for the opaque, creamy backdrop that makes the colors pop.
- Boiling Water: Precise volume for dissolving the crystals without thinning the viscosity too much.
- Cold Water: Required for the blooming phase to ensure even hydration of the protein granules.
- Neutral Oil: A light coating of vegetable or grapeseed oil for the mold to facilitate a flawless release.
Substitutions & Variations
[ra_display_video url=”https://www.youtube.com/watch?v=lk2j3xPYjTU”]
Swap dairy for coconut milk for a tropical flair. Use agar-agar for a plant-based structure. Replace sugars with monk fruit for a lighter version of the Stained Glass Gelatin Cake without losing the aesthetic.
For an exciting twist on the traditional, consider how you can enhance your Stained Glass Gelatin Cake by exploring plant-based options like using coconut milk. Discover more about this tropical flair in our guide on Stained Glass Gelatin.
Equipment You’ll Need
As a pragmatic cook, I insist on using the right tools for the job. Precision is your best friend when dealing with hydrocolloids. For this Stained Glass Gelatin Cake, you need equipment that manages heat and volume effectively.
- 9×13 Inch Rectangular Pans: You need at least four shallow containers to set the individual color layers. Glass or metal works best for heat conduction.
- Bundt Mold or Silicone Ring Mold: A 10-12 cup capacity mold provides the iconic shape. Silicone is superior for beginners due to its flexibility during the unmolding process.
- Digital Instant-Read Thermometer: Critical for ensuring the white mixture is cool enough not to melt the colored cubes upon contact.
- Sharp Chef’s Knife: Necessary for dicing the set gelatin into sharp, clean geometric cubes.
- Large Mixing Bowls: Use borosilicate glass or stainless steel to maintain temperature stability during the mixing process.
- Fine Mesh Sieve: Optional, but recommended to strain the white base for an ultra-smooth, bubble-free appearance.
- Offset Spatula: Helps in loosening the edges and lifting the cubes without tearing the delicate protein structure.
Step-by-Step Instructions
Follow these technical steps to ensure your Stained Glass Gelatin Cake retains its structural definition and vibrant clarity.
- Prepare the Color Cubes: Dissolve each flavored gelatin package individually in 1 cup of boiling water. Do not follow the box instructions for “cold water” addition; we need a firmer set. Pour each color into separate shallow pans. Refrigerate for at least 4 hours until the texture is rigid.
- The Dicing Phase: Once firm, use a sharp knife to cut the colored gelatin into 1/2-inch to 1-inch cubes. Precision here creates the “stained glass” effect. Keep these cubes refrigerated until the exact moment of assembly to prevent surface sweating.
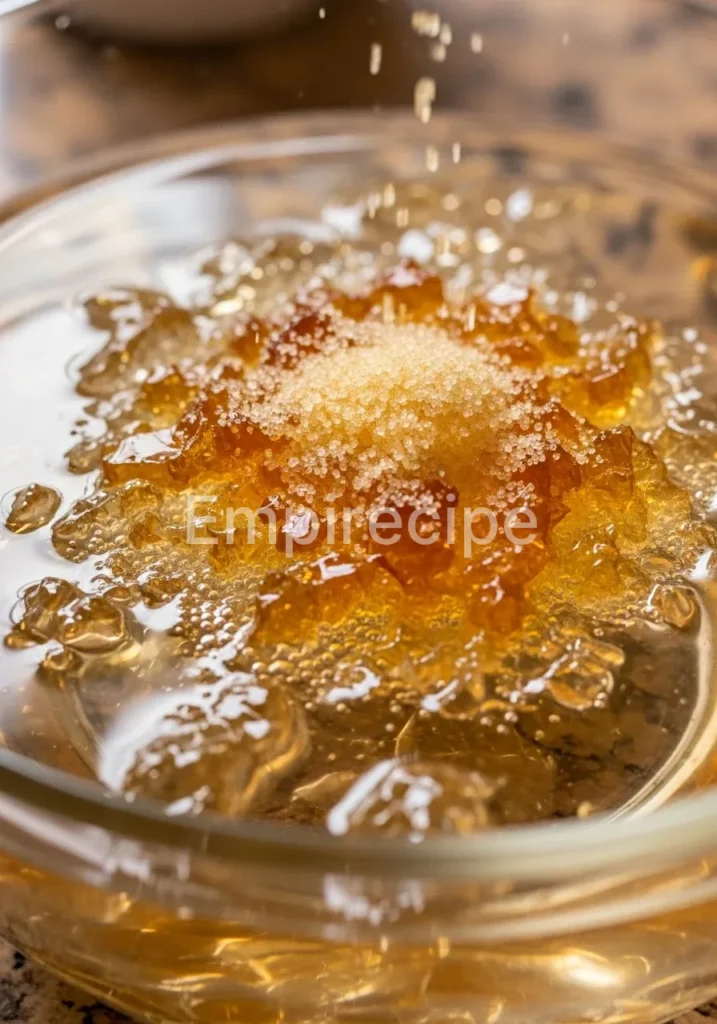
- Bloom the Unflavored Gelatin: In a medium bowl, sprinkle the 4 envelopes of unflavored gelatin over 1/2 cup of cold water. Let it sit for 5 to 10 minutes. This hydration process, known as blooming, is essential for a smooth, lump-free Stained Glass Gelatin Cake.
- Dissolve and Combine: Add 1.5 cups of boiling water to the bloomed gelatin. Stir vigorously until every granule dissolves. Pour in the sweetened condensed milk and whisk until the mixture is homogenous and ivory-white.
- Temperature Control: This is the most critical step. Let the milk mixture cool until it reaches room temperature (approximately 75°F or 24°C). If it is too hot, it will melt your colored cubes, creating a muddy mess instead of a Stained Glass Gelatin Cake.
- Assemble the Mosaic: Lightly oil your main mold. Place the mixed colored cubes into the mold, distributing the colors randomly for maximum visual impact. Pour the cooled milk mixture over the cubes until they are completely submerged.
- Final Set: Place the mold in the coldest part of your refrigerator. Allow the Stained Glass Gelatin Cake to set for a minimum of 8 hours, though 12-24 hours is ideal for the proteins to fully cross-link and stabilize.
- The Unmolding: Briefly dip the bottom of the mold in warm water for 5-10 seconds to break the vacuum seal. Place a serving plate over the mold and invert it quickly. Gravity should release the cake onto the plate.
Ensure your Stained Glass Gelatin Cake maintains its stunning appearance by carefully prepping your gelatin cubes. You can find additional steps and tips for achieving perfect structural definition in our detailed recipe for Potato Salad Gelatin.
Pro Tips for Success
Technical mastery separates a home cook from a culinary expert. To achieve the perfect Stained Glass Gelatin Cake, you must respect the science of the ingredients. First, always bloom your gelatin in cold liquid.
This allows the protein granules to swell individually, preventing “clumps” that ruin the mouthfeel. If you skip this, your base will be grainy.
Second, manage your surface tension. If you see bubbles forming on top of your white milk mixture after whisking, skim them off with a spoon or a paper towel. Bubbles on the surface will translate into unsightly pits on the bottom of your Stained Glass Gelatin Cake once it is inverted. For a glass-like finish, pour the liquid slowly down the side of the mold rather than directly over the cubes.
Third, consider the “Bloom Strength.” Most grocery store gelatins have a specific bloom rating. If you want a more “rubbery” and durable cake that stands up to heat at a party, slightly increase the ratio of unflavored gelatin. However, be careful; too much will make the dessert feel like plastic. Balance is everything in a Stained Glass Gelatin Cake.
Finally, use a neutral oil like grapeseed. Avoid olive oil or butter, as they can solidify in the fridge and leave a cloudy, flavored film on the surface of your beautiful mosaic. A tiny drop on a paper towel rubbed inside the mold is all you need for a clean release.
Storage & Reheating Tips
The Stained Glass Gelatin Cake is a cold-prep dessert and must remain refrigerated until the moment of service. Gelatin starts to lose its structural integrity at temperatures above 75°F. Store the cake in an airtight container to prevent it from absorbing refrigerator odors. Do not freeze this dessert; freezing destroys the cellular structure of the gelatin, resulting in a weeping, spongy mess upon thawing.
If you have leftovers, they will stay fresh for up to 5 days. You might notice a small amount of liquid at the bottom of the plate over time; this is syneresis, a natural process where the gelatin network tightens and expels moisture. Simply pat it dry with a paper towel before serving again.
When storing your Stained Glass Gelatin Cake, remember that temperature management is crucial for preserving its integrity and flavor. If you’re intrigued by other colorful gelatin desserts, check out our recipe for a delicious Colorful Gelatin Cheesecake.
What to Serve With This Recipe
Because the Stained Glass Gelatin Cake is sweet and creamy, you should pair it with items that offer acidity or a crisp texture. A fresh fruit salad featuring acidic fruits like kiwi or pineapple (fresh pineapple contains bromelain which prevents gelatin from setting, but serving it on the side is perfectly fine) cuts through the richness of the condensed milk.
You can also serve it alongside a light, toasted almond biscotti for a crunch that contrasts the jiggly texture. For a more sophisticated presentation, a dollop of unsweetened whipped cream or a sprig of fresh mint adds a modern touch to the retro Stained Glass Gelatin Cake. If serving at a brunch, pair it with roasted nuts to balance the sugar profile with earthy, salty notes.
Frequently Asked Questions (FAQ)
Why did the colors bleed in my Stained Glass Gelatin Cake?
Colors bleed when the white milk mixture is poured while still too hot. The heat melts the outer layer of the colored cubes, causing the dyes to leach into the white base. Always use a thermometer to ensure the liquid is at room temperature before assembly.
Can I use fresh fruit inside the Stained Glass Gelatin Cake?
Be cautious. Fresh pineapple, kiwi, papaya, and ginger contain enzymes that break down gelatin proteins. If you use these, you must used canned versions (which are heat-treated) or the Stained Glass Gelatin Cake will never set and will remain a liquid mess.
How do I get the cake out of the mold without it breaking?
The secret is a combination of a light oil coating and the “warm water dip.” Dip the mold into warm water for no more than 10 seconds. You can also use a thin knife to gently pull the edge of the gelatin away from the mold to let air in, breaking the vacuum seal that holds it in place.
Stained Glass Gelatin Cake is a visually impressive dessert characterized by its mosaic-like appearance created from colorful gelatin cubes embedded in a creamy base. This stunning cake not only captivates the eye but also delights the palate with its contrasting textures, making it a popular choice for celebrations and special events; learn more about its unique preparation methods through this gelatin resource.
Final Thoughts
The Stained Glass Gelatin Cake represents the perfect intersection of culinary geometry and nostalgic sweetness. Mastering this technical challenge proves that simplicity, when executed with precision, creates the most impactful results. Share this mosaic masterpiece and enjoy every creamy, colorful bite.
Nutrition Information (per serving)
This nutritional profile is based on a standard 12-serving yield for the Stained Glass Gelatin Cake. It is a high-protein, moderate-sugar dessert suitable for occasional treats.
| Metric | Value |
| Calories | 185 kcal |
| Total Fat | 4g |
| Saturated Fat | 2.5g |
| Cholesterol | 15mg |
| Sodium | 85mg |
| Total Carbohydrates | 32g |
| Sugars | 28g |
| Protein | 6g |
Stained Glass Gelatin Cake
The Stained Glass Gelatin Cake offers a technical fusion of creamy textures and vibrant colors, creating a stunning mosaic effect with a firm, bouncy chew from colored cubes paired with a silky cream base.
Ingredients
Method
- Dissolve each flavored gelatin package in 1 cup of boiling water and pour into separate shallow pans. Refrigerate until firm.
- Dice the set colored gelatin into cubes and keep refrigerated.
- Sprinkle unflavored gelatin over 1/2 cup of cold water and let it bloom for 5-10 minutes.
- Add 1.5 cups of boiling water to the bloomed gelatin, stir until dissolved, and mix in the sweetened condensed milk.
- Cool the milk mixture to room temperature before assembly.
- Oil the mold lightly and arrange the colored cubes in it. Pour the cooled milk mixture over the cubes.
- Refrigerate for at least 8 hours before unmolding.
Notes
Ensure all ingredients are high quality for the best bloom strength. Use a thermometer to check the milk mixture temperature. Do not freeze the cake.