The Best Fluffy Pancakes recipe you will fall in love with. Full of tips and tricks to help you make the best pancakes.
Cherry peppers, those vibrant, often overlooked gems, offer a delightful burst of sweet heat and a satisfying crunch that elevates any dish. Their distinctive piquant flavor profile and crisp texture make them an indispensable ingredient for the adventurous home cook. This isn’t just about pickling; it’s about harnessing their full potential.
Dive into this essential resource, “Cherry Peppers Guide,” to unlock a world of culinary innovation. Discover how these versatile peppers can transform your kitchen.
Table of Contents
Why You’ll Love This Cherry Pepper Guide
- Bold, Complex Flavor: Experience the perfect balance of piquant, sweet, and a satisfying kick.
- Culinary Versatility: These peppers elevate everything from simple salads to gourmet main courses, proving an invaluable addition to any pantry.
- Nutrient-Dense Powerhouse: Packed with essential vitamins and antioxidants, they offer a healthy boost to your meals.
- Achieve Gourmet Results: Follow our clear instructions to create a sophisticated condiment with minimal effort.
Ingredients You’ll Need
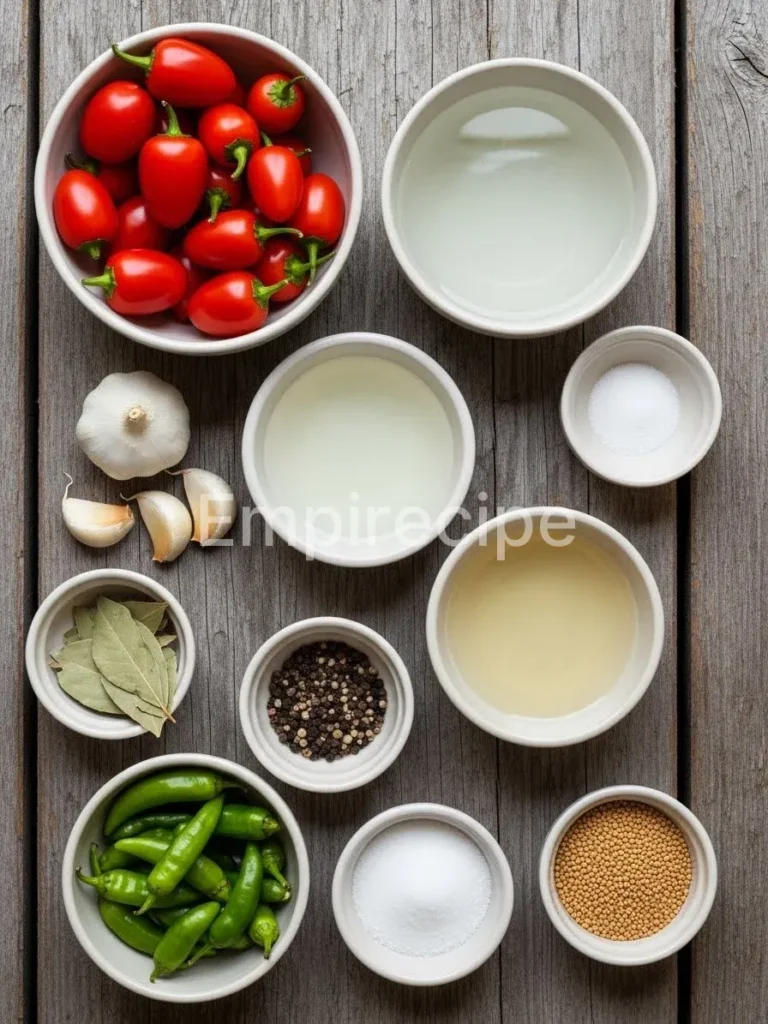
Quality ingredients form the foundation of any exceptional dish, especially when dealing with the nuanced flavors of cherry peppers. Selecting fresh, firm peppers and high-grade vinegar ensures a superior end product for this “Cherry Peppers Guide”.
- Fresh Cherry Peppers: Approximately 2 pounds, firm and unblemished. Select a mix of red and yellow for visual appeal and varied sweetness.
- White Vinegar: 4 cups. Choose a good quality 5% acidity distilled white vinegar for a clean, sharp brine.
- Water: 2 cups. Filtered water ensures a pure taste profile for your brine.
- Granulated Sugar: ½ cup. Balances the vinegar’s acidity, highlighting the peppers’ natural sweetness.
- Kosher Salt: 2 tablespoons. Avoid iodized salt, which can cloud the brine.
- Garlic Cloves: 6-8, peeled and lightly smashed. Infuses a foundational aromatic depth.
- Bay Leaves: 4. Adds a subtle, herbaceous note to the pickling liquid.
- Black Peppercorns: 2 teaspoons. Provides a gentle, spicy undertone.
- Mustard Seeds: 1 teaspoon. Offers a piquant, earthy complexity.
Substitutions & Variations
[ra_display_video url=”https://www.youtube.com/watch?v=fIKd5u_wkjA”]
Embrace innovation. For a milder pickling liquid, use apple cider vinegar, enhancing gut health and flavor. Deepen the profile with smoked paprika or bay leaf.
Reduce sugar by half; the peppers’ natural sweetness is often enough. These healthy swaps personalize “Cherry Peppers Guide” while maintaining integrity.
Elevate your culinary creations by exploring innovative cooking techniques that complement the unique flavor of cherry peppers. For more smoky and delicious meals, check out these 30 Must-Try Traeger Recipes for Smoky, Delicious Meals.
Equipment You’ll Need
Having the right tools simplifies the process and ensures food safety, particularly when venturing into preserving these fantastic cherry peppers. This “Cherry Peppers Guide” relies on standard kitchen equipment for optimal results.
- Large Non-Reactive Pot: Essential for preparing the pickling brine without metallic interaction.
- Sterilized Canning Jars: Pint or half-pint sizes are ideal, with new lids and bands. Sterilization is paramount for safety.
- Canning Funnel: Facilitates cleanly pouring brine into jars.
- Ladle: For transferring hot brine.
- Tongs: Useful for handling hot jars and peppers.
- Cutting Board and Sharp Knife: For precise pepper preparation.
- Measuring Cups and Spoons: Accurate brine ratios are critical for flavor and preservation.
- Bubble Remover Tool or Thin Spatula: Helps remove air pockets from jars.
Step-by-Step Instructions

Mastering this technique allows you to preserve the vibrant flavor of cherry peppers. Precision at each stage ensures both safety and incredible taste, a core tenet of “Cherry Peppers Guide.”
- Prepare the Cherry Peppers: Thoroughly wash all cherry peppers. Trim the stems, but do not remove the core unless you desire less heat. You can leave them whole or slice them in half for easier packing and quicker pickling. Puncturing whole peppers with a small slit helps the brine penetrate.
- Sterilize Jars and Lids: Wash jars, lids, and bands in hot, soapy water. Rinse thoroughly. To sterilize, submerge jars in boiling water for at least 10 minutes. Keep them hot until ready to fill. Set new lids in simmering (not boiling) water to soften the sealing compound. This step is critical for safe preservation of your cherry peppers.
- Prepare the Brine: In your large non-reactive pot, combine white vinegar, water, granulated sugar, and kosher salt. Add the smashed garlic cloves, bay leaves, black peppercorns, and mustard seeds. Bring the mixture to a rolling boil over high heat, stirring occasionally to dissolve the sugar and salt completely. Once boiling, reduce heat to a simmer and let it infuse for 5-7 minutes. This allows the spices to release their aromatic compounds, enhancing the “Cherry Peppers Guide” flavor profile.
- Pack the Jars: Carefully remove the hot, sterilized jars from the water. Place 1-2 smashed garlic cloves and a bay leaf at the bottom of each jar. Tightly pack the prepared cherry peppers into the hot jars, leaving about ½ inch of headspace from the rim. Ensure a snug fit without crushing the peppers.
- Pour the Brine: Using a canning funnel and ladle, carefully pour the hot brine over the packed cherry peppers. Ensure the peppers are fully submerged, still maintaining ½ inch headspace. Tap the jars gently on the counter to release any trapped air bubbles. Use a bubble remover tool or a thin, non-metallic spatula to work around the edges, releasing any stubborn air.
- Seal and Process (Optional, for shelf stability): Wipe the jar rims clean with a damp cloth. Center the softened lids on the jars and apply the bands, tightening them to fingertip-tight. For shelf-stable preservation of these magnificent cherry peppers, process jars in a boiling water bath for 10 minutes (adjusting for altitude). Alternatively, simply cool and refrigerate for immediate use and shorter-term storage.
- Cool and Rest: Carefully remove the processed jars from the water bath and place them on a towel-lined counter to cool completely, undisturbed, for 12-24 hours. You will hear the satisfying “pop” as the lids seal. Once cool, check seals. Any unsealed jars must be refrigerated. Allow the pickled cherry peppers to rest for at least 2-3 weeks before opening for optimal flavor development. This patience delivers the ultimate experience promised by “Cherry Peppers Guide.”
Mastering proper preservation techniques ensures that the vibrant flavor of cherry peppers shines through in your dishes. For a delightful pairing, consider trying out this Spinach Soup recipe that beautifully incorporates fresh ingredients.
Pro Tips for Success
Achieving culinary excellence with cherry peppers demands precision and a keen eye for detail. As a proponent of modern cooking, I emphasize these technical points for a flawless product that exemplifies this “Cherry Peppers Guide.”
- Ingredient Purity: Always use fresh, unblemished cherry peppers. Any soft spots compromise texture and shelf life. For the brine, filtered water avoids mineral interference, ensuring a pristine flavor.
- Sterilization Protocol: Absolutely non-negotiable for safe preservation. Use properly sanitized jars and lids. Any compromise risks spoilage.
- Brine Temperature Consistency: Pouring hot brine over hot-packed peppers helps create a strong vacuum seal, crucial for shelf stability. Maintain the brine at a simmer until ready to use.
- Headspace Accuracy: Maintaining ½ inch of headspace prevents lids from buckling during processing and ensures a proper seal. Too little, and brine can siphon out; too much, and the seal might fail.
- Aromatics Infusion: Don’t rush the brine infusion. Simmering the spices for the recommended time allows their essential oils to fully integrate, building complex flavor layers in your pickled cherry peppers.
- Patience for Flavor Development: While tempting, resist opening the jars immediately. A minimum of two weeks allows the brine to fully penetrate and mature the flavors of the cherry peppers. The longer they sit, the better they become.
- Experiment with Acidity: For a bolder profile, adjust the vinegar-to-water ratio slightly in favor of vinegar, but always ensure sufficient acidity for safe canning practices.
Storage & Reheating Tips
Proper storage maximizes the longevity and maintains the crisp texture of your pickled cherry peppers. This guide to “Cherry Peppers Guide” prioritizes both flavor and safety.
For properly processed and sealed jars, store them in a cool, dark place for up to one year. Once opened, or for jars that were not water bath processed, refrigerate immediately. They will maintain their quality for several weeks to a few months in the refrigerator. These cherry peppers are designed to be enjoyed cold or at room temperature; reheating is neither necessary nor recommended, as it can soften their delightful crunch.
To maintain the freshness and flavor of your pickled cherry peppers, it’s crucial to store them correctly. Learn how to enhance your meals with this nourishing Corned Beef Soup that pairs wonderfully with pickled peppers.
What to Serve With This Recipe
The versatility of these pickled cherry peppers is truly remarkable. Their bright, piquant flavor cuts through richness and adds a vibrant spark to countless dishes, making them an indispensable component of any modern pantry and a highlight of this “Cherry Peppers Guide.”
- Charcuterie Boards: Offer a vibrant burst of flavor and color alongside cured meats, cheeses, and olives.
- Sandwiches and Wraps: Add a delightful crunch and piquant kick to elevate any deli classic or homemade creation.
- Salads: Chop them finely and toss into green salads, grain bowls, or pasta salads for a zesty upgrade.
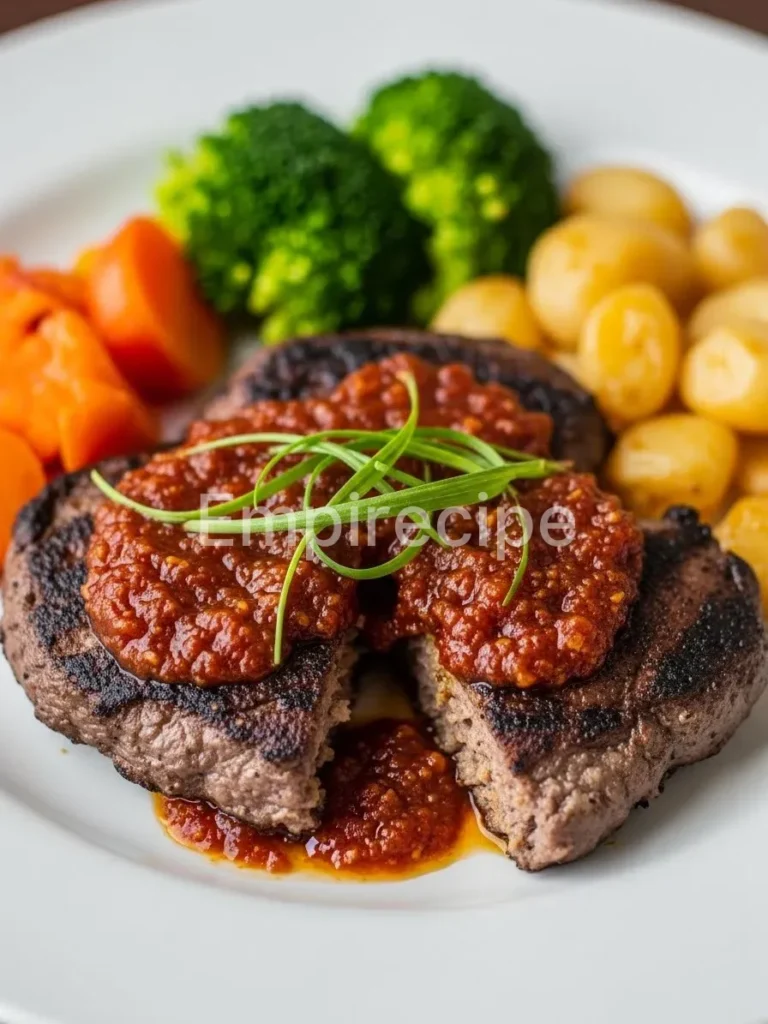
- Roasted Vegetables: Serve alongside roasted broccoli, asparagus, or Brussels sprouts to brighten their earthy notes.
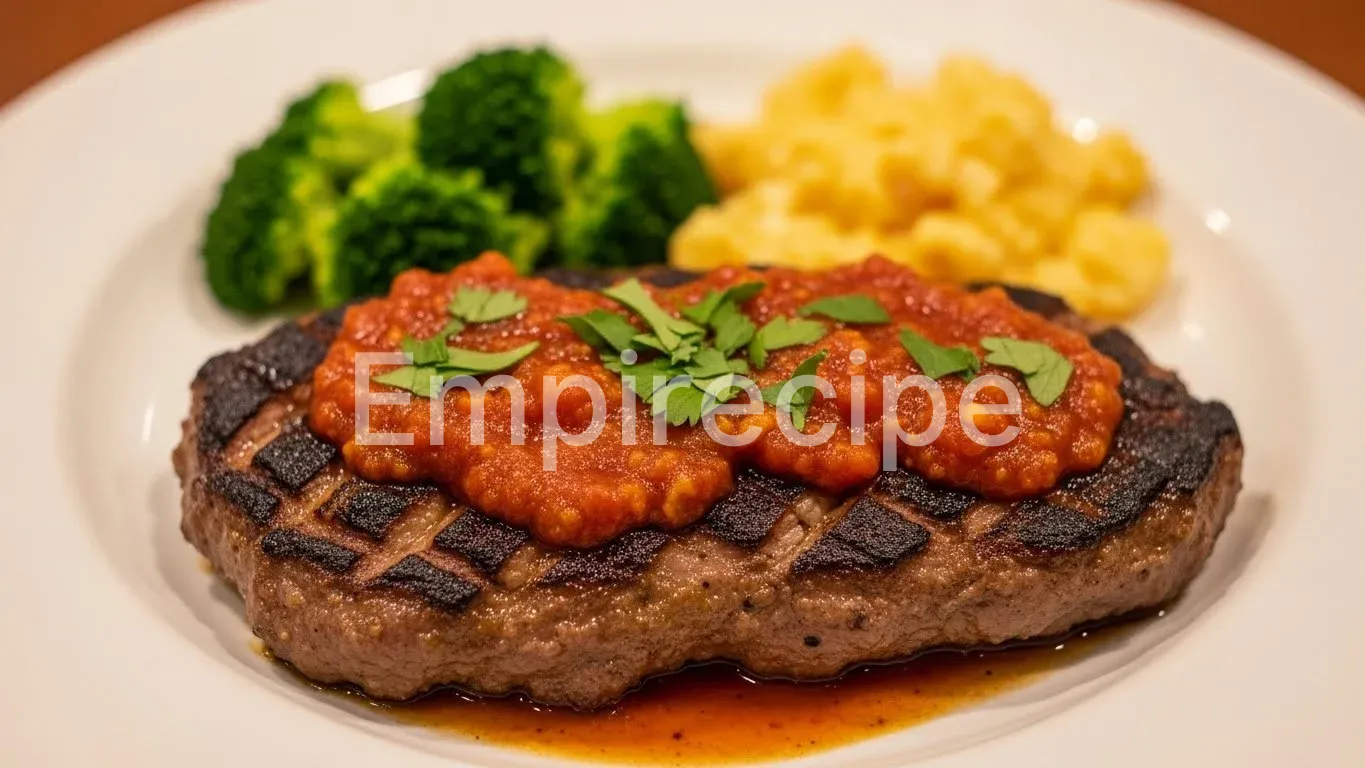
- Grilled Meats and Fish: Their acidity perfectly complements rich grilled steaks, pork chops, or flaky white fish.
- Eggs: Finely dice and stir into scrambled eggs, omelets, or frittatas for an unexpected flavor dimension.
- Pasta Sauces: Add a chopped handful to your favorite tomato-based pasta sauce for an extra layer of complexity and heat.
- Tacos and Burritos: Provide a fresh, tangy counterpoint to savory fillings.
- Pizza Topping: Sprinkle over freshly baked pizza for a tangy, spicy kick.
Frequently Asked Questions (FAQ)
Are cherry peppers typically very hot?
Cherry peppers generally offer a mild to moderate heat level, typically ranging from 2,500 to 5,000 Scoville Heat Units (SHU). This places them in a similar range to jalapeños, but often on the milder side, making them approachable for most palates. The heat can vary slightly depending on the specific variety and growing conditions. This balance of heat and sweetness makes them excellent for a “Cherry Peppers Guide”
Can I use other types of peppers for this recipe?
Absolutely, you can adapt this recipe for other peppers, but anticipate a different flavor profile. Banana peppers or Hungarian wax peppers offer a similar size and crunch but are generally milder. For more heat, consider serrano peppers, though you might adjust the quantity. Each pepper brings its unique characteristics, so experimentation allows you to personalize this “Cherry Peppers Guide”
How long do pickled cherry peppers last?
Properly water bath canned and sealed pickled cherry peppers can last for up to one year when stored in a cool, dark pantry. Once opened, or if you opt for refrigeration without canning, they will maintain their quality in the refrigerator for several weeks to a few months. Always ensure lids remain sealed and the brine fully covers the peppers for optimal freshness, as detailed in this “Cherry Peppers Guide.”
Cherry peppers are vibrant additions to various culinary dishes, known for their sweet yet spicy flavor. Discover more about their nutritional benefits and uses in the kitchen by visiting this article on cherry peppers.
Final Thoughts
Embrace the bold, vibrant spirit of cherry peppers in your culinary endeavors. This guide empowers you to transform humble ingredients into extraordinary flavors. From piquant accents to foundational elements, these peppers elevate every plate. This is more than a recipe; it’s an invitation to explore, innovate, and master “Cherry Peppers Guide.”
Nutrition Information (per serving)
The nutritional profile of pickled cherry peppers offers a healthy addition to your diet, rich in vitamins and low in calories. This data is an approximation, as ingredient variations can occur.
| Nutrient | Amount |
|---|---|
| Calories | 15-25 |
| Total Fat | 0g |
| Sodium | 150-200mg |
| Total Carbohydrates | 4-6g |
| Dietary Fiber | 1g |
| Sugars | 3-5g |
| Protein | 0-1g |
| Vitamin C | Significant %DV |
Cherry Peppers: A Comprehensive Guide to Taste, Benefits, and Recipes
This guide offers comprehensive instructions for pickling cherry peppers, showcasing their vibrant flavors and health benefits. By following this recipe, you’ll create a versatile condiment to elevate various dishes.
Ingredients
Method
- Prepare the Cherry Peppers: Clean and trim the cherry peppers.
- Sterilize Jars and Lids: Wash and sterilize jars in boiling water.
- Prepare the Brine: Combine vinegar, water, sugar, and salt in a pot, boil, and then simmer with spices for 5-7 minutes.
- Pack the Jars: Fill jars with garlic and bay leaves, then tightly pack cherry peppers.
- Pour the Brine: Fill jars with hot brine, ensuring peppers are submerged.
- Seal and Process: Wipe rims, apply lids, and process in a boiling water bath for 10 minutes.
- Cool and Rest: Let jars cool, check seals, and allow to rest for 2-3 weeks to develop flavor.
Notes
Use firm and unblemished cherry peppers for the best quality. Store in a cool, dark place for up to one year. Enjoy them as a condiment on various dishes.