The Best Fluffy Pancakes recipe you will fall in love with. Full of tips and tricks to help you make the best pancakes.


Table of Contents
What Is Self-Rising Flour?
Self rising flour is like the secret ingredient your grandma always swore by, and it’s every baker’s lifesaver. But what exactly is it? Simply put, self rising flour is a pre-mixed combination of all-purpose flour, baking powder, and a pinch of salt. This trio works together like a dream team to give your baked goods that perfect rise without the need for extra leavening agents. It’s perfect for biscuits, pancakes, and so much more.
Benefits of Using Self-Rising Flour
Convenience for Quick Baking
Time is precious, and self-rising flour saves you a ton of it. With everything pre-mixed, there’s no need to measure out baking powder or salt. Just scoop, mix, and bake!
Ideal for No-Yeast Recipes
If you’re not a fan of waiting hours for dough to rise, self-rising flour has your back. It’s the go-to for recipes that don’t require yeast, like quick breads and scones.
Versatility in Sweet and Savory Dishes
Self-rising flour is a chameleon in the kitchen. From fluffy pancakes to savory dumplings, it adapts to any recipe with ease. Thinking of trying new pancake ideas? Here’s a fun twist on breakfast favorites.
Common Problems When Using Self-Rising Flour
Over-Rising: Why It Happens and How to Fix It
Ever baked something that looked like a cloud but collapsed moments later? Over-rising is often caused by too much leavening. To avoid this, stick to recipes designed for self-rising flour. Need help fixing baking mishaps? This troubleshooting guide might help.
Adjusting Salt and Leavening for Recipes
Not every recipe is written with self-rising flour in mind. If you’re substituting it, reduce or eliminate added salt and baking powder to avoid overpowering flavors.
Substituting Self-Rising Flour in Recipes
No self-rising flour at home? No problem! Make your own by mixing 1 cup of all-purpose flour with 1 1/2 teaspoons of baking powder and 1/4 teaspoon of salt. For more substitution tips, this article offers handy tricks.
Essential Tips for Baking with Self-Rising Flour
Best Storage Practices
Keep your self-rising flour fresh by storing it in an airtight container in a cool, dry place. This prevents clumping and ensures the leavening agents remain active.
Combining with Other Flours
Experimentation is key in baking! Self-rising flour can be blended with whole wheat or almond flour to create unique flavors and textures. Here’s a guide to creative flour mixes you might love.
Measuring Self-Rising Flour Accurately
Accuracy matters! Always level off your measuring cup with a knife to ensure you’re not adding too much or too little flour.
Recipe #1: Classic Self-Rising Flour Biscuits

Nothing says comfort food like warm, flaky biscuits. This recipe is so simple you’ll be making it on repeat.
Ingredients:
Ingredient Quantity Self-rising flour 2 cups Unsalted butter 1/2 cup (cold) Milk 2/3 cup
Instructions:
- Preheat your oven to 450°F (232°C).
- In a large bowl, cut the cold butter into the flour until the mixture resembles coarse crumbs.
- Stir in the milk just until the dough comes together. Avoid overmixing!
- Roll out the dough on a floured surface to about 1/2-inch thickness. Cut into rounds using a biscuit cutter.
- Place the biscuits on a baking sheet and bake for 10–12 minutes or until golden brown.
Pair these biscuits with your favorite gravy or jam for a hearty breakfast.
Recipe #2: Fluffy Pancakes Using Self-Rising Flour
Pancakes are the ultimate crowd-pleaser, and self-rising flour makes them incredibly fluffy with minimal effort.
Nutrition Facts (Per Serving):
Nutrient Amount Calories 150 Protein 4g Carbohydrates 22g Fat 5g
Instructions:
- Combine 1 cup of self-rising flour, 1 tablespoon of sugar, and 1 cup of milk in a bowl. Mix until smooth.
- Heat a lightly oiled griddle or frying pan over medium-high heat.
- Pour 1/4 cup of the batter onto the griddle for each pancake.
- Cook until bubbles form on the surface, then flip and cook the other side until golden brown.
Top with syrup, fresh fruit, or even chocolate chips for a fun twist!
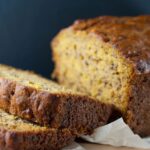
Recipe #3: Self-Rising Flour Banana Bread

When life gives you overripe bananas, turn them into banana bread! Using self-rising flour makes this recipe practically foolproof.
Ingredients:
Ingredient Quantity Self-rising flour 2 cups Ripe bananas 3 large, mashed Granulated sugar 3/4 cup Eggs 2 large Vegetable oil 1/2 cup Vanilla extract 1 teaspoon
Instructions:
- Preheat your oven to 350°F (175°C) and grease a 9×5-inch loaf pan.
- In a large bowl, whisk together the mashed bananas, sugar, eggs, oil, and vanilla extract until smooth.
- Add the self-rising flour to the wet ingredients and gently fold until just combined. Avoid overmixing.
- Pour the batter into the prepared loaf pan and smooth the top.
- Bake for 50–60 minutes or until a toothpick inserted into the center comes out clean.
- Allow the bread to cool in the pan for 10 minutes before transferring it to a wire rack to cool completely.
This banana bread is perfect for breakfast or as an afternoon snack with a cup of tea. For more sweet treat ideas, check out these easy donut recipes.
Recipe #4: Self-Rising Flour Muffins
Muffins are the ultimate grab-and-go breakfast or snack. With self-rising flour, they come out light, fluffy, and perfect every time.
Basic Muffin Recipe:
- Self-rising flour: 2 cups
- Sugar: 1/2 cup
- Milk: 1 cup
- Egg: 1 large
- Vegetable oil: 1/4 cup
- Vanilla extract: 1 teaspoon
Instructions:
- Preheat your oven to 375°F (190°C) and line a muffin tin with paper liners.
- In a large bowl, combine the self-rising flour and sugar.
- In a separate bowl, whisk together the milk, egg, oil, and vanilla extract.
- Pour the wet ingredients into the dry ingredients and stir until just combined. Do not overmix.
- Spoon the batter into the prepared muffin tin, filling each cup about 2/3 full.
- Bake for 18–20 minutes or until a toothpick inserted into the center comes out clean.
For variations, add blueberries, chocolate chips, or chopped nuts to the batter. Need more muffin inspiration? Check out this raisin muffin recipe.
Recipe #5: Self-Rising Flour Pizza Dough

Craving pizza but short on time? This quick and easy self-rising flour pizza dough recipe is your answer.
Ingredients:
Ingredient Quantity Self-rising flour 2 cups Greek yogurt 1 cup
Instructions:
- Preheat your oven to 425°F (220°C).
- In a large bowl, mix the self-rising flour and Greek yogurt until a dough forms.
- Turn the dough onto a floured surface and knead for 2–3 minutes until smooth.
- Roll out the dough to your desired thickness and place it on a pizza pan or baking sheet.
- Add your favorite pizza sauce, cheese, and toppings.
- Bake for 15–20 minutes or until the crust is golden and the cheese is bubbly.
This recipe is great for a quick dinner or a weekend treat. Want more pizza ideas? Check out this supreme pizza guide.
Recipe #6: Self-Rising Flour Scones
Nothing feels as fancy as homemade scones. With self-rising flour, you can make these buttery, crumbly treats in no time!
Ingredients:
Ingredient Quantity Self-rising flour 2 cups Heavy cream 2/3 cup Granulated sugar 2 tablespoons Butter 1/4 cup (cold, diced) Optional: Raisins or chocolate chips 1/3 cup
Instructions:
- Preheat your oven to 400°F (200°C). Line a baking sheet with parchment paper.
- In a large bowl, combine the self-rising flour and sugar. Add the cold butter and use a pastry cutter or your fingers to work it into the flour until it resembles coarse crumbs.
- Gently stir in the heavy cream until the dough comes together. If you’re adding raisins or chocolate chips, fold them in now.
- Turn the dough onto a floured surface and pat it into a 1-inch-thick circle. Cut out scones using a round cutter or knife.
- Place the scones on the prepared baking sheet. Brush the tops with a bit of cream for a golden finish.
- Bake for 12–15 minutes, or until golden brown. Cool slightly before serving.
Scones pair perfectly with clotted cream and jam for a classic tea-time treat. For more baking inspiration, check out this authentic recipe guide.
Recipe #7: Self-Rising Flour Cupcakes
Whether it’s a party or just a treat-yourself day, cupcakes made with self-rising flour are always a hit. They’re quick, easy, and endlessly customizable.
Basic Cupcake Recipe:
- Self-rising flour: 1 1/2 cups
- Sugar: 3/4 cup
- Butter: 1/2 cup (softened)
- Eggs: 2 large
- Milk: 1/2 cup
- Vanilla extract: 1 teaspoon
Instructions:
- Preheat your oven to 350°F (175°C). Line a muffin tin with cupcake liners.
- Cream together the butter and sugar until light and fluffy. Add the eggs one at a time, mixing well after each addition.
- Mix in the vanilla extract, then alternate adding the self-rising flour and milk, starting and ending with the flour. Mix until just combined.
- Spoon the batter into the cupcake liners, filling them about 2/3 full.
- Bake for 18–20 minutes, or until a toothpick inserted into the center comes out clean.
- Cool completely before frosting with your favorite icing.
For decorating tips and creative ideas, visit this helpful guide.
Recipe #8: Self-Rising Flour Dumplings
Looking for something hearty and comforting? Dumplings made with self-rising flour are the perfect addition to soups and stews.
Ingredients:
- Self-rising flour: 1 cup
- Milk: 1/2 cup
- Butter: 2 tablespoons (melted)
- Salt: 1/4 teaspoon
Instructions:
- In a bowl, mix the self-rising flour and salt. Stir in the milk and melted butter until a dough forms.
- Drop spoonfuls of the dough onto simmering soup or stew. Cover the pot and let the dumplings cook for 10–12 minutes. Don’t peek—steam is crucial for fluffy dumplings!
- Once cooked, serve the dumplings hot with the soup or stew.
Need ideas for soups to pair with these dumplings? Check out this chicken stew recipe.
Recipe #9: Self-Rising Flour Cookies

Who doesn’t love cookies? With self-rising flour, you can whip up soft and chewy cookies in no time. Perfect for a quick snack or dessert!
Ingredients:
Ingredient Quantity Self-rising flour 2 cups Butter 1/2 cup (softened) Brown sugar 3/4 cup Granulated sugar 1/4 cup Egg 1 large Vanilla extract 1 teaspoon Optional: Chocolate chips, nuts 1 cup
Instructions:
- Preheat your oven to 350°F (175°C) and line a baking sheet with parchment paper.
- Cream the butter, brown sugar, and granulated sugar until light and fluffy. Add the egg and vanilla extract, mixing well.
- Gradually mix in the self-rising flour until a dough forms. Fold in your choice of chocolate chips or nuts.
- Drop spoonfuls of dough onto the prepared baking sheet, spacing them about 2 inches apart.
- Bake for 10–12 minutes, or until the edges are golden. Let cool on the baking sheet for a few minutes before transferring to a wire rack.
These cookies are a crowd-pleaser! For more cookie ideas, check out these unique recipes.
Recipe #10: Self-Rising Flour Bread Loaf
Need a quick bread recipe? This no-yeast bread loaf made with self-rising flour is soft, delicious, and ready in under an hour!
Ingredients:
Ingredient Quantity Self-rising flour 3 cups Sugar 1/4 cup Milk 1 1/2 cups Butter 3 tablespoons (melted) Optional: Herbs or cheese 1/2 cup
Instructions:
- Preheat your oven to 375°F (190°C) and grease a 9×5-inch loaf pan.
- In a large bowl, mix the self-rising flour and sugar. If you’re adding herbs or cheese, fold them in now.
- Add the milk and melted butter to the dry ingredients and stir until just combined. Do not overmix.
- Pour the batter into the prepared loaf pan and smooth the top.
- Bake for 35–40 minutes, or until a toothpick inserted into the center comes out clean.
- Let the bread cool in the pan for 10 minutes before transferring it to a wire rack to cool completely.
Slice and serve this bread with butter or alongside soups and stews. For more bread recipes, check out these creative bread ideas.
Frequently Asked Questions
How Do I Make All-Purpose Flour Into Self-Rising Flour?
It’s super simple! For every cup of all-purpose flour, add 1 1/2 teaspoons of baking powder and 1/4 teaspoon of salt. Whisk it all together, and voilà—you’ve got self-rising flour!
What Is the Difference Between Flour and Self-Rising Flour?
While all-purpose flour is plain, self-rising flour includes baking powder and salt. It’s a shortcut that saves you time and effort, especially for quick breads and cakes.
What Can I Use If I Don’t Have Self-Rising Flour?
If you’re out of self-rising flour, make your own by combining all-purpose flour with baking powder and salt (as mentioned above). Alternatively, you can experiment with other flour types for unique textures.
How Do You Make Self-Raising Flour?
The terms “self-rising” and “self-raising” are often used interchangeably. The process is the same—mix all-purpose flour with baking powder and salt. Need tips on baking techniques? Explore this helpful guide.
Unlock Your Baking Potential with Self-Rising Flour
Self-rising flour is more than just a shortcut—it’s a game changer in the kitchen. Whether you’re baking biscuits, pancakes, or something fancy like scones, it simplifies the process and delivers consistent results. Ready to experiment? Grab a bag of self-rising flour and let your imagination run wild.

