The Best Fluffy Pancakes recipe you will fall in love with. Full of tips and tricks to help you make the best pancakes.

Prepare for a burst of pure sunshine with this delightful Orange Juice Jelly! This vibrant, wobbly dessert perfectly marries the sweet tang of fresh oranges with a refreshingly smooth texture. It’s an incredibly simple yet elegant treat, ideal for brightening any meal or gathering. Get ready to create a truly pétillante and plant-based Orange Juice Jelly that will leave everyone craving more.
Table of Contents
Why You’ll Love This Recipe
- Experience a vibrant, refreshing taste explosion that invigorates your palate.
- Discover an incredibly easy recipe to prepare, perfect for beginners and seasoned cooks alike.
- Relish a naturally vegan and gluten-free Orange Juice Jelly, suitable for diverse dietary needs.
- Enjoy a dessert crafted from fresh, wholesome ingredients, promoting wellness with every bite.
- Utilize this recipe as a brilliant anti-gaspillage solution for leftover citrus, turning potential waste into wonderful treats.
Ingredients You’ll Need

Crafting the perfect Orange Juice Jelly starts with selecting the finest ingredients. Opt for ripe, juicy oranges for the most vibrant flavor, and choose a high-quality gelling agent for that ideal wobble. Here’s what you’ll need:
- Fresh Orange Juice: 4 cups (from about 8-10 large oranges). Freshly squeezed is non-negotiable for the best Orange Juice Jelly.
- Granulated Sugar: 1/2 cup (adjust to taste, depending on orange sweetness). For a healthier twist, consider maple syrup or agave nectar.
- Agar-Agar Powder: 4 teaspoons (or 4 tablespoons of agar-agar flakes). This plant-based gelling agent is key for our vegan Orange Juice Jelly.
- Orange Zest: 2 tablespoons (from 2-3 oranges). Adds an incredible aromatic depth and brightens the flavor profile of the Orange Juice Jelly.
- Filtered Water: 1/2 cup. To dissolve the agar-agar effectively.
- Pinch of Salt: A tiny touch enhances all the other flavors.
Substitutions & Variations
Note: This video is for demonstration purposes and may use a slightly different method.
As Hana, I adore creativity and anti-gaspillage in the kitchen! This Orange Juice Jelly recipe is wonderfully adaptable. Feel free to experiment with these healthy swaps and creative variations:
- Sweetener Swaps: Instead of granulated sugar, try using date syrup, agave nectar, or maple syrup for a more natural sweetness. Adjust quantities to your preference. For an extra touch of “pétillante” flavor, a hint of stevia can also work.
- Citrus Blends: While pure Orange Juice Jelly is divine, consider blending your orange juice with a splash of grapefruit, lime, or lemon juice for a more complex, zesty profile. This is also a fantastic anti-gaspillage tip for any leftover citrus halves!
- Spice Infusion: Gently infuse your Orange Juice Jelly mixture with a cinnamon stick, a few cardamom pods, or a star anise while heating. Strain them out before pouring for a subtle, warming note.
- Herbal Twist: Add fresh mint leaves or a sprig of rosemary to the mixture while cooling. Remove before serving for a refreshing herbal aroma.
- Fruity Layers: Create a beautiful layered dessert by setting a thin layer of Orange Juice Jelly, then adding a layer of coconut cream, and finishing with another Orange Juice Jelly layer.
- Tropical Fusion: Introduce a tropical flair by adding a small amount of mango or passion fruit puree to your Orange Juice Jelly mixture.
If you love experimenting in the kitchen, you might be interested in our innovative approach featured in the Bariatric Surgery Gelatin Trick Recipe. It’s all about making healthy swaps that can elevate your jelly game!
Equipment You’ll Need
- Medium Saucepan: For dissolving the agar-agar and heating the juice.
- Whisk: Essential for ensuring the agar-agar dissolves smoothly without lumps.
- Fine-Mesh Sieve: For straining the fresh orange juice and ensuring a perfectly smooth Orange Juice Jelly.
- Measuring Cups and Spoons: For accurate ingredient proportions.
- Citrus Juicer: Manual or electric, for extracting the fresh orange juice.
- Grater/Zester: For obtaining that aromatic orange zest.
- Molds or Dish: Individual ramekins, a loaf pan, or an 8×8 inch glass dish for setting the Orange Juice Jelly.
- Spatula: For stirring and scraping.
Step-by-Step Instructions
Creating this vibrant Orange Juice Jelly is a straightforward process, promising a delightful treat with every wobbly spoonful. Follow these steps for a perfect consistency and incredible flavor:
- Prepare Your Oranges: Begin by thoroughly washing your oranges. Zest 2-3 oranges to get about 2 tablespoons of fragrant zest. Be careful to only get the orange part, avoiding the bitter white pith. Set the zest aside.
- Extract the Juice: Juice all your oranges until you have 4 cups of fresh orange juice. For the smoothest Orange Juice Jelly, pour the juice through a fine-mesh sieve to remove any pulp or seeds. This step is crucial for that luxurious texture.
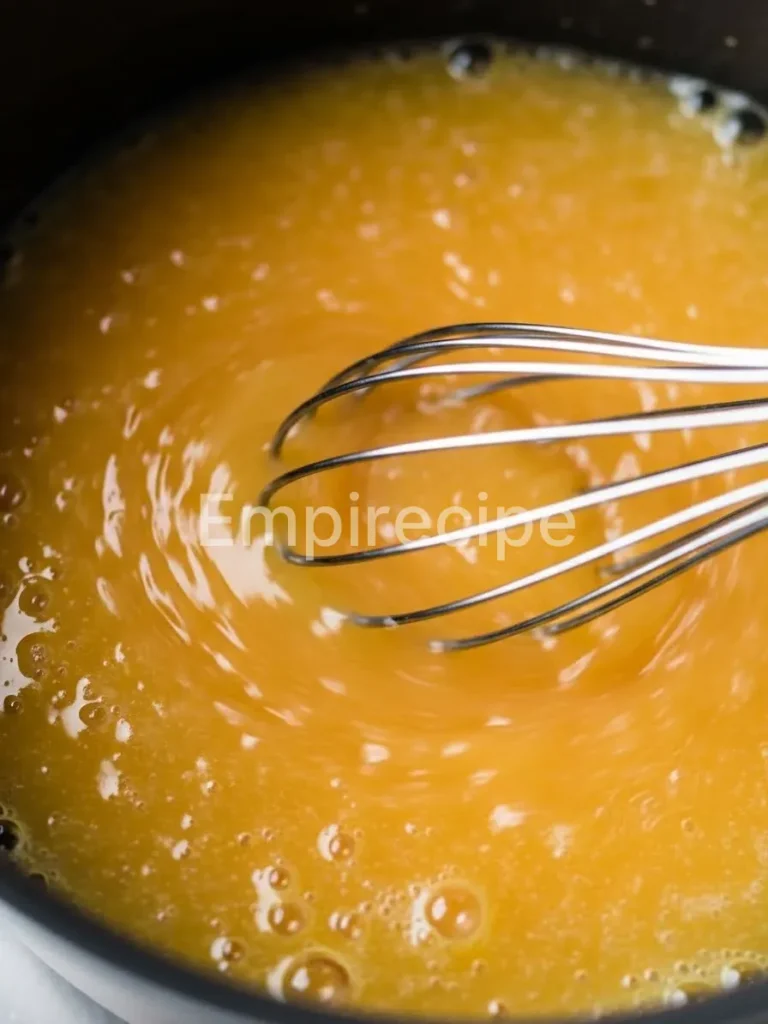
- Dissolve Agar-Agar: In your medium saucepan, combine the 1/2 cup of filtered water with the 4 teaspoons of agar-agar powder (or 4 tablespoons of flakes). Whisk continuously over medium heat until the agar-agar is completely dissolved. This usually takes about 2-3 minutes, ensuring there are no visible lumps.
- Combine with Juice: Once the agar-agar is fully dissolved, slowly pour the strained orange juice into the saucepan, continuing to whisk gently. Add the granulated sugar (or your chosen sweetener) and the pinch of salt.
- Heat the Mixture: Continue heating the mixture over medium-low heat, stirring frequently, until it just begins to simmer. Do not let it boil vigorously; a gentle simmer is all you need to ensure the agar-agar is fully activated and the sugar dissolves completely. Taste and adjust sweetness if desired.
- Add Orange Zest: Remove the saucepan from the heat. Stir in the reserved orange zest. This infusion of zest at the end preserves its vibrant aroma and flavor in your Orange Juice Jelly.
- Prepare Molds: Lightly grease your chosen molds or dish with a tiny bit of neutral oil (optional, but helps with release) or simply rinse them with cold water.
- Pour and Chill: Carefully pour the warm Orange Juice Jelly mixture into your prepared molds or dish. Allow them to cool at room temperature for about 15-20 minutes before transferring them to the refrigerator.
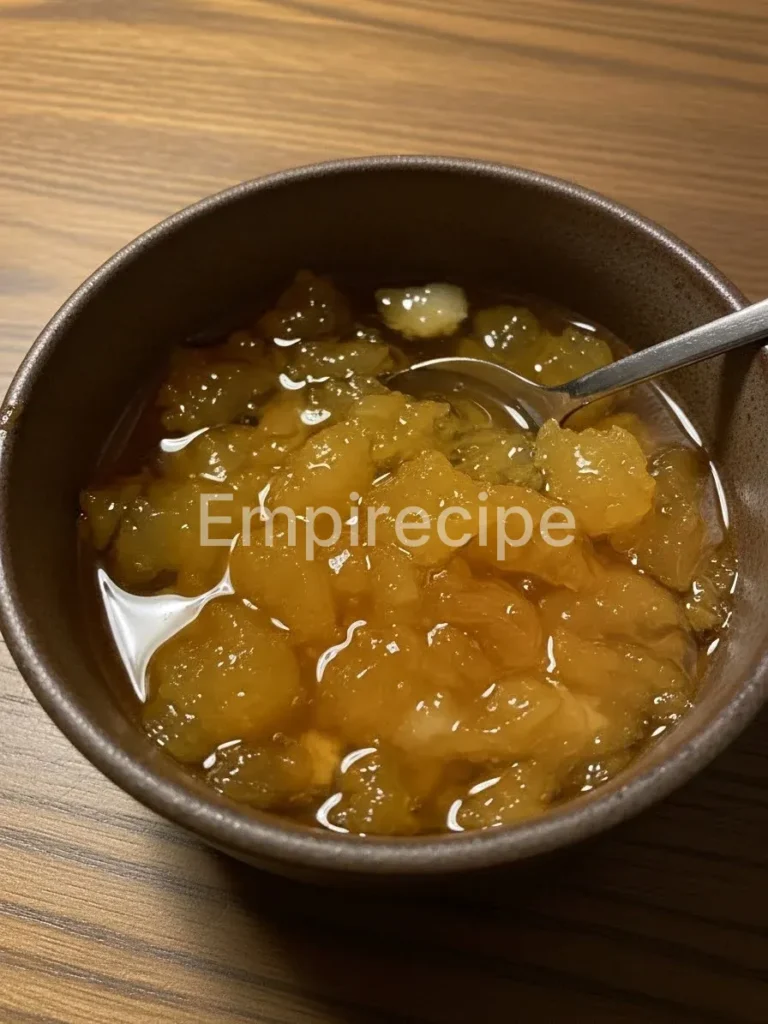
- Set the Jelly: Chill the Orange Juice Jelly for at least 2-4 hours, or until fully set and firm. Agar-agar sets faster than gelatin, so you won’t have to wait too long to enjoy your delicious creation!
- Serve: Once completely set, gently unmold the Orange Juice Jelly (if using molds) or slice it directly from the dish. Serve chilled and enjoy this pétillante treat!
For those looking to enhance their dessert-making skills, be sure to check out our comprehensive Gelatin Diet Recipe that provides useful tips and techniques for achieving the perfect consistency in your jelly.
Pro Tips for Success
- Agar-Agar Activation: Always dissolve agar-agar in cold liquid first, then bring it to a simmer. Boiling ensures proper activation, but avoid prolonged vigorous boiling as it can weaken its gelling power. Whisk constantly during this stage.
- Fresh Juice is Key: Do not use store-bought orange juice concentrate for this Orange Juice Jelly. The fresh, vibrant flavor is paramount and cannot be replicated.
- Sweetness Balance: Taste your orange juice before adding sugar. Oranges vary in sweetness. Adjust the sugar content according to your preference and the natural sweetness of your fruit. A perfectly balanced Orange Juice Jelly is neither too tart nor overly sweet.
- Smooth Texture: Strain your orange juice rigorously. Pulp can create a cloudy or less smooth Orange Juice Jelly.
- Don’t Over-Zest: When zesting, only remove the bright orange outer layer. The white pith underneath is bitter and will negatively impact the flavor of your Orange Juice Jelly.
- Molding Made Easy: For easy unmolding of your Orange Juice Jelly, dip the bottom of the mold briefly in hot water (not too long, or it will melt!) or run a thin, warm knife around the edges before inverting onto a plate.
- Anti-Gaspillage Tip: After zesting and juicing, you can use the leftover orange rinds to make candied peels or simply compost them responsibly!
Storage & Reheating Tips
Your beautiful Orange Juice Jelly is best enjoyed fresh, but it stores wonderfully too! Keep it fresh and delicious with these simple tips:
- Refrigeration: Store your Orange Juice Jelly in an airtight container in the refrigerator. This prevents it from absorbing odors and keeps it firm.
- Shelf Life: Properly stored, Orange Juice Jelly will stay fresh for up to 3-5 days in the refrigerator.
- Freezing: Freezing is not recommended for Orange Juice Jelly as it can alter its texture, making it less appealing upon thawing. The delicate structure of the Orange Juice Jelly is best preserved chilled.
- No Reheating: This is a chilled dessert and should not be reheated. Reheating will cause the Orange Juice Jelly to melt and lose its set.
To keep your Orange Juice Jelly fresh and delicious for longer, visit our Baby Blue Popcorn page for creative storage tips that can help maintain the quality of your culinary creations.
What to Serve With This Recipe
The refreshing simplicity of Orange Juice Jelly makes it an incredibly versatile dessert or palate cleanser. As Hana, I love pairing it with contrasting textures and complementary flavors that highlight its natural brightness. Here are some healthy and delicious ideas:
- Fresh Berries: A medley of fresh raspberries, blueberries, or sliced strawberries provides a lovely contrast in texture and bursts of natural sweetness against the smooth Orange Juice Jelly.
- Coconut Cream: A dollop of whipped coconut cream or a drizzle of plain coconut milk adds a rich, creamy counterpoint, making the Orange Juice Jelly feel even more indulgent and tropical.
- Mint Garnish: A few fresh mint leaves not only add a pop of color but also a refreshing aromatic note that perfectly complements the citrusy Orange Juice Jelly.
- Granola or Toasted Nuts: For a delightful crunch, sprinkle a small amount of homemade granola or lightly toasted slivered almonds or pistachios over the Orange Juice Jelly.
- Fruit Salad: Serve small cubes of Orange Juice Jelly alongside a vibrant fruit salad featuring melons, grapes, and kiwi for an ultimate healthy dessert platter.
- Vegan Yogurt: A side of unsweetened vegan yogurt (coconut or almond-based) offers a tangy balance to the sweet Orange Juice Jelly.
- Ginger Snap Crumble: For a touch of spice and crunch, crush a few vegan ginger snap cookies and sprinkle them lightly over the Orange Juice Jelly.
Frequently Asked Questions (FAQ)
How can I ensure my Orange Juice Jelly sets perfectly every time?
To guarantee your Orange Juice Jelly sets perfectly, always ensure the agar-agar powder is fully dissolved in cold water before heating, then bring the entire mixture to a gentle simmer for at least 2-3 minutes. This activates the gelling properties of the agar-agar. Additionally, use the recommended proportions of agar-agar to liquid.
Rushing the chilling process or not allowing enough time in the refrigerator can also affect the final set of your Orange Juice Jelly. Patience is a virtue when making Orange Juice Jelly!
Can I make Orange Juice Jelly ahead of time for parties?
Absolutely! Orange Juice Jelly is an ideal make-ahead dessert for parties and gatherings. Prepare it up to 2-3 days in advance and store it in an airtight container in the refrigerator.
This allows the flavors to meld beautifully and frees up your time on the day of your event. Just before serving, you can add any fresh garnishes. This makes the Orange Juice Jelly a stress-free option for entertaining.
What are some creative ways to use leftover Orange Juice Jelly?
As Hana, I love inventive anti-gaspillage solutions! Leftover Orange Juice Jelly can be repurposed creatively. Dice it into small cubes and add it to a fruit cocktail for an extra burst of flavor and texture.
Layer it with granola and vegan yogurt for a delightful breakfast parfait. You can even blend small amounts into smoothies for a thicker, more flavorful drink, or incorporate it into a vegan trifle. The vibrant taste of Orange Juice Jelly makes it a versatile ingredient for many culinary adventures.
Orange Juice Jelly is a delightful dessert that showcases the vibrant flavor of oranges in a unique way. Known for its refreshing taste and smooth texture, this treat can add a splash of color to your table, making it a popular choice for gatherings and special occasions. Learn more about this delicious delicacy by visiting its detailed entry on jelly.
Final Thoughts
This Orange Juice Jelly recipe is more than a dessert; it’s a celebration of fresh, vibrant flavors and conscious cooking. It’s an invitation to bring a little pétillance into your day, proving that plant-based, anti-gaspillage cooking can be both simple and spectacularly delicious. Enjoy this radiant treat!
Nutrition Information (per serving)
(Estimates based on 8 servings, using 1/2 cup sugar)
| Nutrient | Amount |
|---|---|
| Calories | 95 kcal |
| Total Fat | 0.2g |
| Saturated Fat | 0g |
| Cholesterol | 0mg |
| Sodium | 10mg |
| Total Carbohydrates | 24g |
| Dietary Fiber | 1g |
| Total Sugars | 20g |
| Protein | 1g |
| Vitamin C | 70% DV |
| Calcium | 2% DV |
| Iron | 1% DV |
Orange Juice Jelly
Prepare for a burst of pure sunshine with this delightful Orange Juice Jelly! This vibrant, wobbly dessert perfectly marries the sweet tang of fresh oranges with a refreshingly smooth texture.
Ingredients
Method
- Wash the oranges and zest 2-3 of them to get about 2 tablespoons of zest.
- Juice all oranges to obtain 4 cups of fresh orange juice and strain through a fine-mesh sieve.
- In a saucepan, combine 1/2 cup of water and 4 teaspoons of agar-agar. Whisk over medium heat until dissolved.
- Pour the strained orange juice into the saucepan and add the sugar and salt, whisking gently.
- Heat the mixture over medium-low until it just simmers and the sugar dissolves.
- Remove from heat and stir in the orange zest.
- Lightly grease molds and pour in the mixture. Allow it to cool for 15-20 minutes before refrigerating.
- Chill for 2-4 hours until set, then unmold or slice and serve chilled.
Notes
Use fresh orange juice for the best flavor. Store in an airtight container in the fridge for up to 3-5 days.