The Best Fluffy Pancakes recipe you will fall in love with. Full of tips and tricks to help you make the best pancakes.
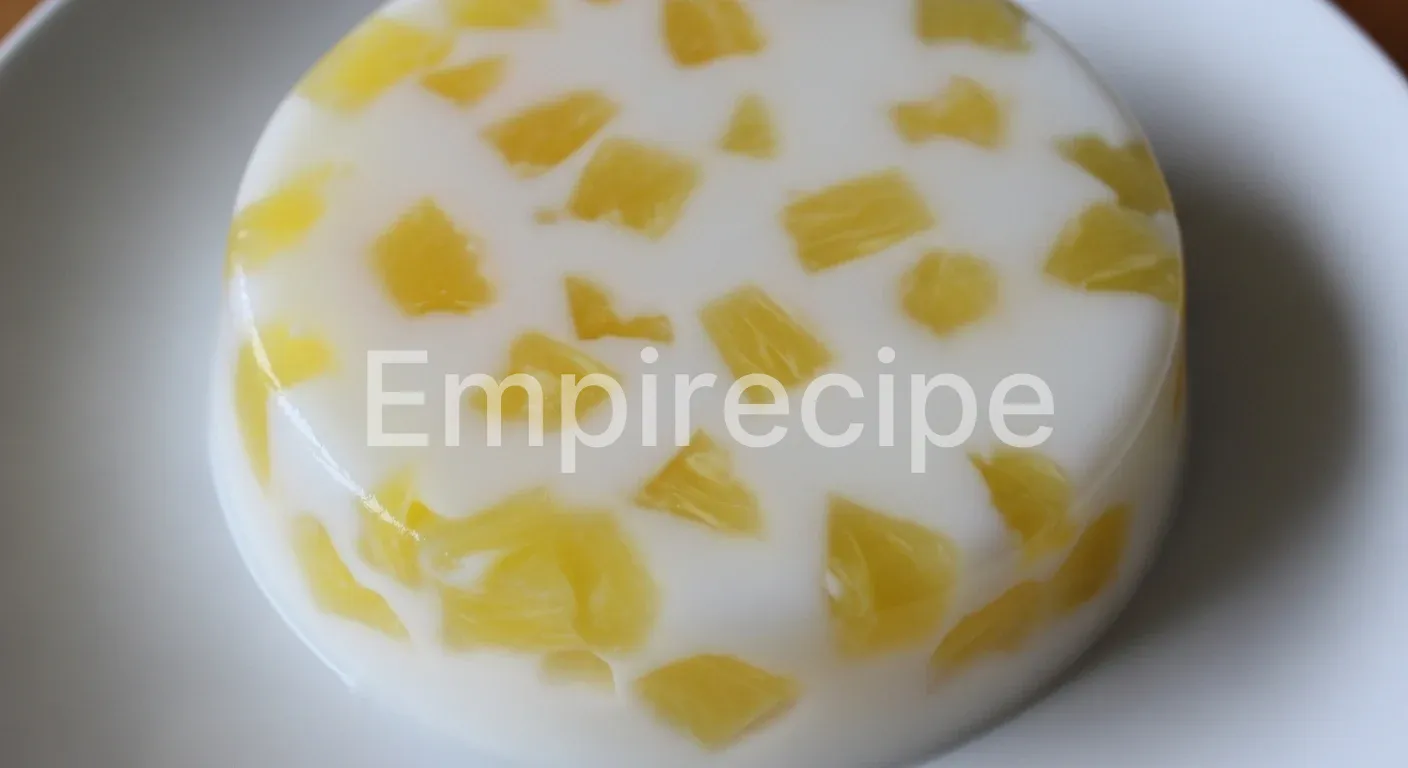
Discover a refreshing tropical escape with this creamy Milky Pineapple Gelatin. This dessert combines the zesty brightness of sun-ripened fruit with a velvet-smooth finish. It is light, vibrant, and perfectly sweet for any occasion. You will love how easily this elegant treat comes together.
Table of Contents
Why You Will Love This Milky Pineapple Gelatin
- Tropical Fusion: Experience the perfect balance between tangy pineapple and luscious coconut cream.
- Quick Preparation: Spend less than twenty minutes in the kitchen for a stunning, high-impact dessert.
- Plant-Based Joy: This version uses agar-agar, making it 100% vegan and inclusive for everyone.
- Zero Waste: Use the whole fruit and simple pantry staples to create a gourmet experience.
Ingredients You Will Need
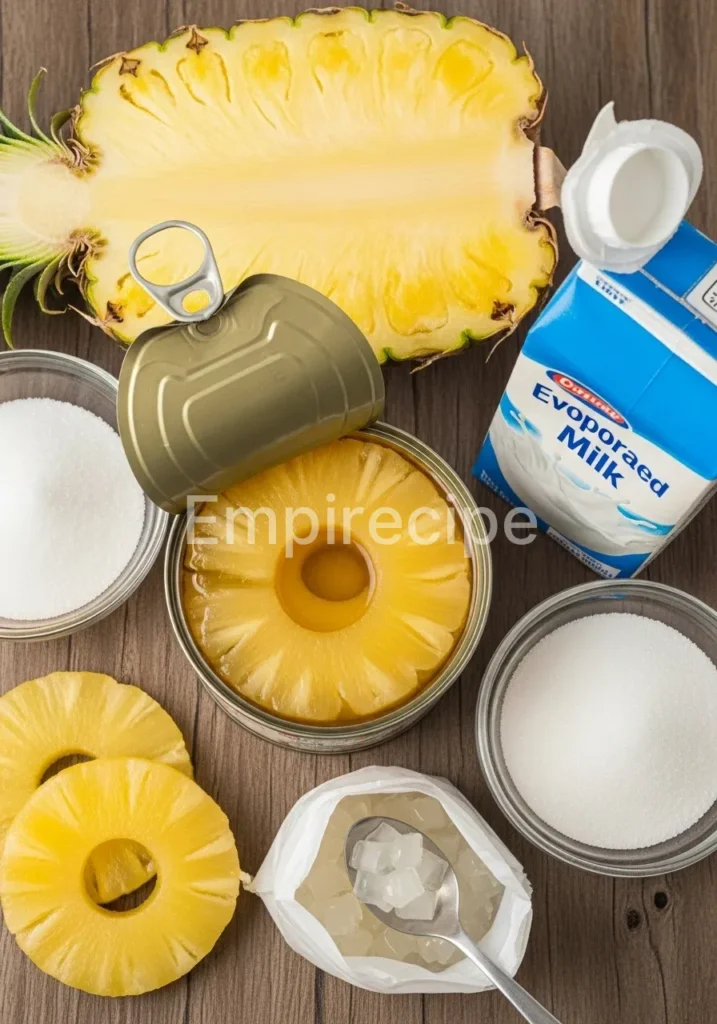
- Fresh Pineapple: Use one medium-sized, very ripe pineapple. Fresh fruit provides the best enzymatic balance and natural sweetness. Ensure you peel and core it properly. If you use canned pineapple, choose the variety packed in natural juice rather than heavy syrup to keep the flavor profile clean and authentic.
- Coconut Milk: I recommend full-fat canned coconut milk for that signature Milky Pineapple Gelatin texture. The high fat content ensures a velvety mouthfeel that mimics traditional dairy without the ethical or environmental footprint. Look for organic brands that do not use stabilizers like guar gum for the purest flavor.
- Agar-Agar Powder: This is our magical plant-based gelling agent derived from red algae. It sets much more firmly than animal-based gelatin and stays stable at room temperature. It is a fantastic eco-friendly alternative that works perfectly for modern vegan confectionery.
- Agave Nectar or Maple Syrup: To enhance the natural sugars of the fruit, add a touch of liquid sweetener. Agave has a neutral profile that lets the pineapple shine, while maple syrup adds a subtle earthy depth that pairs beautifully with the tropical notes.
- Pure Vanilla Extract: A small splash of high-quality vanilla acts as a bridge between the acidity of the fruit and the richness of the milk. It rounds out the flavors and provides a professional pastry-chef finish to the recipe.
- Pinch of Sea Salt: Never skip salt in desserts. A tiny pinch intensifies the perception of sweetness and balances the tartness of the pineapple juices.
- Water: Filtered water is essential for blooming the agar-agar correctly before you introduce the creamy elements.
Substitutions and Variations
Note: This video is for demonstration purposes and may use a slightly different method.
If you want to customize your Milky Pineapple Gelatin, try swapping the coconut milk for creamy oat milk or cashew milk for a different nutty undertone. You can also replace half of the pineapple with mango puree to create a tropical “sunshine” swirl.
For a lower-glycemic option, use monk fruit sweetener or stevia, though you may need to adjust the liquid ratios slightly. If you prefer a more textured dessert, fold in small chunks of dehydrated pineapple or toasted coconut flakes just before the mixture begins to set.
If you’re looking to give your Milky Pineapple Gelatin a unique twist, consider checking out our recipe for Pinoy Gelatin. This variation offers interesting flavor combinations that could enhance your tropical dessert experience.
Equipment You Will Need
- High-Speed Blender: Essential for achieving a completely smooth fruit puree without any fibrous strands.
- Medium Saucepan: A heavy-bottomed pot ensures even heat distribution so the agar-agar dissolves perfectly without scorching the coconut milk.
- Silicone Molds or Glass Dish: Silicone molds allow for easy popping and beautiful shapes, while a glass dish is perfect for rustic, square-cut portions.
- Fine Mesh Strainer: If you want an ultra-silky result, passing the pineapple puree through a sieve is a pro move.
- Whisk: A sturdy whisk helps incorporate the agar-agar into the liquid to prevent clumping.
Step-by-Step Instructions
- Prepare the Fruit: Start by slicing your fresh pineapple into small chunks. Place them into your high-speed blender and process until the mixture is completely liquid. For an exceptionally smooth Milky Pineapple Gelatin, pour this puree through a fine-mesh strainer into a bowl to remove any remaining pulp or fibers.
- Bloom the Agar-Agar: In your medium saucepan, combine the filtered water and the agar-agar powder. Whisk them together while the liquid is still cold. This prevents the powder from forming stubborn lumps. Let it sit for about five minutes to hydrate properly.
- Simmer and Activate: Turn the heat to medium and bring the water and agar mixture to a gentle boil. You must simmer this for at least two to three minutes while stirring constantly. Agar-agar requires heat to “activate” its gelling properties; if you do not boil it, the dessert will not set.
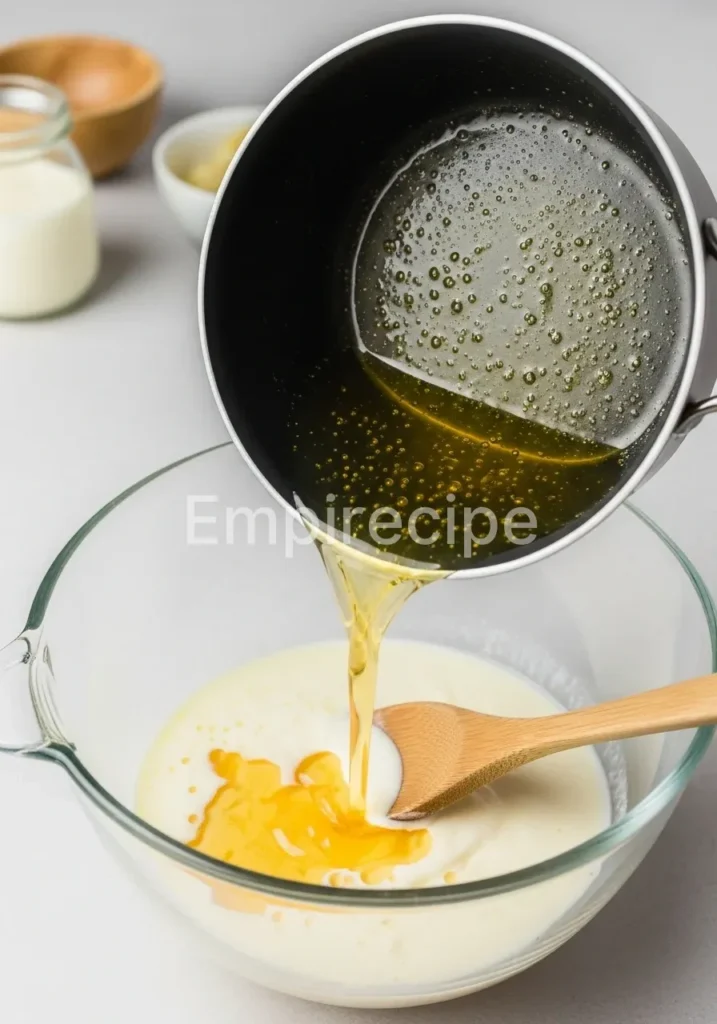
- Combine the Creamy Base: Lower the heat and slowly pour in the full-fat coconut milk, your chosen liquid sweetener, vanilla extract, and the pinch of sea salt. Whisk vigorously to ensure the fat from the coconut milk emulsifies perfectly with the water base.
- Incorporate the Pineapple: Gradually add the pineapple puree to the warm milk mixture. Continue to stir for another two minutes. Do not let the mixture reach a rolling boil again, as excessive heat can sometimes dull the vibrant flavor of the fresh fruit.
- The Pouring Phase: Carefully pour the liquid into your prepared silicone molds or glass dish. If you see any small bubbles on the surface, you can lightly spray them with a mist of food-grade alcohol or simply pop them with a toothpick for a flawless finish.
- The Chilling Process: Allow the mixture to cool at room temperature for about twenty minutes. Once it has stopped steaming, transfer it to the refrigerator. Let the gelatin set for at least three to four hours, though overnight is even better for the flavors to meld and the texture to firm up.
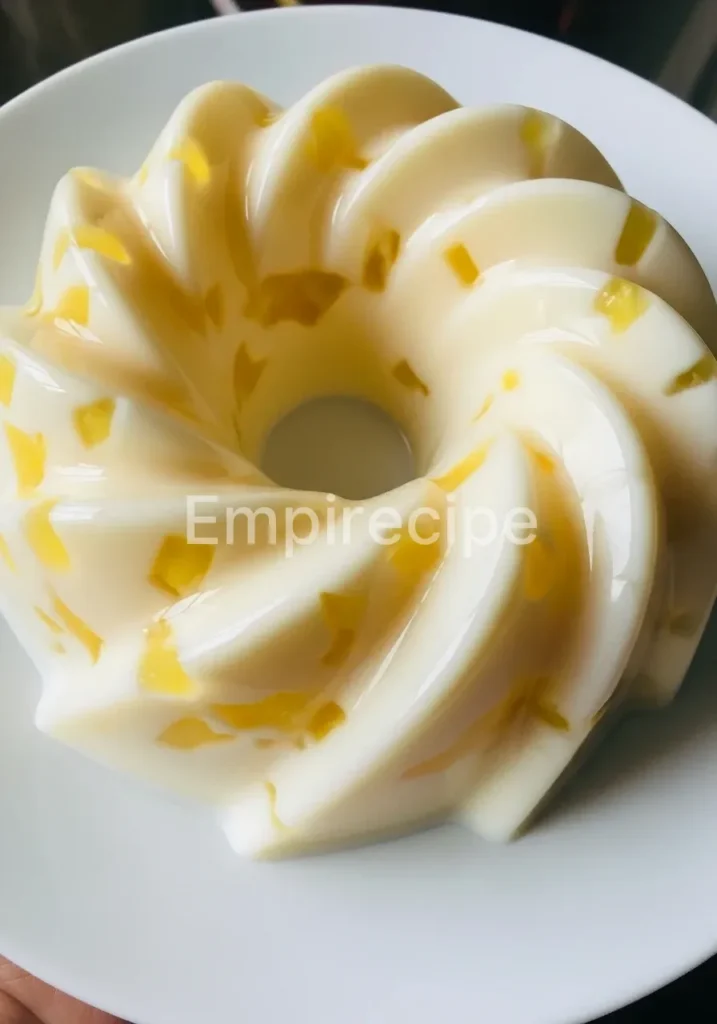
- Unmolding: If using a glass dish, run a thin knife around the edges before slicing. If using silicone molds, gently pull the edges away from the gelatin and invert them onto a serving plate. The Milky Pineapple Gelatin should pop out with a beautiful, glossy sheen.
For a smoother base in your Milky Pineapple Gelatin, you’ll benefit from the preparation steps outlined in our Pink Hot Chocolate guide. Learning about perfecting your fruit puree process can take your gelatin to the next level.
Pro Tips for Success
The most important technical tip involves the acidity of the fruit. Raw pineapple contains an enzyme called bromelain, which can break down proteins and sometimes interfere with gelling agents. However, agar-agar is a carbohydrate (polysaccharide) and is generally more resistant to bromelain than animal gelatin.
To be completely safe and ensure a firm set, heating the pineapple puree as we do in this recipe neutralizes the enzyme entirely. Furthermore, always ensure your agar-agar is fresh; old powder can lose its strength over time.
If you find your gelatin is too soft, you can actually re-melt the mixture in a saucepan, add a tiny bit more dissolved agar, and let it set again. This “second chance” property is one of the reasons I love working with plant-based gelling agents.
Storage and Reheating Tips
Keep your Milky Pineapple Gelatin in an airtight container in the refrigerator to prevent it from absorbing other food odors. It stays fresh and delicious for up to five days. Unlike animal gelatin, agar-based desserts do not “weep” or release as much water over time, so they maintain their shape beautifully.
I do not recommend freezing this dessert, as the ice crystals will damage the delicate cellular structure of the agar, resulting in a grainy and watery texture once thawed. This is a cold dessert, so there is no need for reheating. If you are serving it at a party, it can safely sit at room temperature for a couple of hours without melting, which is a huge advantage for summer gatherings.
To ensure your Milky Pineapple Gelatin stays fresh and maintains its delightful texture, consider the storage tips provided in our 5 Reasons Twix Is the Ultimate Office Snack. Understanding how different desserts maintain quality can help you enjoy your treats longer.
What to Serve With This Recipe
To elevate the presentation of your Milky Pineapple Gelatin, serve it alongside a crisp, refreshing herb salad. A mixture of fresh mint leaves, Thai basil, and a squeeze of lime juice provides a sharp contrast to the creamy sweetness of the gelatin. For an added crunch, consider serving it with a side of toasted macadamia nuts or a sprinkle of toasted coconut flakes.
If you want a more substantial pairing, roasted spicy chickpeas or a light quinoa salad with cucumber and lime can balance the palate. The goal is to provide textures that contrast the smooth, jiggly nature of the dessert while keeping the overall vibe light and tropical.
Frequently Asked Questions (FAQ)
Can I use canned pineapple instead of fresh for this recipe?
Yes, you can absolutely use canned pineapple. In fact, canned pineapple is pre-heated during the canning process, which means the bromelain enzyme is already deactivated. This makes the Milky Pineapple Gelatin even easier to set. Just make sure to drain the fruit well or use the juice as part of your liquid measurements to maintain the right consistency.
Is agar-agar the same as gelatin?
No, they are very different. Gelatin is derived from animal collagen, whereas agar-agar comes from seaweed. Agar-agar sets more firmly and has a higher melting point, meaning your Milky Pineapple Gelatin won’t turn into liquid on a warm day. It is also flavorless and odorless, making it the perfect neutral base for tropical fruits.
Why did my gelatin not set properly?
The most common reason agar-agar fails to set is that it wasn’t boiled long enough. It must reach a full boil and simmer for a few minutes to fully dissolve and activate. Another reason could be the ratio of liquid to powder; if you added too much pineapple juice without increasing the agar, the structure might be too weak to hold its shape.
Milky Pineapple Gelatin is a delicious and refreshing dessert that merges the sweet taste of pineapple with a creamy texture, often achieved using plant-based ingredients. This tropical treat can typically be made with agar-agar, offering a vegan alternative to traditional gelatin, and it exemplifies culinary creativity in dessert making, as can be found in various culinary resources on desserts.
Final Thoughts
This Milky Pineapple Gelatin represents my favorite kind of cooking: simple, vibrant, and kind to the planet. Every creamy bite celebrates tropical flavors while keeping things plant-based and light. Share this sunshine-filled treat with your loved ones and enjoy the sweet, conscious magic.
Nutrition Information (per serving)
| Calories | 145 kcal |
| Total Fat | 8g |
| Carbohydrates | 18g |
| Fiber | 2g |
| Sugars | 14g |
| Protein | 1.5g |
Milky Pineapple Gelatin
Discover a refreshing tropical escape with this creamy Milky Pineapple Gelatin. This dessert combines the zesty brightness of sun-ripened fruit with a velvet-smooth finish. It is light, vibrant, and perfectly sweet for any occasion. You will love how easily this elegant treat comes together.
Ingredients
Method
- Slice the fresh pineapple into small chunks and blend until liquid. Strain through a fine-mesh strainer for a smooth puree.
- In a medium saucepan, combine filtered water and agar-agar powder, whisking until combined. Let sit for 5 minutes to bloom.
- Heat the agar mixture, bringing to a gentle boil while stirring continuously for 2-3 minutes to activate.
- Lower the heat and slowly whisk in coconut milk, sweetener, vanilla, and salt until emulsified.
- Gradually add the pineapple puree to the warm mixture, stirring for another 2 minutes.
- Pour the mixture into molds or a glass dish, removing any bubbles from the surface.
- Allow to cool for 20 minutes at room temperature, then refrigerate for 3-4 hours to set.
- Run a knife around the edges of a glass dish or gently pull away from silicone molds to unmold.
Notes
Use fresh pineapple for best results. Agar-agar requires boiling to set properly. Store in an airtight container for up to 5 days.