The Best Fluffy Pancakes recipe you will fall in love with. Full of tips and tricks to help you make the best pancakes.
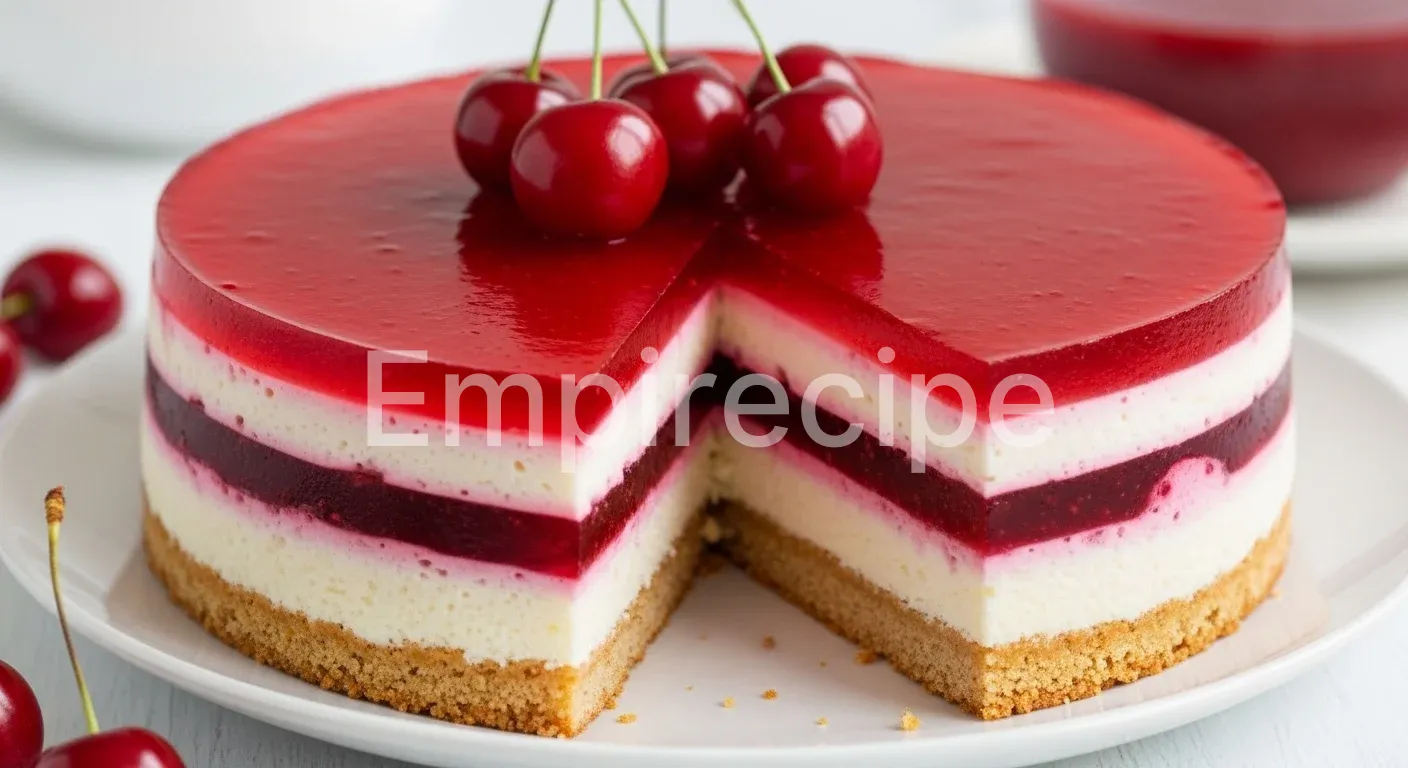
Welcome to my kitchen, where colors pop and flavors sing in perfect harmony! Today, I am beyond excited to share a dessert that feels like a celebration of summer and sustainability combined. This Cherry Gelatin Cream Cake offers a stunning visual appeal with its deep ruby-red layers and cloud-like creamy base.
You will love how the tartness of the cherries cuts through the velvety sweetness of the whipped cream. Every slice provides a refreshing burst of fruit that dances on your palate with grace. Preparing this Cherry Gelatin Cream Cake is a mindful process that honors high-quality, seasonal ingredients. Let us dive into this bubbly and creative recipe that will surely steal the show at your next gathering!
Table of Contents
Why You’ll Love This Cherry Gelatin Cream Cake
- Vibrant antioxidants: Fresh cherries provide natural color and health benefits.
- Velvety texture: The contrast between firm jelly and soft cream is magical.
- Eco-friendly: Uses seasonal produce and minimal waste techniques.
- Simple elegance: A stunning dessert that looks professional yet feels homemade.
Ingredients You’ll Need
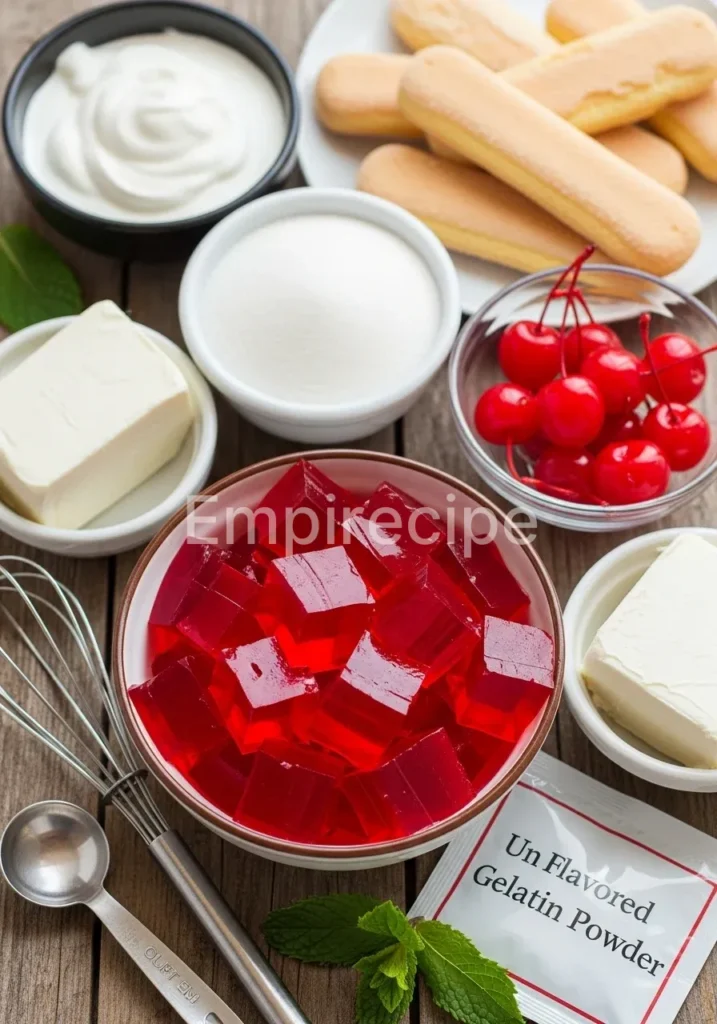
Quality is the heartbeat of my kitchen, and for this Cherry Gelatin Cream Cake, I recommend sourcing organic and local components whenever possible. Starting with the freshest cherries ensures a deep, authentic flavor that store-bought mixes simply cannot replicate. We want to avoid synthetic dyes and embrace the natural pigments provided by the earth.
The base of our cake relies on a high-quality gelling agent—I often use agar-agar for a plant-based twist, but traditional gelatin works beautifully for those who prefer it. Here is the list of essentials for your masterpiece:
- Fresh Cherries: 500g of pitted, ripe cherries (sweet or sour varieties).
- Cream Base: 400ml of organic heavy cream or chilled full-fat coconut milk for a vegan alternative.
- Natural Sweetener: 150g of raw cane sugar or maple syrup to maintain a lower glycemic index.
- Gelling Agent: 4 tablespoons of high-quality gelatin powder or 2 teaspoons of agar-agar powder.
- Vanilla: 1 whole vanilla bean, scraped, or 1 tablespoon of pure vanilla extract for aromatic depth.
- Liquid: 250ml of filtered water or cherry juice for the gelatin layer.
- Citrus: 1 tablespoon of fresh lemon juice to brighten the fruit profile.
- Crust: 200g of crushed digestive biscuits mixed with 80g of melted grass-fed butter or coconut oil.
Substitutions & Variations
Note: This video is for demonstration purposes and may use a slightly different method.
Creativity knows no bounds when crafting a Cherry Gelatin Cream Cake, and I encourage you to make it your own! If you are following a strictly plant-based lifestyle, swap the gelatin for agar-agar and the heavy cream for a thick coconut whipped cream. For a gluten-free version, simply use almond-flour-based cookies for the crust.
You can also experiment with flavor fusions by adding a hint of almond extract, which pairs divinely with cherries. If cherries are out of season, high-quality frozen cherries or even a mix of berries like raspberries and blackberries can create a beautiful alternative Cherry Gelatin Cream Cake profile. Always remember to taste your fruit first; if it is particularly tart, you might need a touch more sweetener to balance the intensity.
If you’re feeling adventurous with your Cherry Gelatin Cream Cake, consider learning more about how to incorporate flavorful ingredients by visiting our Cherry Peppers Guide.
Equipment You’ll Need
To ensure your Cherry Gelatin Cream Cake sets perfectly and looks professional, having the right tools is essential. I always advocate for using glass or stainless steel equipment, which is more durable and eco-friendly than plastic alternatives. You will need a high-quality springform pan (9-inch is standard) to easily release the delicate layers without damaging the structure.
A cherry pitter is a lifesaver for this recipe, though you can use a straw or a small knife if you want to be more “low-tech.” A stand mixer or a powerful hand whisk will help you achieve the voluminous cream required for the middle layer. Lastly, a small heavy-bottomed saucepan is necessary for gently heating the fruit and gelling agent to the perfect temperature for your Cherry Gelatin Cream Cake.
Step-by-Step Instructions
- Prepare the Crust: Combine your crushed biscuits and melted butter in a bowl. Press the mixture firmly into the bottom of a parchment-lined springform pan and chill in the freezer for 15 minutes while you prepare the next layer of the Cherry Gelatin Cream Cake.
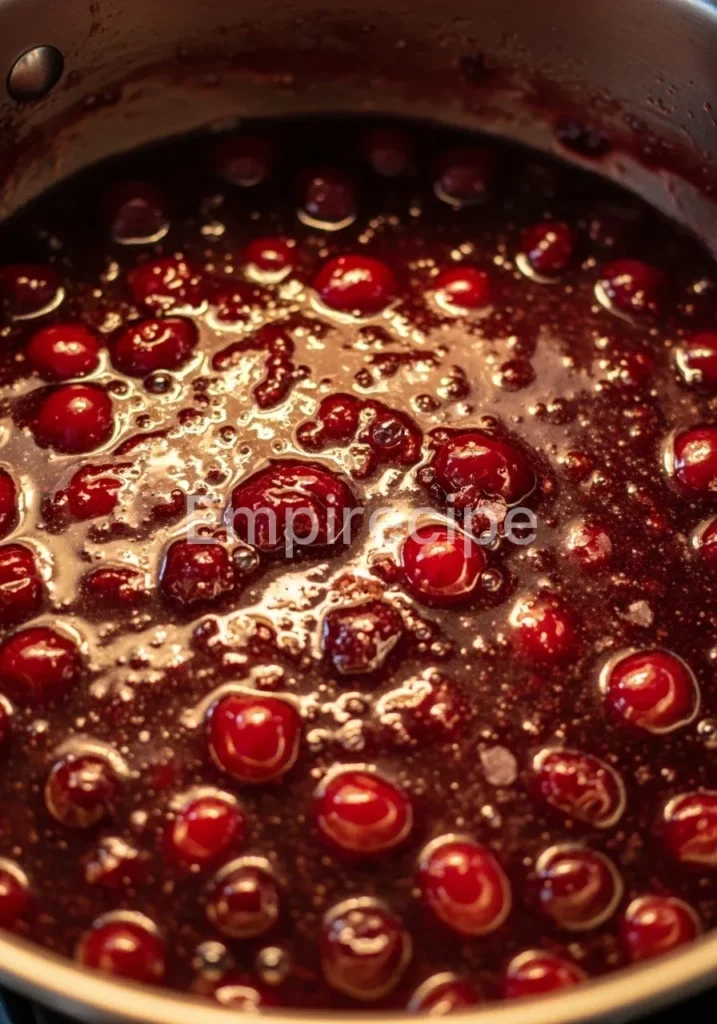
- Simmer the Cherries: In a saucepan, combine the pitted cherries, half of the sugar, and the lemon juice. Simmer over medium heat for about 10 minutes until the cherries release their juices and soften.
- Bloom the Gelatin: Sprinkle your gelatin over 50ml of cold water and let it sit for 5 minutes. If using agar-agar, skip this and add it directly to the boiling liquid in the next step.
- Create the Fruit Base: Stir the bloomed gelatin into the hot cherry mixture until completely dissolved. Let this mixture cool to room temperature before assembling your Cherry Gelatin Cream Cake to prevent the cream from melting.
- Whip the Cream: In a cold bowl, whip your heavy cream (or coconut cream) with the remaining sugar and vanilla until stiff peaks form. The airiness here is what gives the Cherry Gelatin Cream Cake its signature “cloud” texture.
- Fold the Layers: Gently fold half of the cooled cherry mixture into the whipped cream. Use a spatula and a light hand to maintain the volume of the Cherry Gelatin Cream Cake center.
- First Set: Pour the creamy cherry mixture over the chilled crust. Smooth the top with an offset spatula and refrigerate for at least 2 hours.
- Prepare the Top Layer: Take the remaining cherry juice/syrup and gently warm it if it has set. Ensure it is pourable but not hot, as a hot liquid will ruin the surface of your Cherry Gelatin Cream Cake.
- The Final Pour: Carefully pour the clear cherry gelatin layer over the set cream layer. I like to use the back of a spoon to break the fall of the liquid, ensuring a perfectly smooth finish.
- The Long Chill: Place the entire Cherry Gelatin Cream Cake back into the refrigerator for at least 6 hours, or ideally overnight, to ensure every layer is firm and stable.
While creating the base for your cake, you might find some inspiration for quick breakfasts that can complement your dessert by checking out our Easy Grilled Cheese Breakfast Burrito.
Pro Tips for Success
Achieving the perfect Cherry Gelatin Cream Cake requires a bit of patience and technical finesse. First, always make sure your cream is ice-cold before whipping; this ensures the best volume and stability. When working with gelatin, never let the mixture boil vigorously once the gelling agent is added, as high heat can weaken its setting properties.
For the most beautiful presentation, dip your knife in hot water and wipe it dry between each slice when serving your Cherry Gelatin Cream Cake. This technique creates clean, sharp edges that showcase the distinct layers. Lastly, don’t throw away your cherry pits! You can infuse them into a simple syrup or vinegar for a zero-waste flavor boost in other recipes, staying true to our eco-responsible kitchen philosophy.
Storage & Reheating Tips
Since the Cherry Gelatin Cream Cake relies on temperature-sensitive ingredients, it must remain refrigerated until the moment of serving. It will keep beautifully in the fridge for up to 4 days if stored in an airtight container or covered tightly with a reusable beeswax wrap. I do not recommend freezing this cake, as the texture of the gelatin and the cream can become grainy and weep liquid upon thawing.
If you are transporting the Cherry Gelatin Cream Cake to a party, use an insulated cooler bag with ice packs to maintain its structural integrity. Always serve it chilled to enjoy the refreshing contrast of the cold fruit and the melt-in-your-mouth cream.
To preserve your Cherry Gelatin Cream Cake perfectly, consider tips from our The Gelatin Trick Diet which outlines how to handle temperature-sensitive desserts.
What to Serve With This Recipe
To complement the sweetness of the Cherry Gelatin Cream Cake, I love serving it alongside something light and perhaps slightly savory. A fresh mint tea or a cold brew hibiscus tea provides a floral note that enhances the cherry flavor perfectly. If you are hosting a brunch, a simple arugula salad with a light balsamic vinaigrette and toasted walnuts offers a sophisticated balance to the dessert.
For an extra touch of indulgence, a small dollop of crème fraîche or a sprinkle of lime zest over each slice of Cherry Gelatin Cream Cake adds a zesty pop that awakens the senses. I also find that a few toasted almond slivers scattered on top provide a delightful crunch that contrasts the soft textures.
Frequently Asked Questions (FAQ)
Can I use frozen cherries for my Cherry Gelatin Cream Cake?
Yes, you absolutely can! Frozen cherries are often picked at peak ripeness and work wonderfully. Just be sure to thaw them first and drain any excess water, but keep the juice to use in the gelatin layer of your Cherry Gelatin Cream Cake to ensure no flavor goes to waste.
How do I make this Cherry Gelatin Cream Cake vegan?
To transform this into a vegan delight, substitute the gelatin for an equal strength of agar-agar powder (usually about 1/3 the amount of gelatin). Use a high-fat coconut cream instead of heavy dairy cream. This version of the Cherry Gelatin Cream Cake is just as delicious and inclusive for all guests.
Why did my Cherry Gelatin Cream Cake layers separate?
Separation usually happens if the first layer isn’t set enough before adding the second, or if the second layer is too hot. Ensure the cream layer is firm to the touch and the top gelatin layer has cooled to room temperature before you combine them. Patience is key for a perfect Cherry Gelatin Cream Cake!
Cherry Gelatin Cream Cake is a delightful dessert that combines the flavors of fresh cherries with a smooth, creamy texture and a vibrant appearance. For those interested in the culinary uses of gelatin, exploring gelatin itself can provide deeper insights into this ingredient’s versatile applications in cooking.
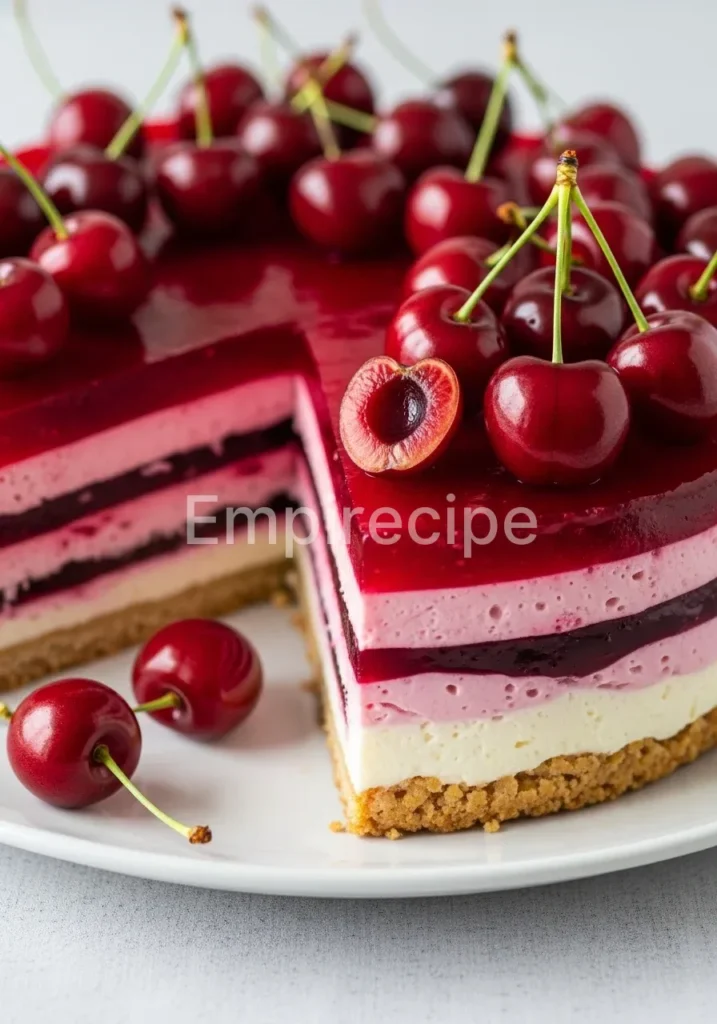
Final Thoughts
This Cherry Gelatin Cream Cake represents the harmony of vibrant fruit and silky textures. It brings joy to every gathering while celebrating seasonal bounty and creative flair. I hope this colorful dessert inspires your kitchen adventures and fuels your passion for beautiful, eco-friendly food!
Nutrition Information (per serving)
This nutritional summary provides an estimate for one slice of our Cherry Gelatin Cream Cake, based on 12 servings per cake.
| Nutrient | Amount |
|---|---|
| Calories | 285 kcal |
| Total Fat | 18g |
| Saturated Fat | 11g |
| Carbohydrates | 28g |
| Sugars | 22g |
| Protein | 4g |
| Fiber | 2g |
Cherry Gelatin Cream Cake
A vibrant, refreshing dessert that combines the tartness of cherries with a creamy base, perfect for summer gatherings and made with high-quality, seasonal ingredients.
Ingredients
Method
- Prepare the Crust: Combine crushed biscuits and melted butter in a bowl. Press into the bottom of a parchment-lined springform pan and chill.
- Simmer the Cherries: In a saucepan, combine cherries, half of the sugar, and lemon juice. Simmer for about 10 minutes.
- Bloom the Gelatin: Sprinkle gelatin over 50ml of cold water and let it sit for 5 minutes.
- Create the Fruit Base: Stir the bloomed gelatin into the cherry mixture until dissolved. Cool to room temperature.
- Whip the Cream: In a cold bowl, whip cream (or coconut cream) with remaining sugar and vanilla until stiff peaks form.
- Fold the Layers: Gently fold half of the cooled cherry mixture into the whipped cream.
- First Set: Pour the cherry-cream mixture over the chilled crust, smooth the top, and refrigerate for at least 2 hours.
- Prepare the Top Layer: Warm the remaining cherry syrup until pourable.
- The Final Pour: Pour the cherry gelatin layer over the set cream layer carefully.
- The Long Chill: Refrigerate for at least 6 hours or overnight.
Notes
Store in an airtight container for up to 4 days. Transport in an insulated cooler bag to maintain its integrity.