The Best Fluffy Pancakes recipe you will fall in love with. Full of tips and tricks to help you make the best pancakes.
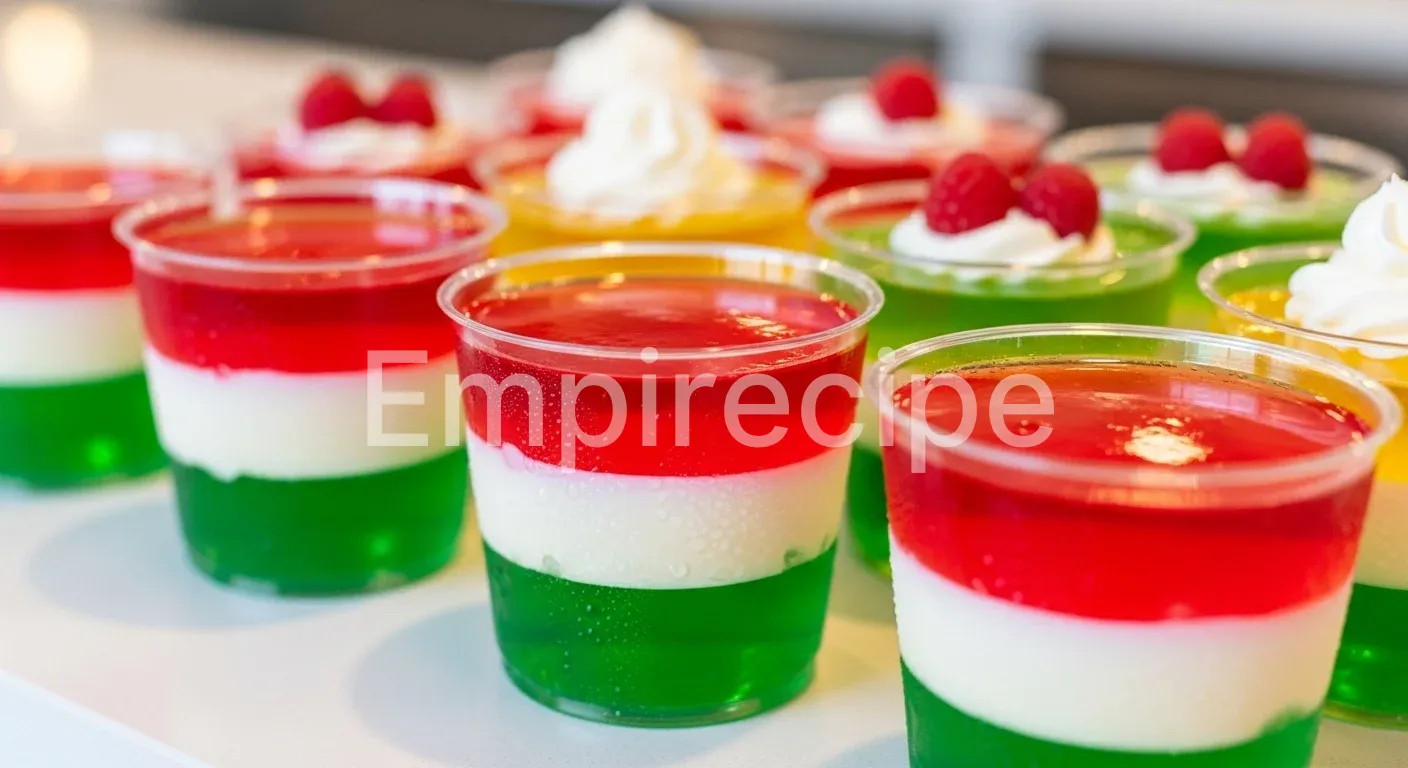
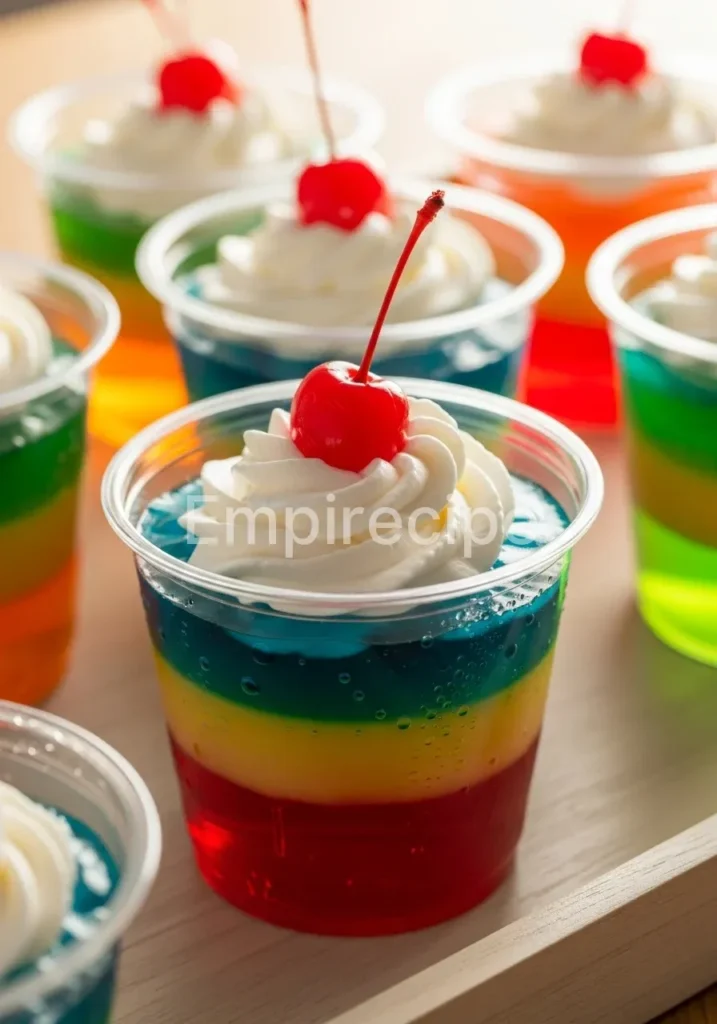
These vibrant Jell-O Dessert Cups offer a shimmering, translucent texture and a burst of nostalgic sweetness in every spoonful. They provide a light, refreshing finish to any meal while remaining incredibly simple to prepare at home. Experience the joyful wobble and bright flavors of this classic treat today.
Table of Contents
Why You’ll Love These Jell-O Dessert Cups
- Nostalgic Delight: Brings back cherished childhood memories with every colorful, wiggly bite.
- Effortless Preparation: Requires minimal active kitchen time, perfect for a slow-living lifestyle.
- Customizable Health: Easily adapt with fresh fruit for added vitamins and natural antioxidants.
Ingredients You’ll Need

Selecting high-quality ingredients transforms a simple snack into a mindful culinary experience. I always recommend using filtered water and the freshest organic fruits to elevate the natural vibrancy of your Jell-O Dessert Cups. When we choose better components, we nourish our bodies and our souls simultaneously.
| Ingredient | Quantity | Purpose |
|---|---|---|
| Gelatin Mix (Any flavor) | 3 ounces (1 package) | Provides the structure and base flavor. |
| Boiling Water | 1 cup | Dissolves the gelatin crystals completely. |
| Cold Water | 1 cup | Speeds up the setting process and maintains volume. |
| Fresh Berries (Optional) | 1/2 cup | Adds texture, fiber, and natural sweetness. |
| Whipped Cream | For garnish | Adds a creamy contrast to the firm gelatin. |
Substitutions & Variations
[ra_display_video url=”https://www.youtube.com/watch?v=gIIpbrLWFWA”]
To keep your Jell-O Dessert Cups healthy, try using unsweetened fruit juice instead of cold water. You can also swap traditional gelatin for agar-agar if you prefer a plant-based, vegan-friendly alternative.
To keep your Jell-O Dessert Cups healthy, consider trying a Bariatric Jello Recipe that uses unsweetened fruit juice instead of cold water. This alternative not only enhances the flavor but also aligns with a healthy lifestyle, making it a great option for everyone. Learn more about it in this Bariatric Jello Recipe.
Equipment You’ll Need
You do not need fancy gadgets to create beautiful Jell-O Dessert Cups. Simple, sturdy tools often yield the most consistent results. Having everything ready before you start allows you to stay present and enjoy the rhythmic process of whisking and pouring.
- Heat-resistant glass measuring cup
- Sturdy wire whisk
- Individual glass ramekins or small dessert jars
- Large mixing bowl
- Small saucepan for boiling water
Step-by-Step Instructions
Creating these Jell-O Dessert Cups is a meditative practice that rewards patience. Follow these steps carefully to ensure a perfect set and a beautiful presentation.
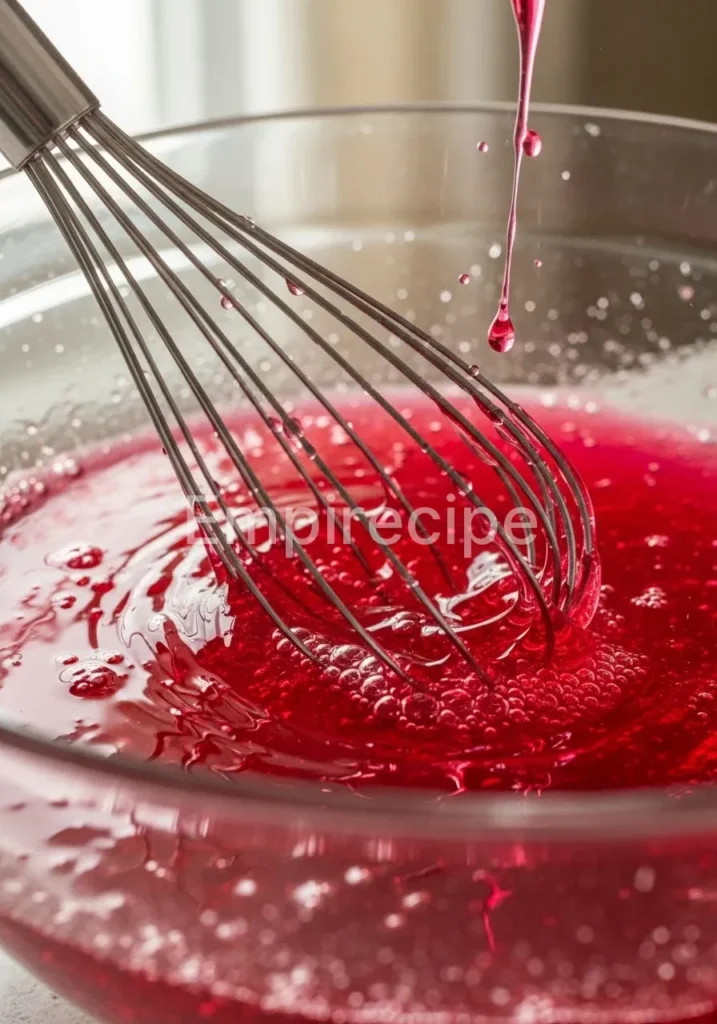
- First, bring one cup of filtered water to a rolling boil in a small saucepan. The heat is essential for breaking down the gelatin granules effectively.
- Carefully pour the gelatin powder into a large glass mixing bowl. Take a moment to appreciate the bright pigment and the fine texture of the dry mix.
- Slowly pour the boiling water over the powder. Use your wire whisk to stir the mixture gently but thoroughly. Continue whisking for at least two minutes until no visible crystals remain at the bottom.
- Once the mixture appears completely clear and dissolved, pour in one cup of very cold water. This sudden temperature change begins the thickening process for your Jell-O Dessert Cups.
- Continue stirring for another minute to ensure a uniform temperature throughout the liquid. If you plan to add fruit, let the mixture sit for ten minutes before stirring in your berries.
- Gently pour the liquid into your chosen glass cups or ramekins. Leave a small amount of space at the top if you plan to add whipped cream later.
- Place the Jell-O Dessert Cups in the refrigerator on a flat, level shelf. Let them chill undisturbed for at least four hours, though overnight is often better for a firm, satisfying set.
- Before serving, top each cup with a small dollop of homemade whipped cream or a sprig of fresh mint for a touch of elegance.
Creating these Jell-O Dessert Cups can be an art, much like the meticulous techniques used in sushi preparation. To dive deeper into the culinary world, explore the intricacies of one of sushi’s essential toppings with this article on Tobiko.
Pro Tips for Success
To achieve the clearest Jell-O Dessert Cups, avoid whisking too vigorously, as this incorporates air bubbles that can cloud the final product. Gently stir in a circular motion to keep the liquid transparent and jewel-like. Additionally, ensure your boiling water is truly at a boil; lukewarm water will result in a grainy texture that lacks the signature wobble.
If you want to layer different colors in your Jell-O Dessert Cups, you must exercise great patience. Let the first layer set completely in the refrigerator for at least two hours before adding the next color. Furthermore, ensure the second liquid layer has cooled to room temperature before pouring it over the first layer. This prevents the warm liquid from melting the base and keeps the lines sharp and distinct.
Another technical secret involves the fruit you choose. Never use fresh pineapple, kiwi, or papaya in your Jell-O Dessert Cups. These fruits contain enzymes called proteases that actually break down the protein bonds in gelatin.
Consequently, your dessert will never set and will remain a liquid mess. Stick to berries, grapes, or canned versions of these tropical fruits for the best results.
Storage & Reheating Tips
Proper storage is vital for maintaining the delicate texture of your Jell-O Dessert Cups. Gelatin is sensitive to both air and odors, so always cover your individual cups with plastic wrap or a tight-fitting lid. This simple step prevents the surface from drying out and forming a tough, rubbery skin. It also protects the dessert from absorbing the scents of other foods in your refrigerator.
Keep your Jell-O Dessert Cups chilled until the very moment you intend to eat them. At room temperature, the structure begins to soften and lose its integrity. Generally, these treats stay fresh and delicious for up to seven days in the fridge. Note that you should never freeze these cups; freezing destroys the molecular structure, resulting in a watery and unappealing texture once thawed.
Proper storage of your Jell-O Dessert Cups is crucial for maintaining their quality and texture. For guidance on preserving other culinary delights, check out this Green Bean Casserole Recipe that highlights essential storage techniques.
What to Serve With This Recipe
Because these Jell-O Dessert Cups are light and airy, they pair beautifully with a variety of wholesome accompaniments. I personally love serving them alongside a crisp, colorful fruit salad tossed in a light lime and honey dressing. The contrast between the soft gelatin and the crunchy fresh fruit creates a wonderful sensory experience that highlights the best of nature’s flavors.
If you are hosting a light afternoon tea, consider pairing these Jell-O Dessert Cups with almond flour shortbread or a simple lemon zest cookie. For a more balanced snack, serve a small cup of Greek yogurt on the side. The protein from the yogurt complements the sweetness of the gelatin, making for a more satiating and nutritionally diverse treat that fits perfectly into a slow-living afternoon.
Frequently Asked Questions (FAQ)
Can I make Jell-O Dessert Cups without sugar?
Yes, you can easily find sugar-free gelatin mixes at most grocery stores. Alternatively, you can make your own version using unflavored gelatin and a natural sweetener like stevia or monk fruit. This allows you to control the ingredients while still enjoying the classic texture of Jell-O Dessert Cups.
How do I unmold the Jell-O Dessert Cups for a fancy presentation?
To unmold your Jell-O Dessert Cups, quickly dip the bottom of the ramekin into a bowl of warm water for about five to ten seconds. Gently run a thin knife around the edge to loosen the seal. Invert the cup onto a chilled plate and give it a firm shake; the gelatin should slide out perfectly while maintaining its shape.
Can I use agar-agar to make vegan Jell-O Dessert Cups?
Absolutely, agar-agar is an excellent seaweed-based substitute. However, keep in mind that agar-agar sets much more firmly and at room temperature. You will need to boil the agar-agar with your liquid for several minutes to activate it properly. The resulting Jell-O Dessert Cups will have a slightly different, less “wiggly” bite, but they are equally delicious and inclusive.
Jell-O Dessert Cups are a classic treat that combines a delightful, wobbly texture with exciting flavors, making them a favorite among dessert lovers. They are not only easy to create at home but also allow for endless customization with different fruits and flavors, all of which can be explored in detail in this comprehensive guide on gelatin desserts.
Final Thoughts
These Jell-O Dessert Cups represent the beauty of simplicity in our busy lives. Taking the time to prepare something so colorful and light reminds us to appreciate the small, shimmering moments of joy. I hope this authentic recipe brings a sense of playful wonder and sweet comfort to your kitchen.
Nutrition Information (per serving)
The nutritional profile of Jell-O Dessert Cups remains quite light, making them an excellent choice for a guilt-free treat. Below is a summary of the macros for a standard serving size using traditional sweetened gelatin.
| Nutrient | Amount per Serving |
|---|---|
| Calories | 80 kcal |
| Total Fat | 0 g |
| Sodium | 75 mg |
| Total Carbohydrates | 19 g |
| Sugars | 18 g |
| Protein | 2 g |
Jell-O Dessert Cups
These vibrant Jell-O Dessert Cups offer a shimmering, translucent texture and a burst of nostalgic sweetness in every spoonful. They provide a light, refreshing finish to any meal while remaining incredibly simple to prepare at home. Experience the joyful wobble and bright flavors of this classic treat today.
Ingredients
Method
- Bring one cup of water to a rolling boil in a small saucepan.
- Pour the gelatin powder into a large glass mixing bowl.
- Slowly pour the boiling water over the gelatin and whisk gently for at least two minutes until dissolved.
- Pour in one cup of very cold water and stir for another minute. If adding fruit, let mixture sit for ten minutes.
- Pour the mixture into glass cups or ramekins, leaving space for whipped cream.
- Refrigerate for at least four hours until set.
- Before serving, top each cup with whipped cream.
Notes
Use filtered water for better flavor n Avoid whisking too vigorously to keep the liquid clear n Do not use fresh pineapple, kiwi, or papaya as they prevent the gelatin from setting